Supervision Workflow - Add Supervisee and Sign Notes
Supervisee Note Signing Tutorial: A Step-by-Step Guide for Clinician Supervisors
In this tutorial, you'll learn how to navigate the supervision workflow to review and sign supervisee session notes efficiently.
Step 1: Navigate to the Supervision Tab
After logging in, head to the Supervision tab from sidebar to manage supervisee notes. This tab displays all pending session notes or sign notes for your associates.
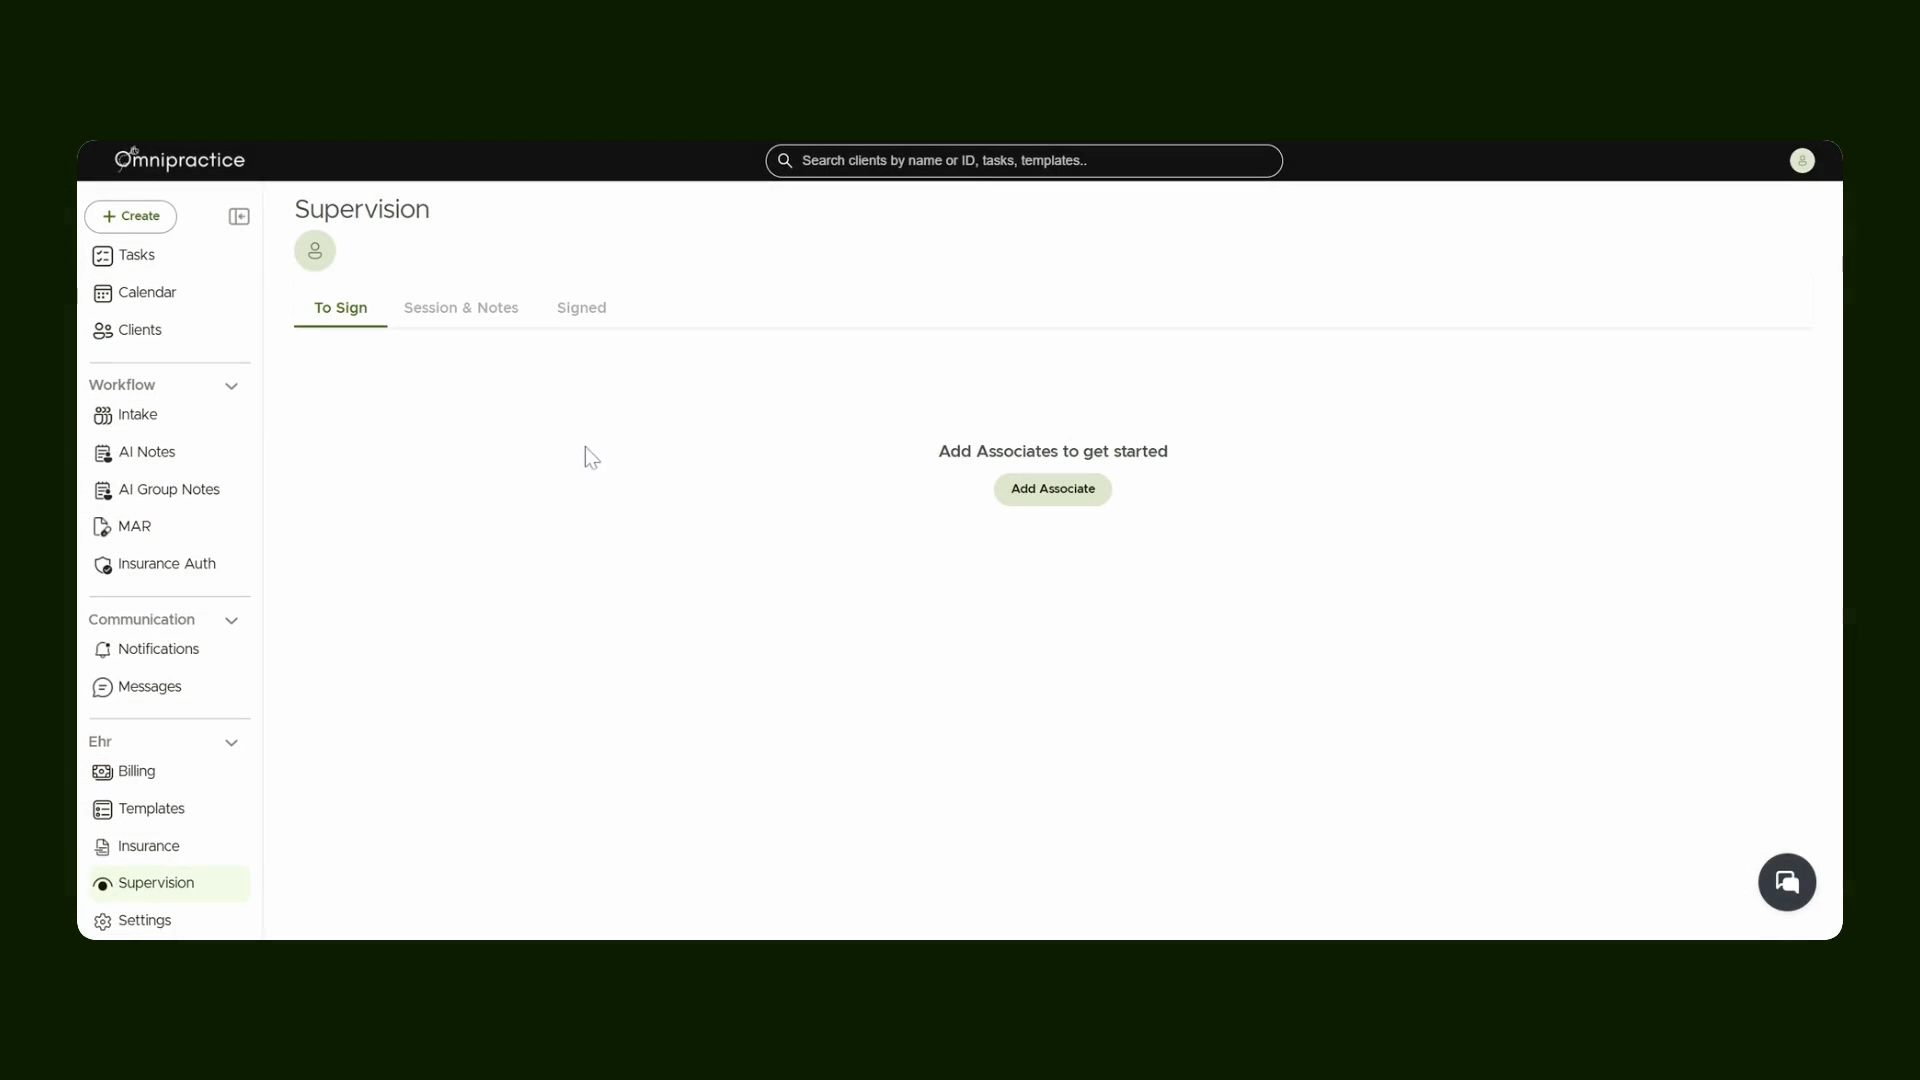
Step 2: Add an Associate (If Not Already Added)
If your associate isn't listed yet, add them before proceeding. You can: - Use the Add Associate button directly.- Or, go to Settings, navigate to Associate Management, and choose Add Associate to include a team member as your associate.

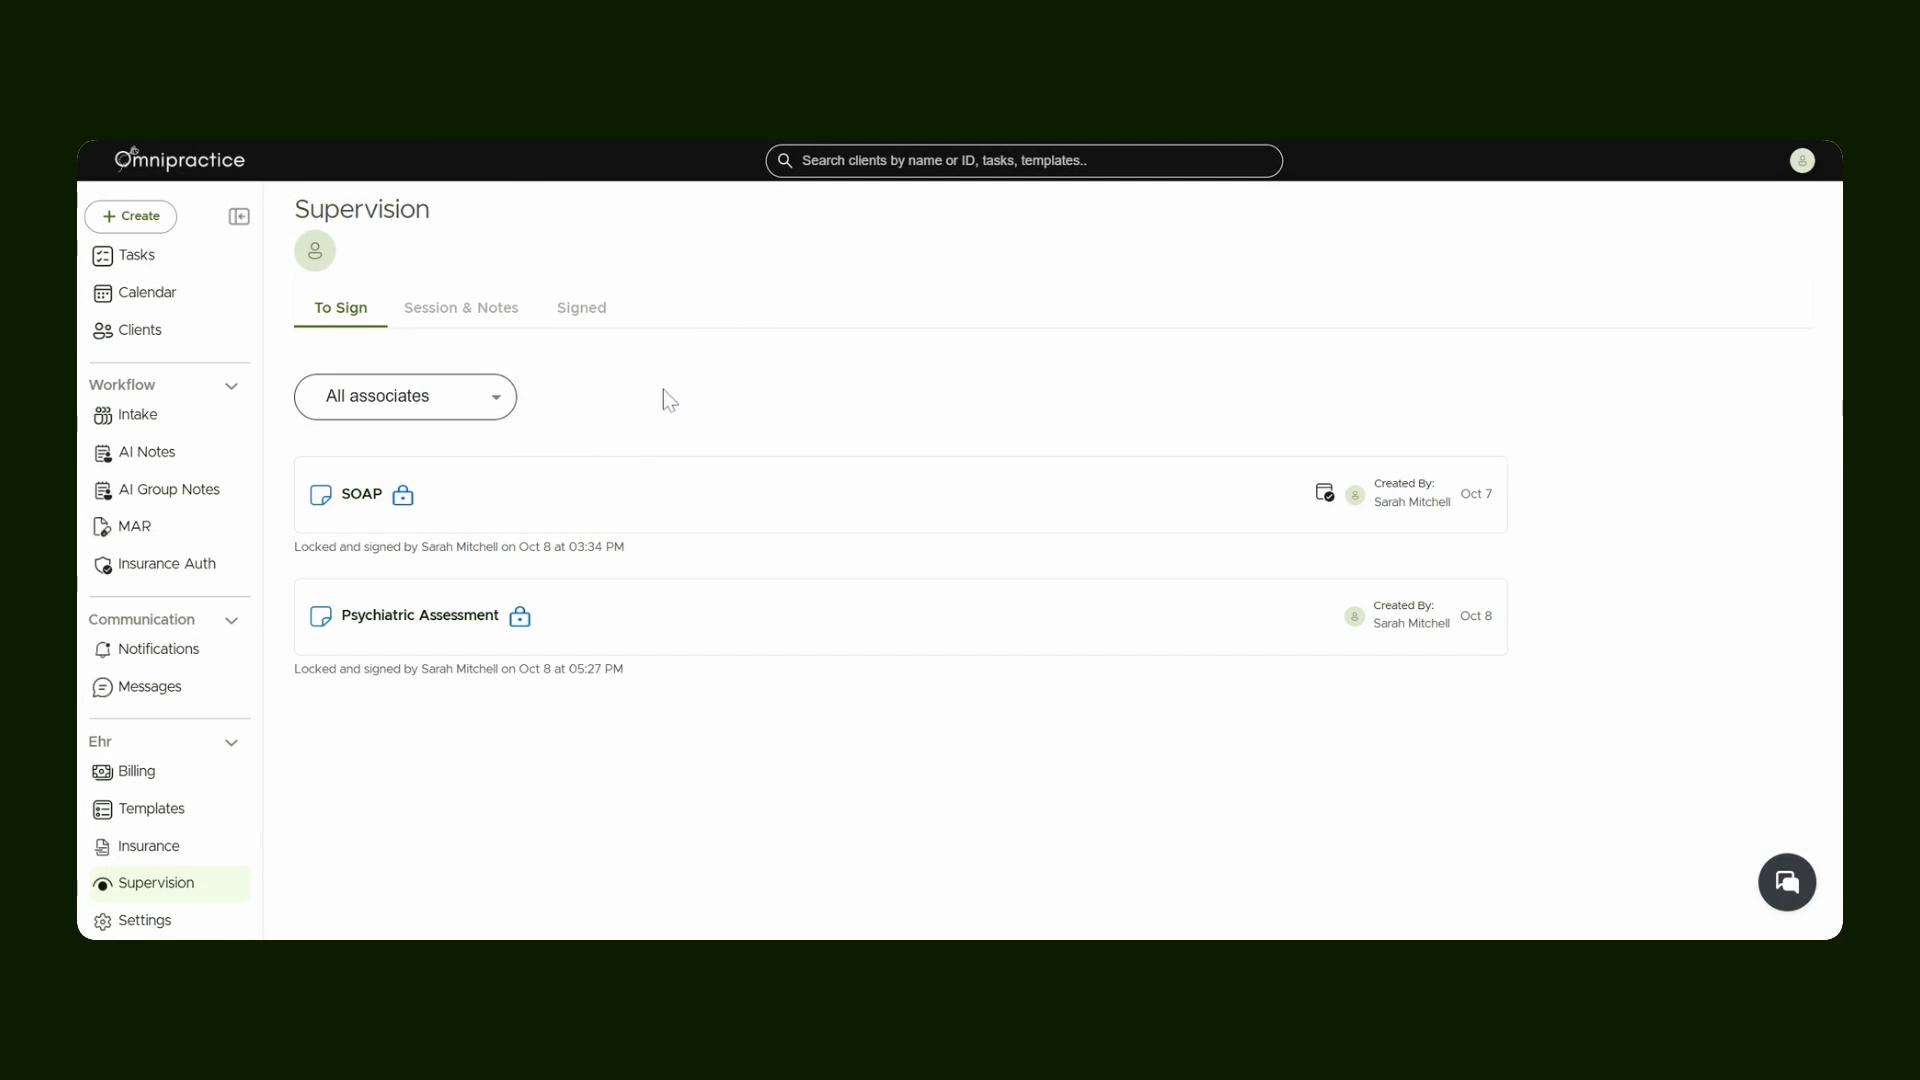
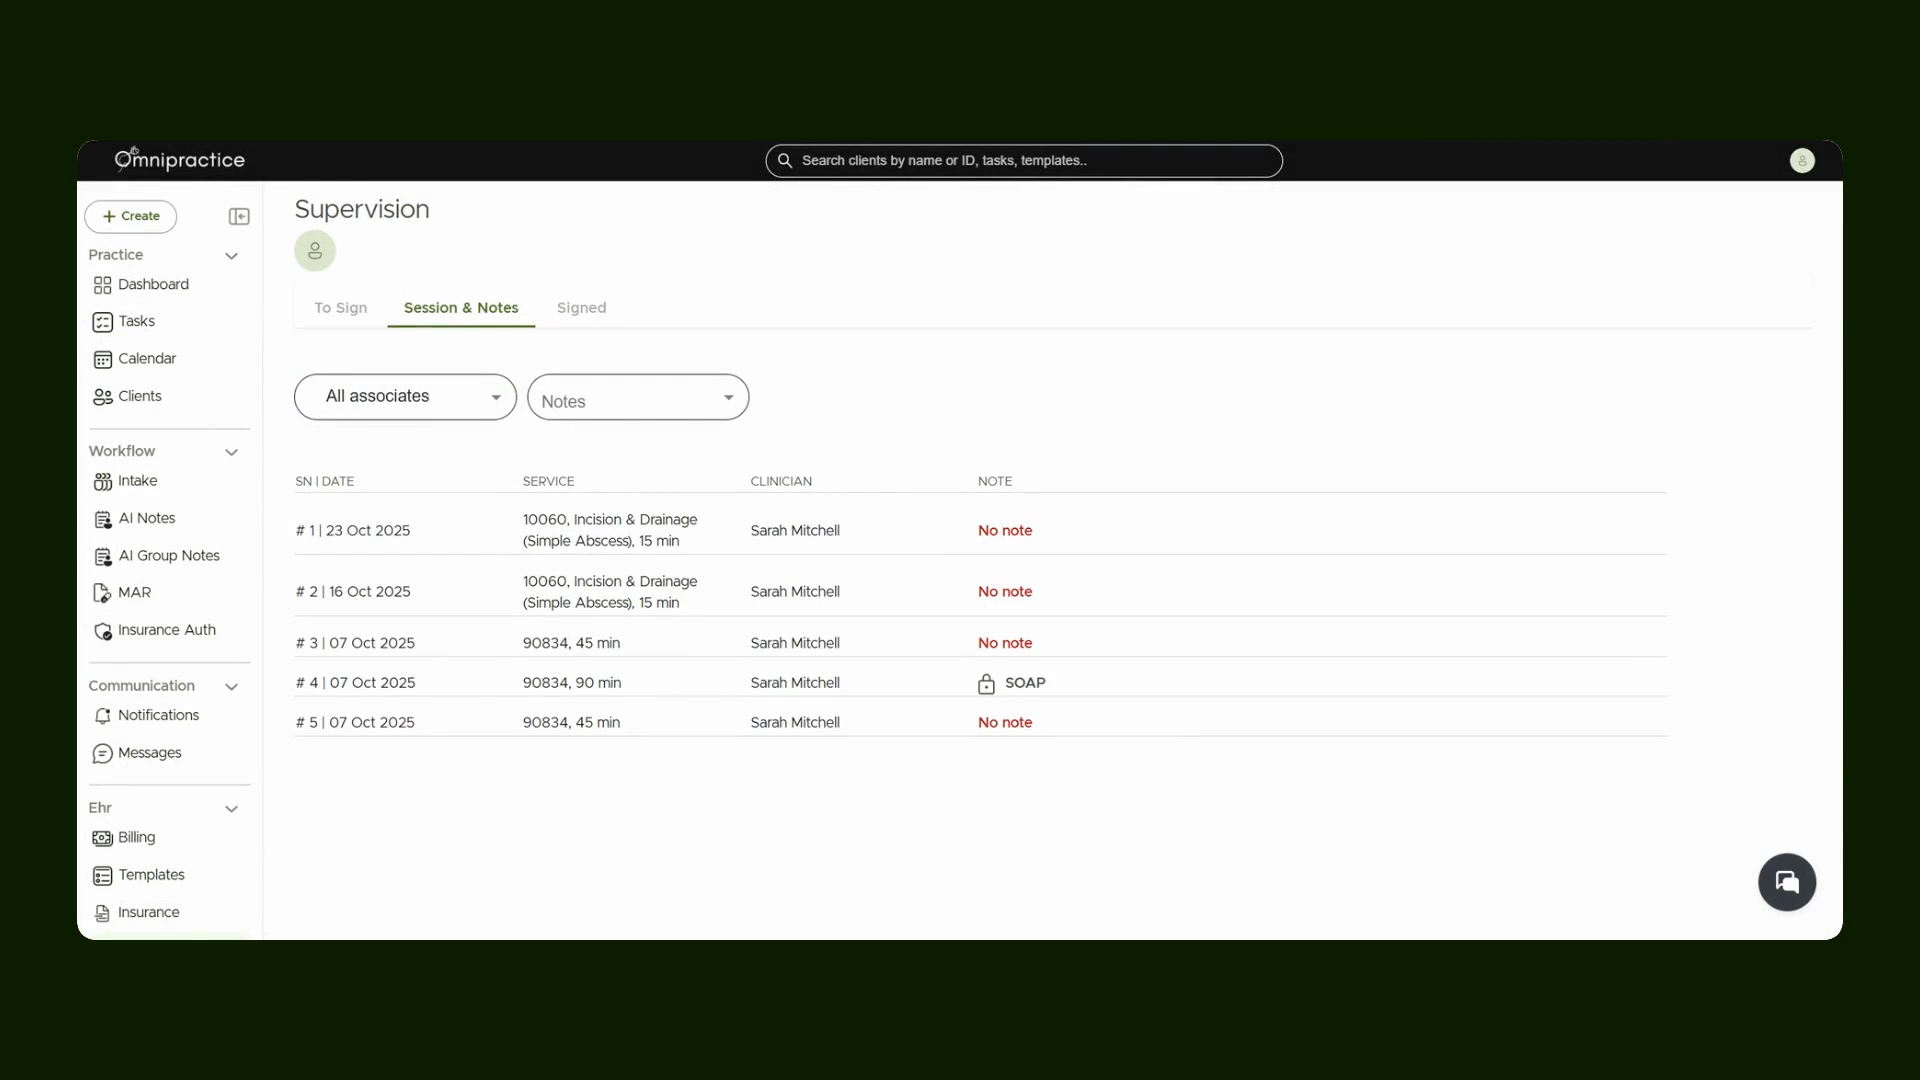
Step 3: Review Pending Session Notes
Once your associate is added, return to the Supervision tab. Here you'll see all session notes that are pending your signature. Notes signed and locked by the clinician will appear for your review.
Step 4: Open and Review a Note
Select any note to open it. Review all details carefully. If the information is accurate, you're ready to proceed.
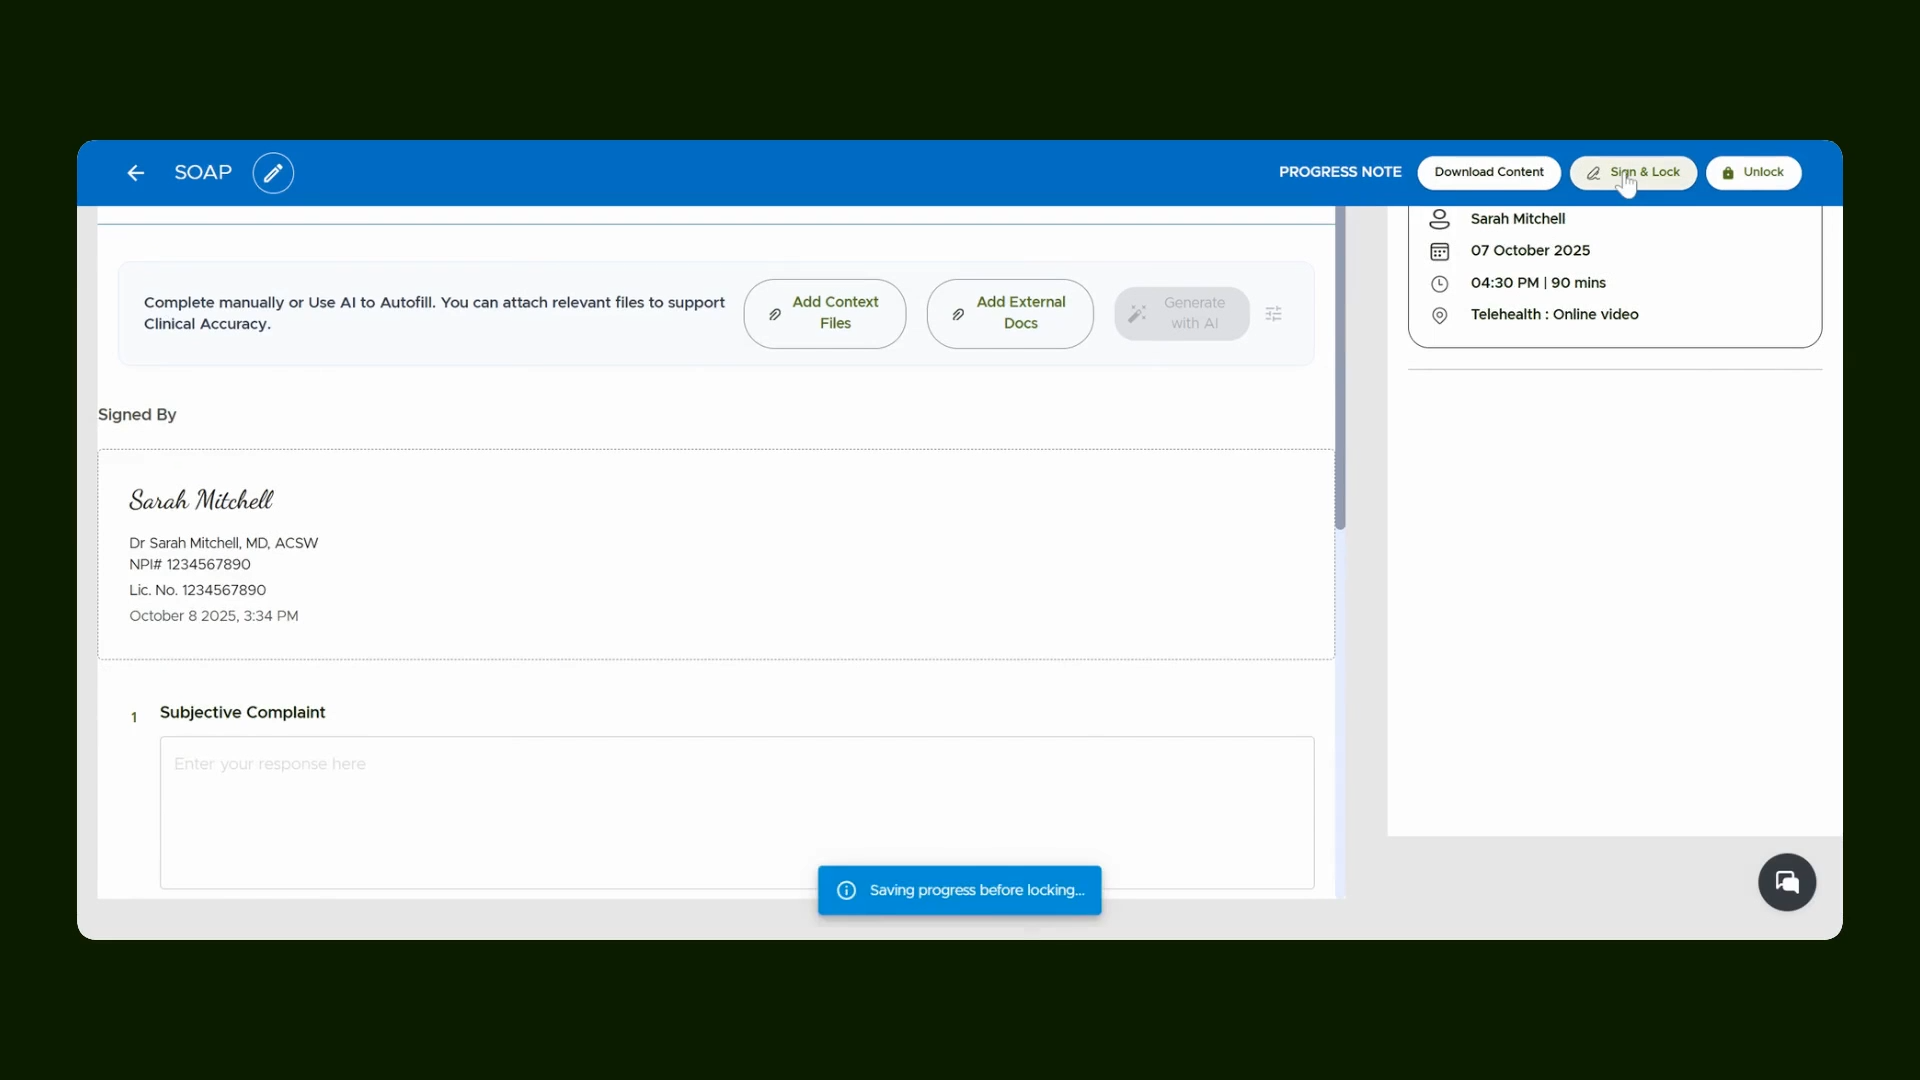
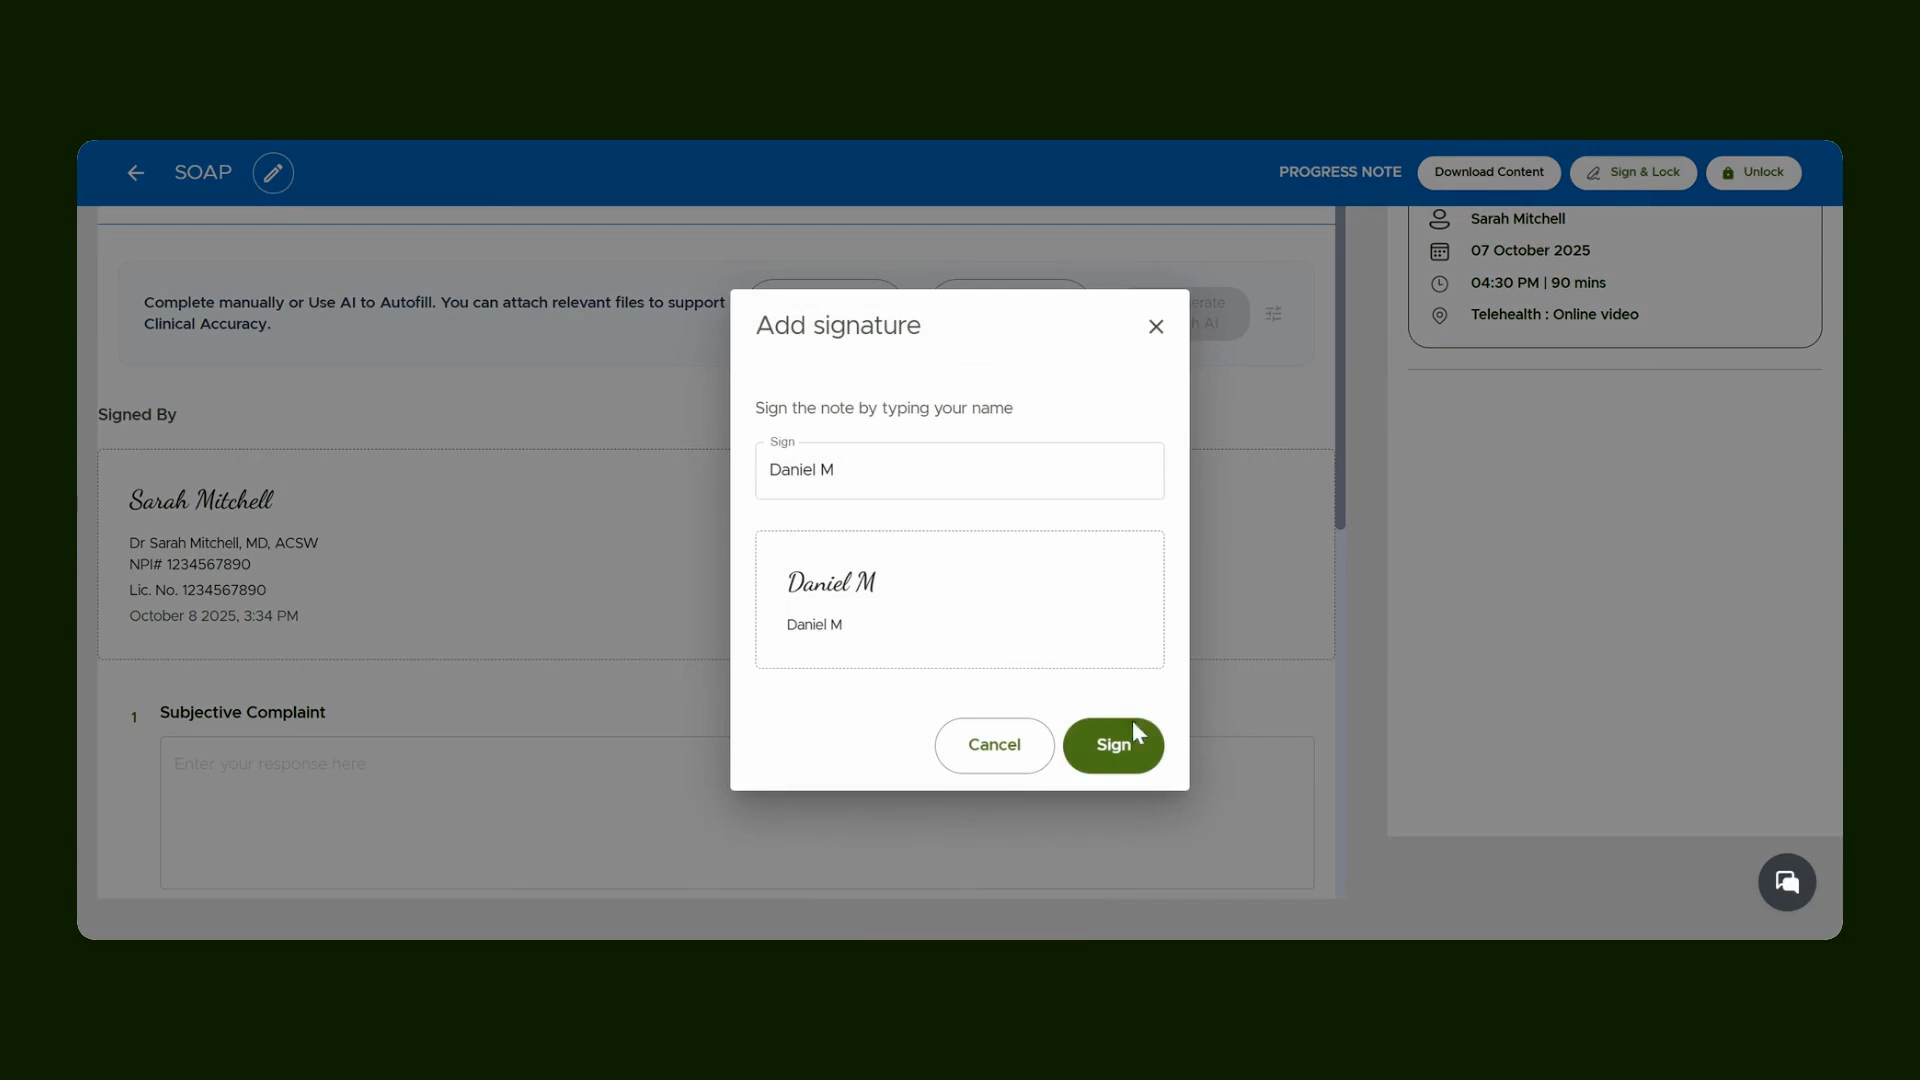
Step 5: Sign or Edit the Note
If the note is correct, select Sign and Lock. If changes are needed, you can unlock and edit the note.
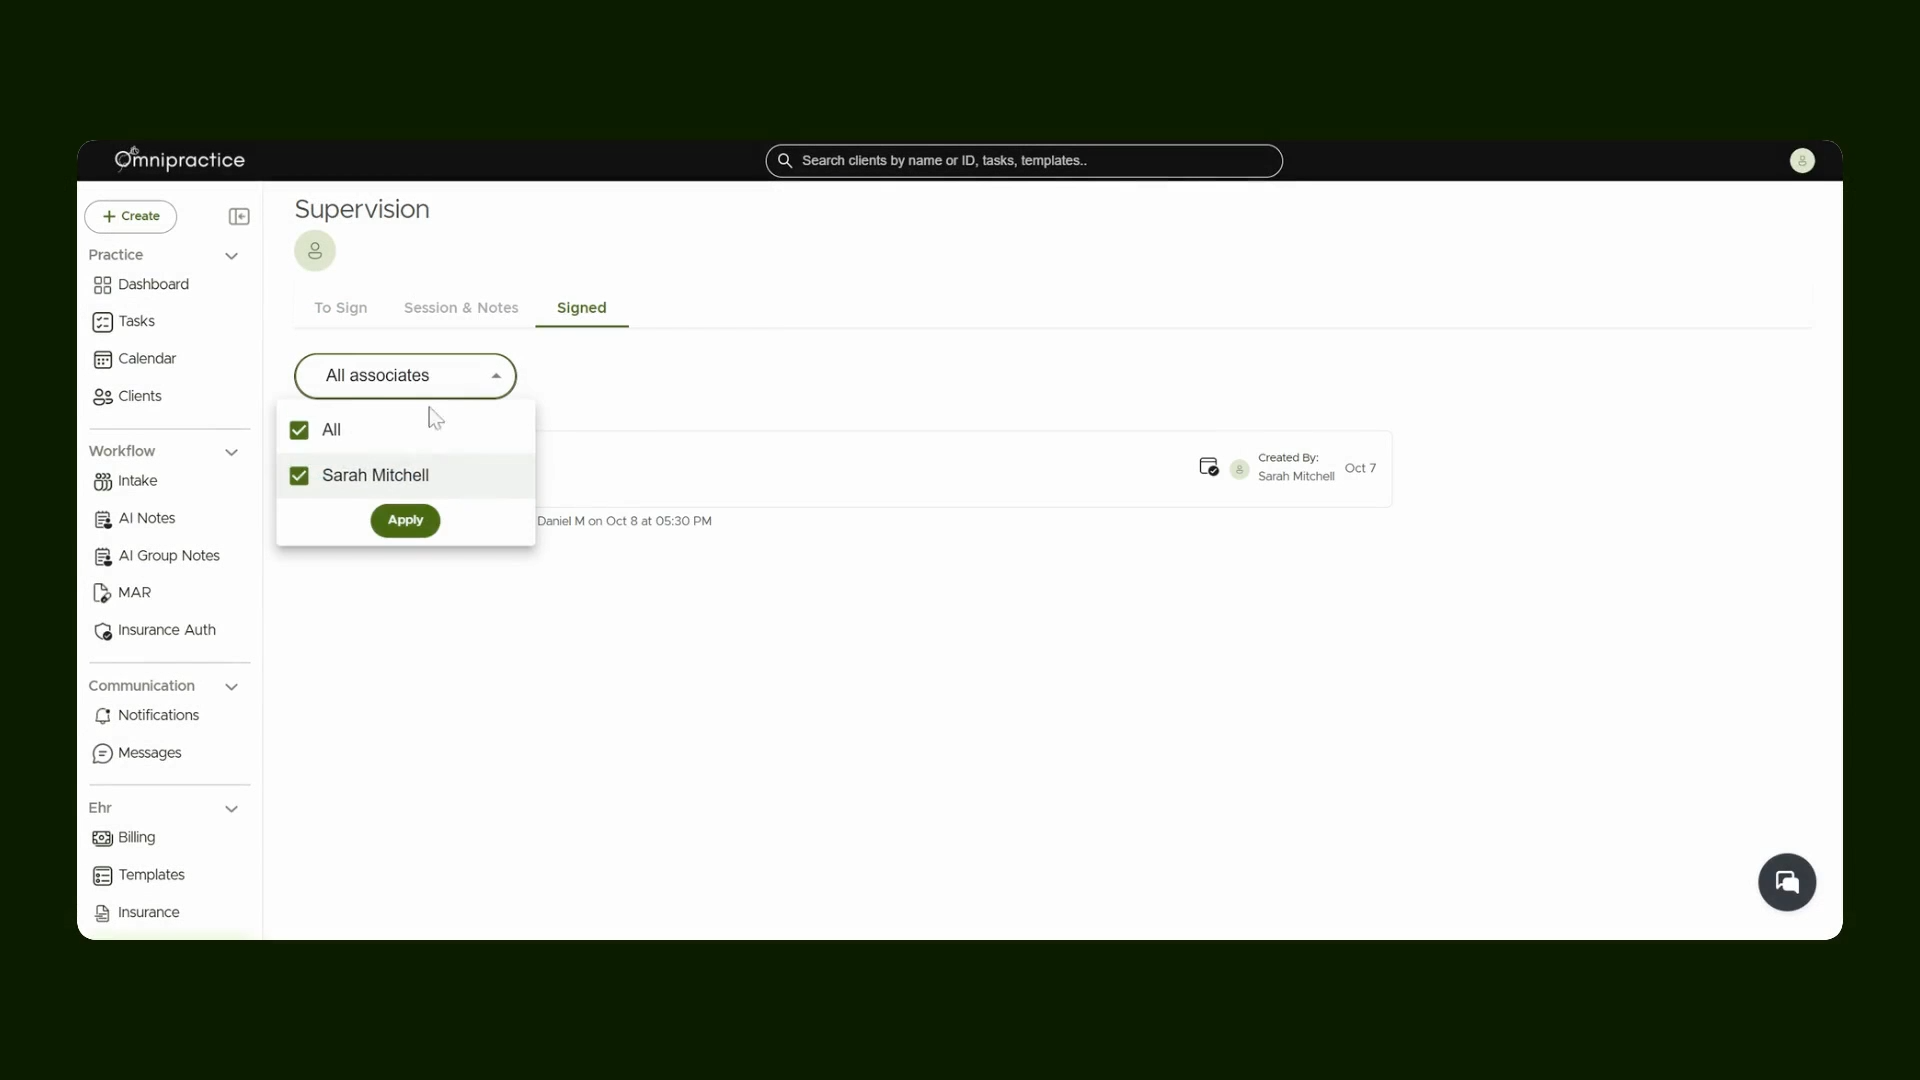
Step 6: View Signed Notes and Use Filters
After signing, notes appear in the Signed tab. Use available filters to narrow down notes as needed.
You can also view all your associate’s sessions (with or without notes) in the Session & Notes tabs. These filters help you manage and track supervisee progress effectively.
By following these steps, you’ll confidently navigate the supervision workflow, ensuring all supervisee notes are accurately reviewed and signed.