E Prescribe Setup Guide
Setting Up and Using E-Prescribe for Your Practice
Quickly and securely send electronic prescriptions by connecting your practice to the Scripture network. This step-by-step guide walks you through setup, onboarding your team, and getting started with prescribing medication, so you can start streamlining your workflow today.
1. Connecting Your EHR to E-Prescribe
Follow these steps to integrate your EHR system with the Scripture pharmacy network.
Step 1: Log into Omnipractice. E-prescription can be set up by a clinical director or prescriber or even an admin with the right credentials.
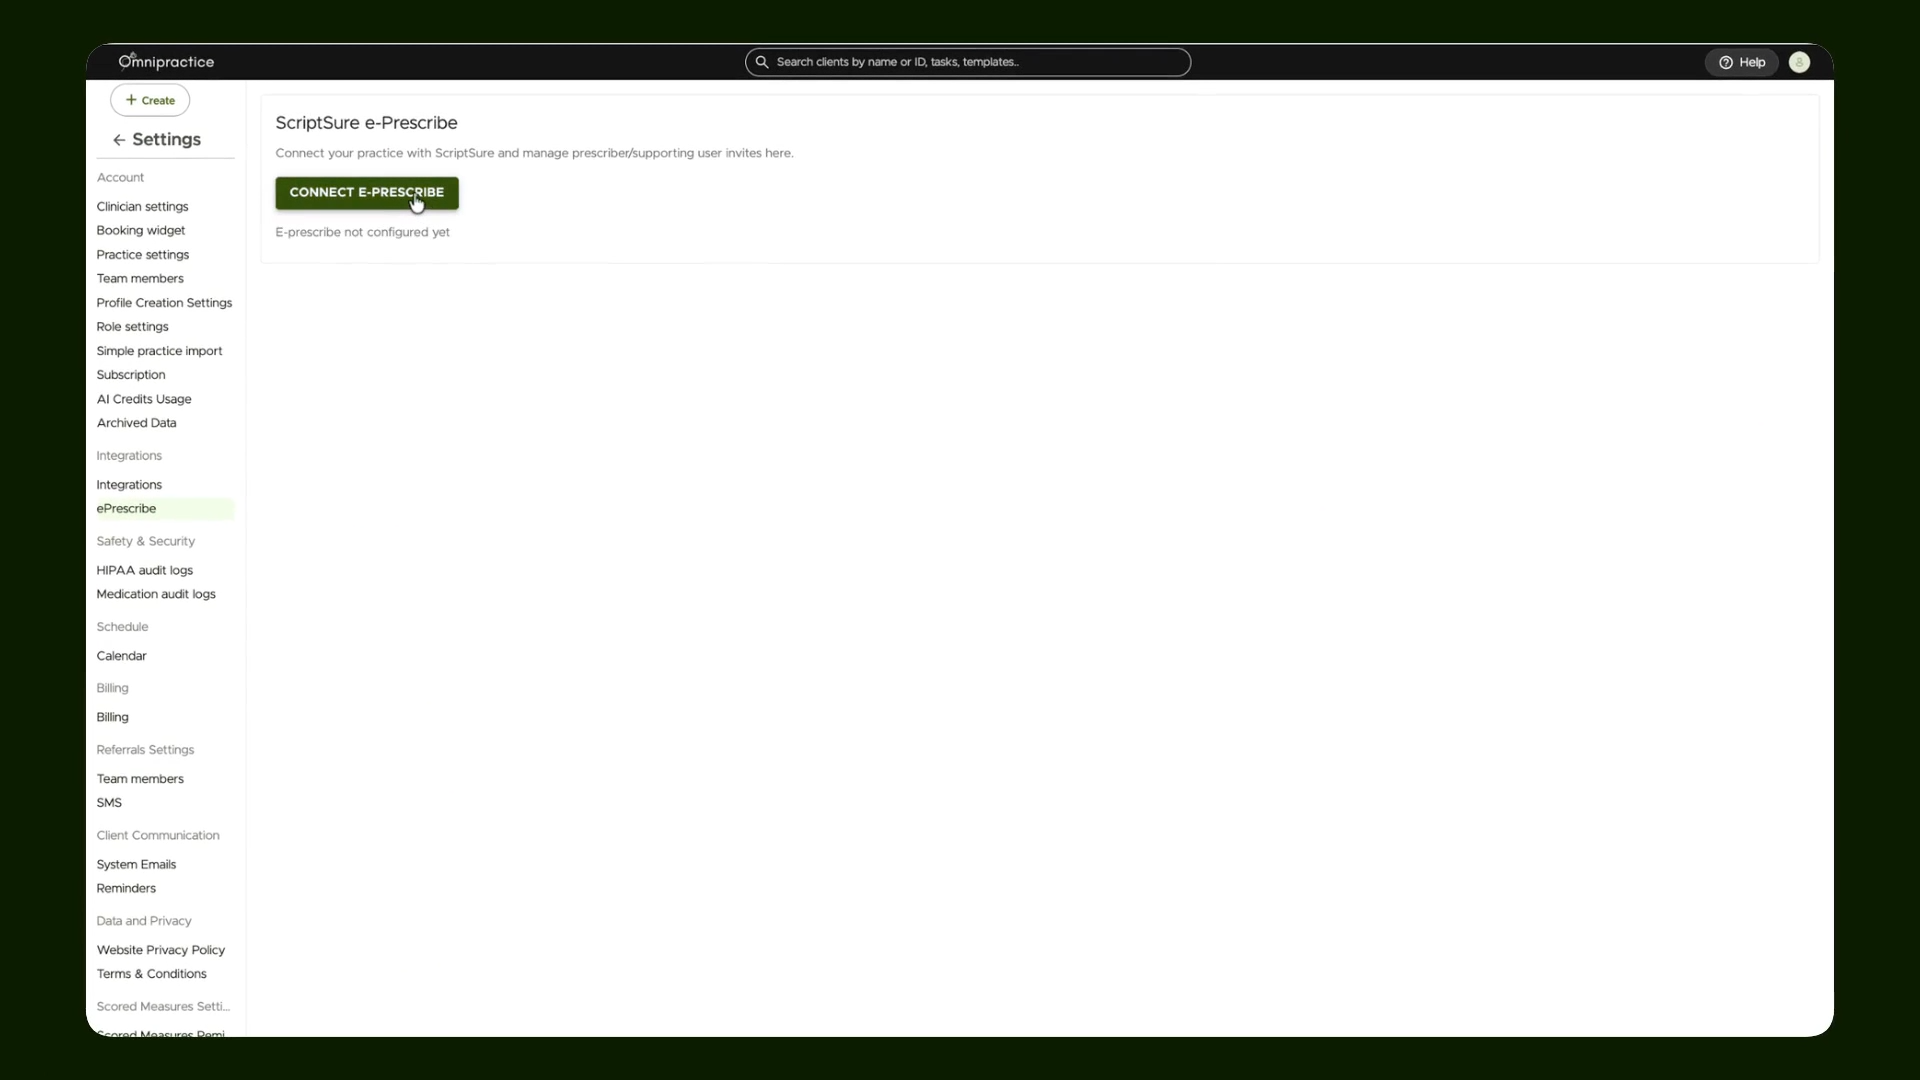
Step 2: From the settings menu, go to Integrations and select E Prescribe.

Step 3: Click Connect E-Prescribe to start linking your EHR with the Scripture network.
2. Completing the E-Prescribe Onboarding Process
Fill out all required information to finish onboarding and enable E-Prescribe for your practice.
Step 4: From the directed link to Scripture, complete the onboarding steps. Enter practice details like phone number, email, and address.
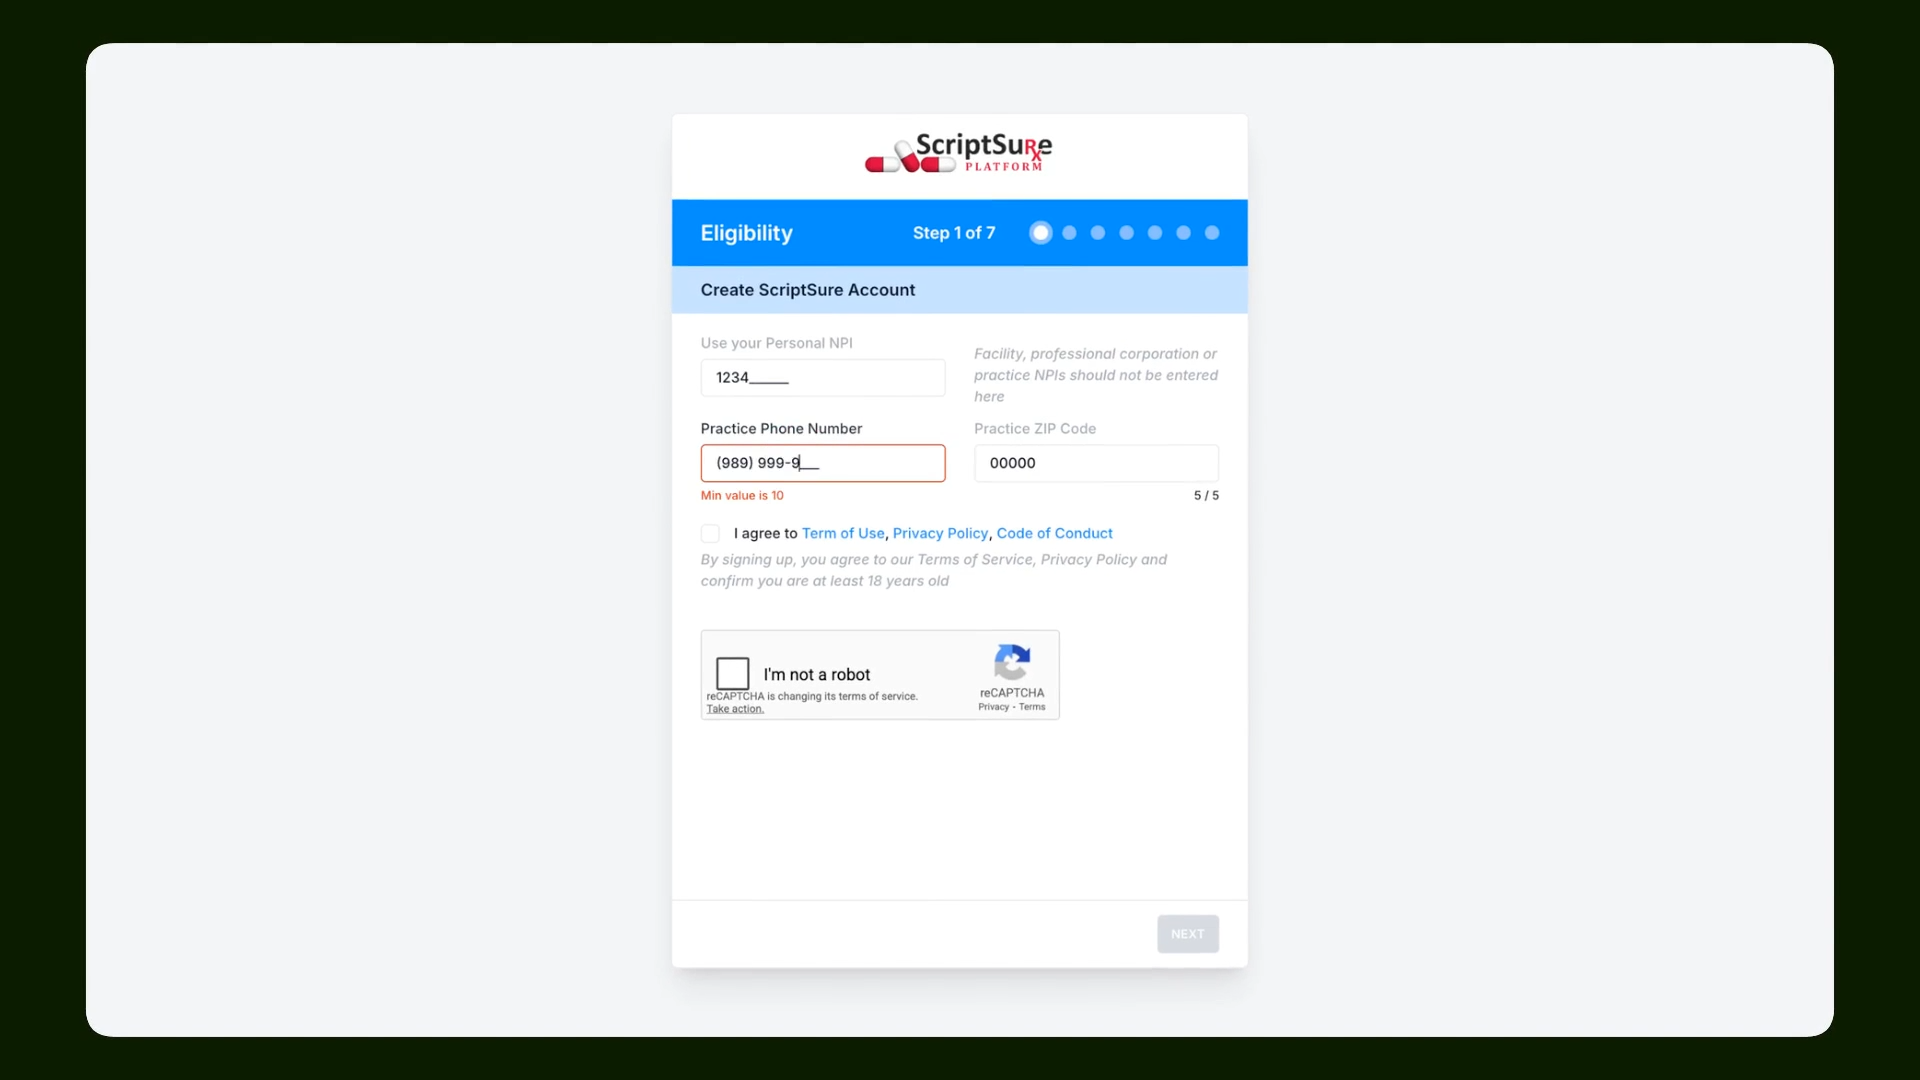
Step 5: Ensure your email address matches. This syncs and streamlines access for existing users.

Step 6: Set a password and verify your email.
Step 7: Enter your state medical license number. If you’re prescribing controlled substances, add your DEA number as well.

Step 8: Fill in the fax number and NPI number—these are essential for prescriptions to process.

Step 9: Review all details for accuracy, then click Next to continue.
Step 10: Accept all terms and conditions, and log in again using your new credentials.

Step 11: Review and sign the Business Associate Agreement (BAA). Add your prescriber title and provide your electronic signature.
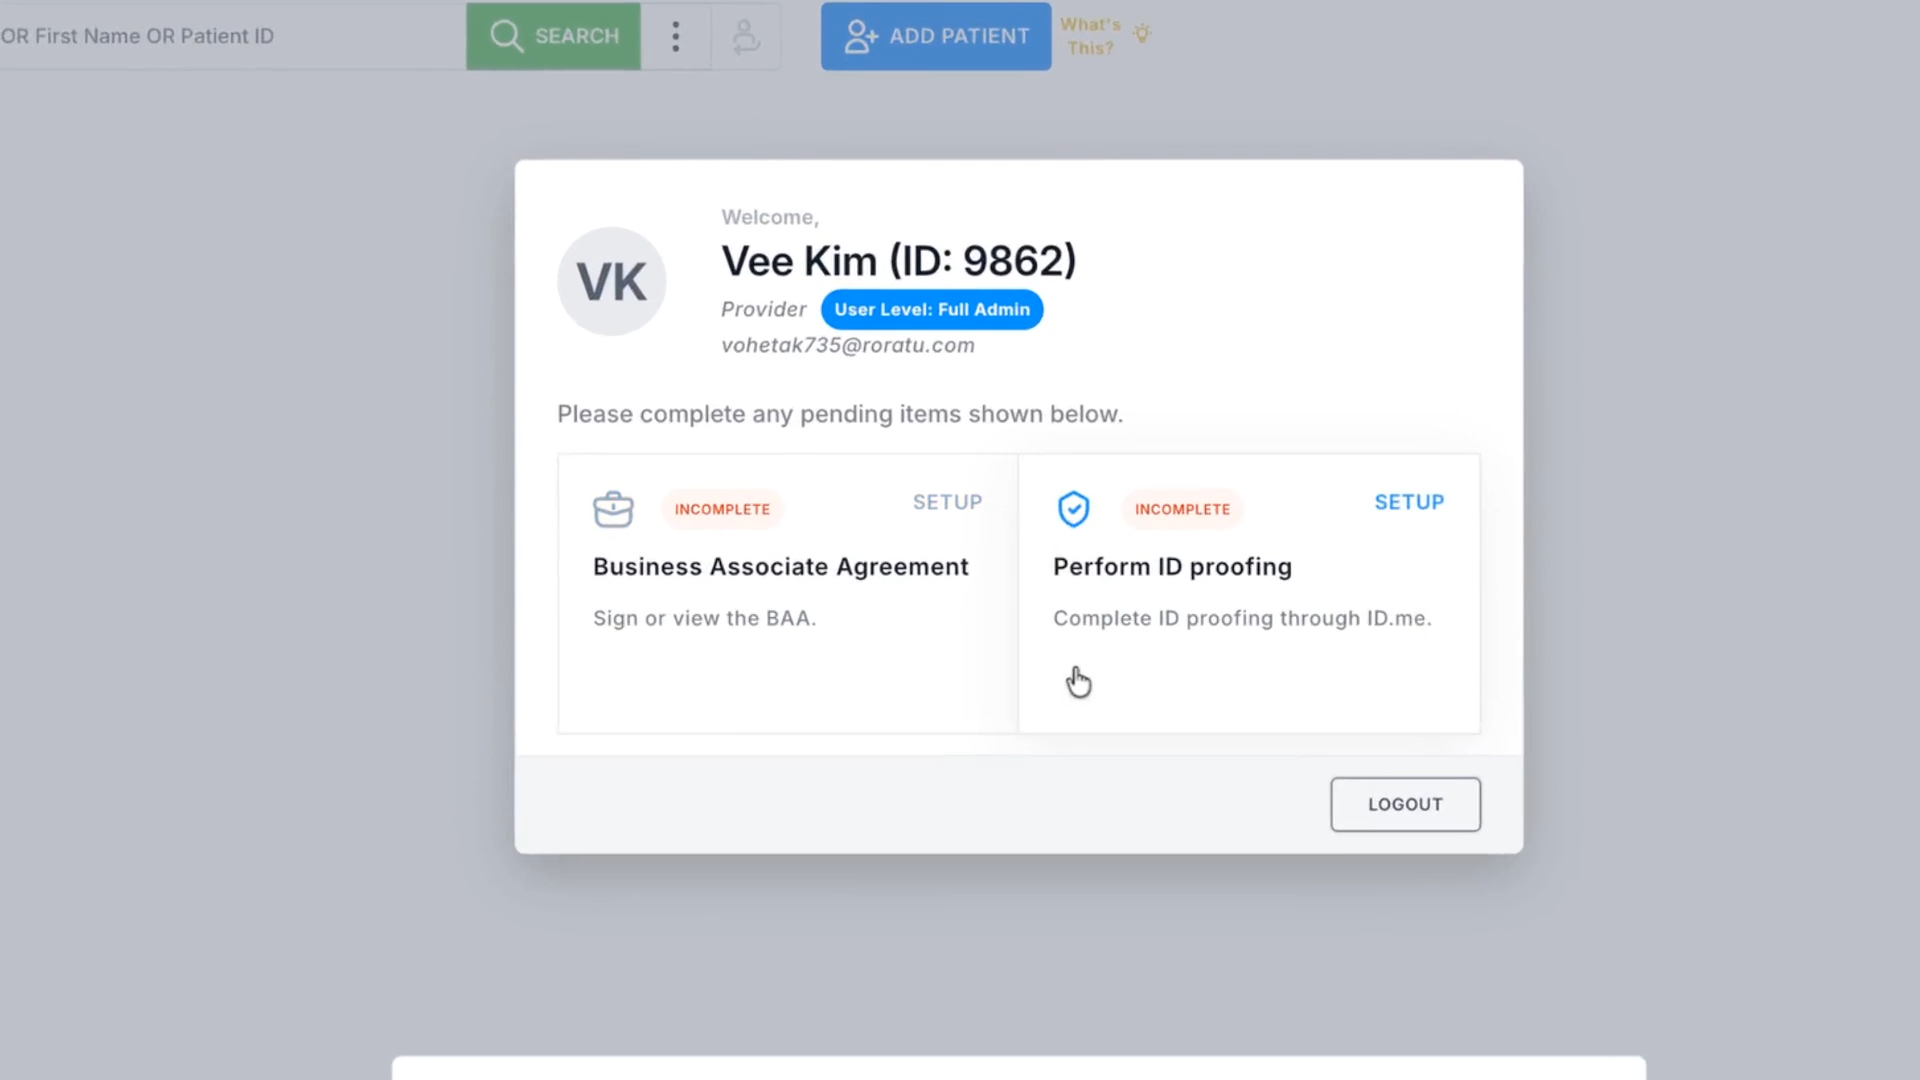
Step 12: Complete identity verification by connecting your ID.me account. Create one if you don’t already have it.

Step 13: When onboarding is done, close the tab and return to your EHR. Refresh the page to check that E Prescribe is now connected.
3. Managing E-Prescribe Access for Team Members
Make sure everyone on your team who needs E-Prescribe access is set up with the right roles.
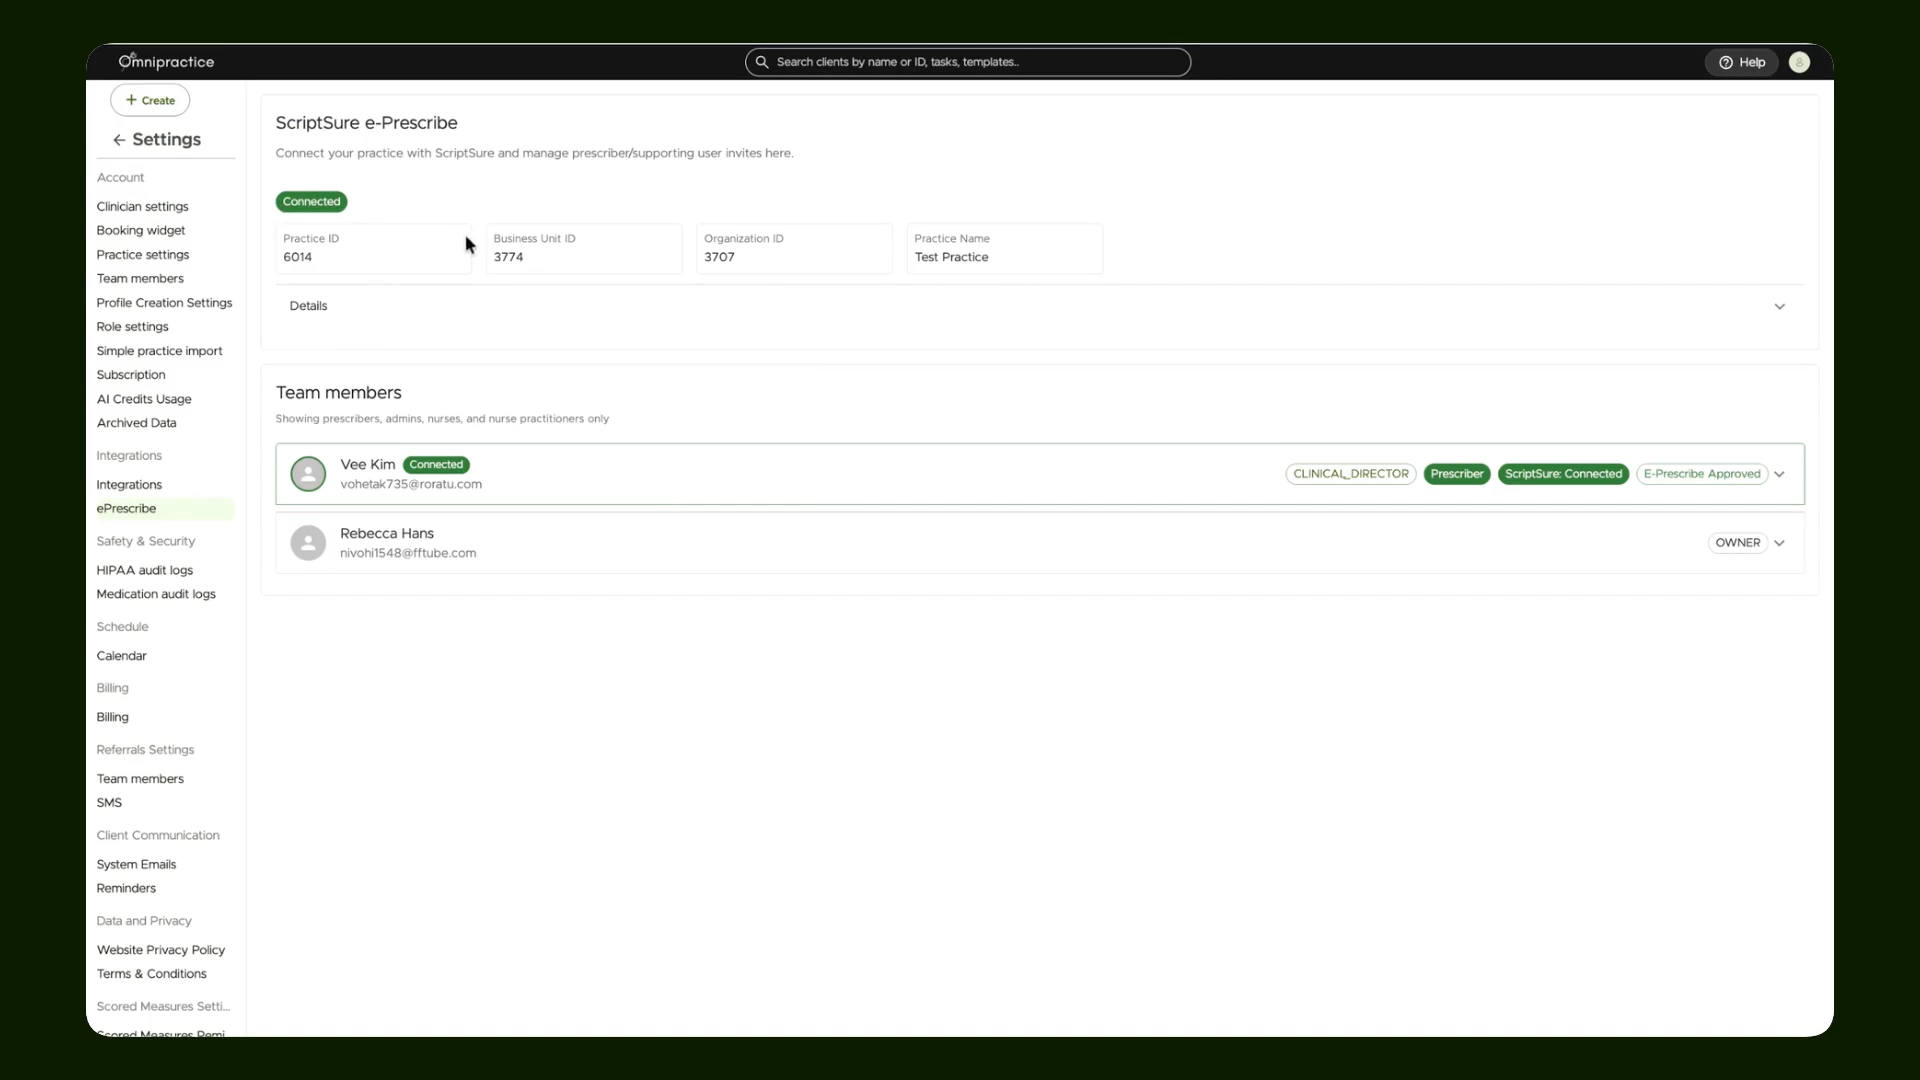
Step 14: View organization details to check which users have E Prescribe enabled. Only prescribers, admins, nurses, and nurse practitioners will appear in this list.

Step 15: To enable E Prescription for team member, use the 'Invite as prescriber' button and share the unique onboarding link with your team member. They'll finish their own onboarding steps individually.

Step 16: Once a team member has connected, their status will update to show E Prescribe access is active.
4. Prescribing Medication from a Client Record
Once setup is complete, it’s easy to send e-prescriptions from within the client's profile.
Step 1: Open the profile for the client you need to prescribe for.
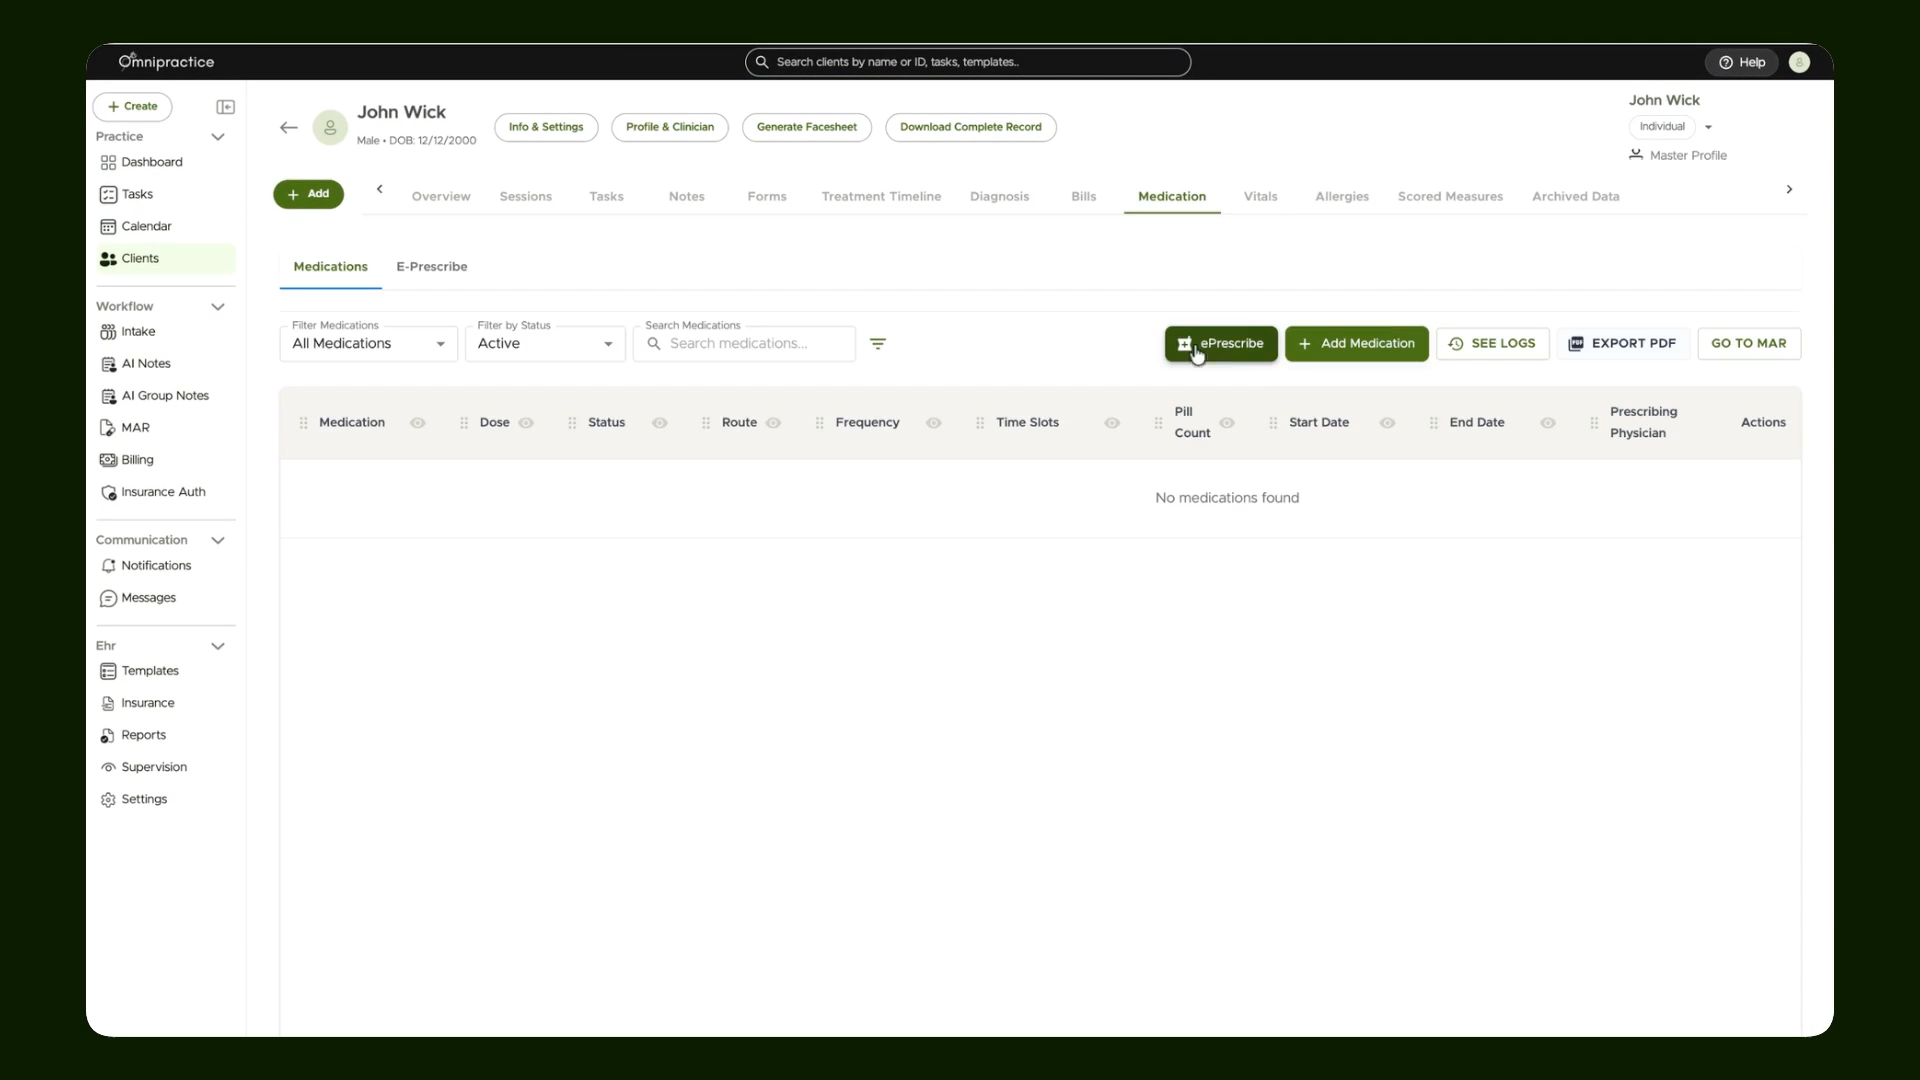
Step 2: Go to the Medication section. The E Prescribe button will be enabled and ready.
You’re all set! Now your team can send prescriptions electronically directly from the medication tab. With E-Prescribe set up, your practice benefits from faster, safer, and more efficient prescription management. For your next steps, check out the tutorial on sending your first prescription electronically.