Add, Administer & Refill Medication
Learn how to manage a client's medication efficiently using this step-by-step tutorial. You'll add, administer, and refill medications in the system, ensuring accurate tracking for each client.
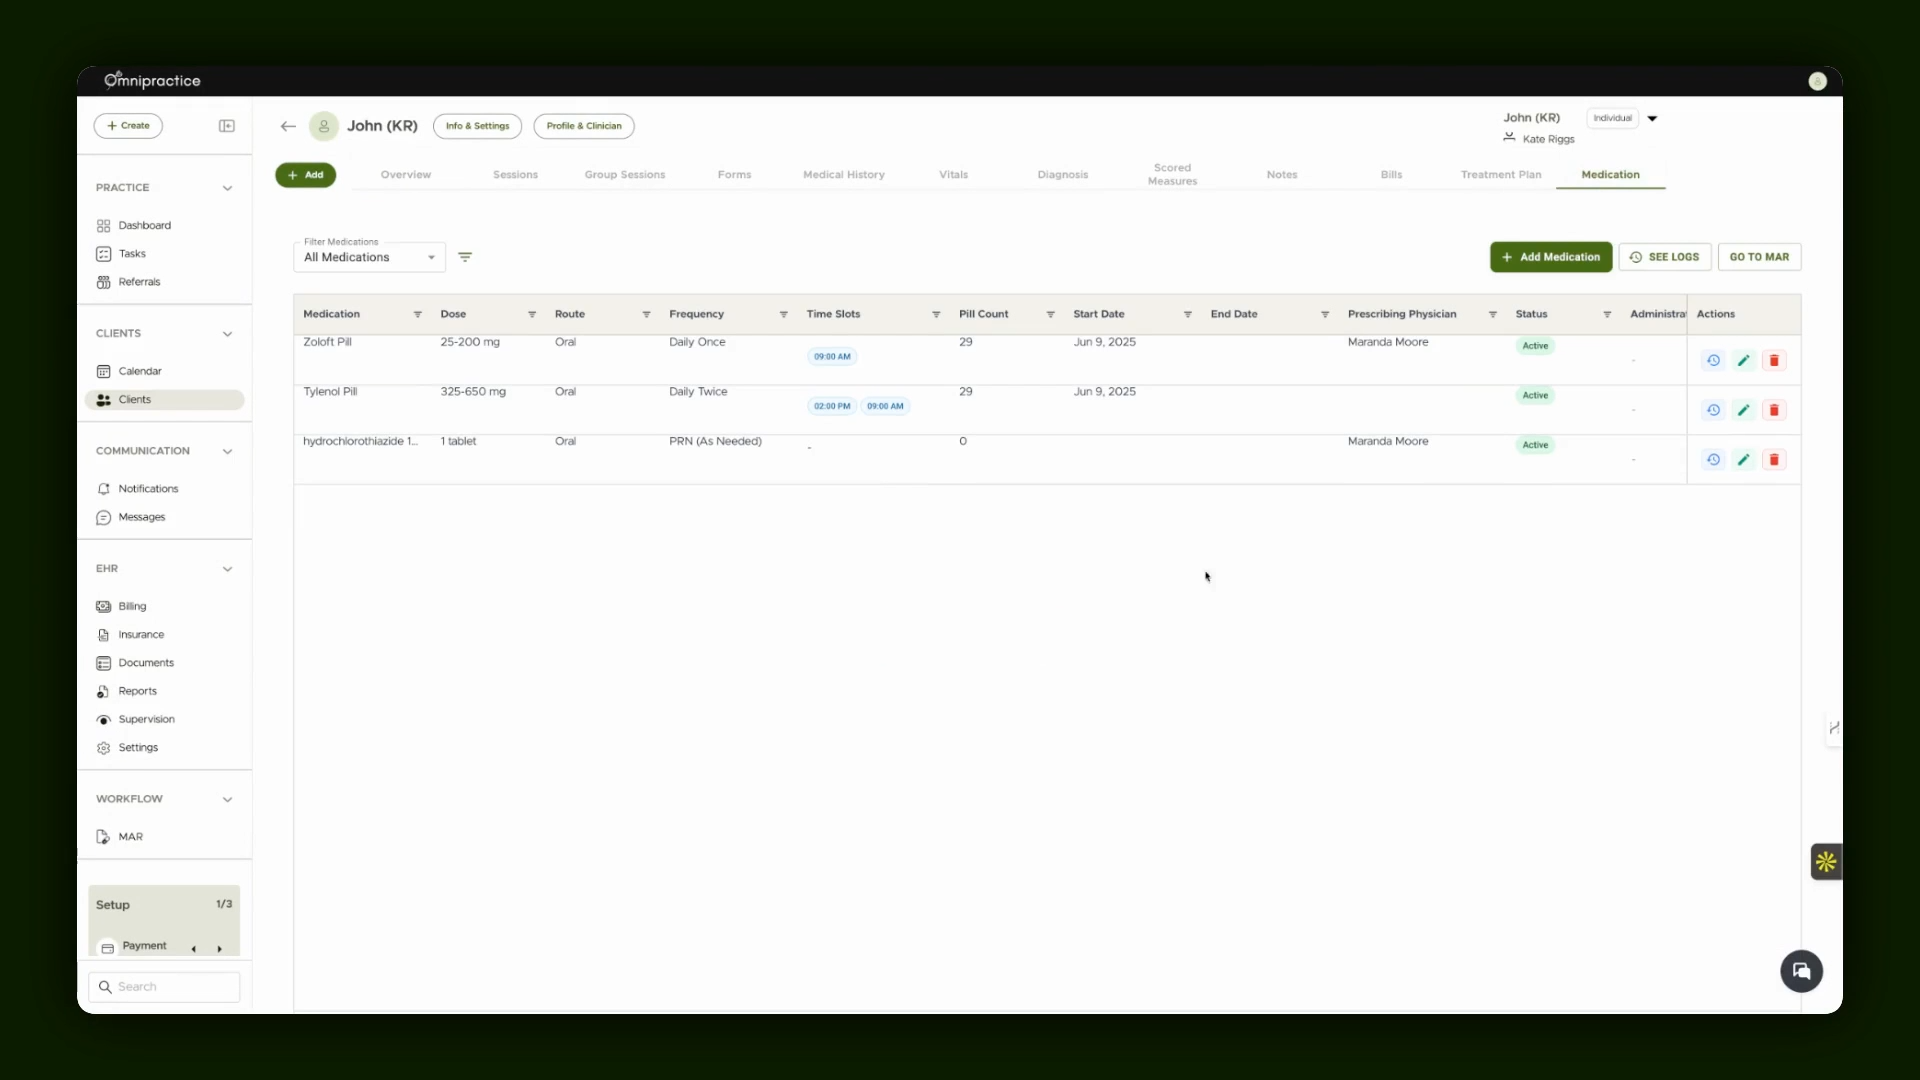
Step 1: Open the Client Chart and Access Medication Management
Begin by opening the client's chart. Select the Medication tab to start managing their medications.
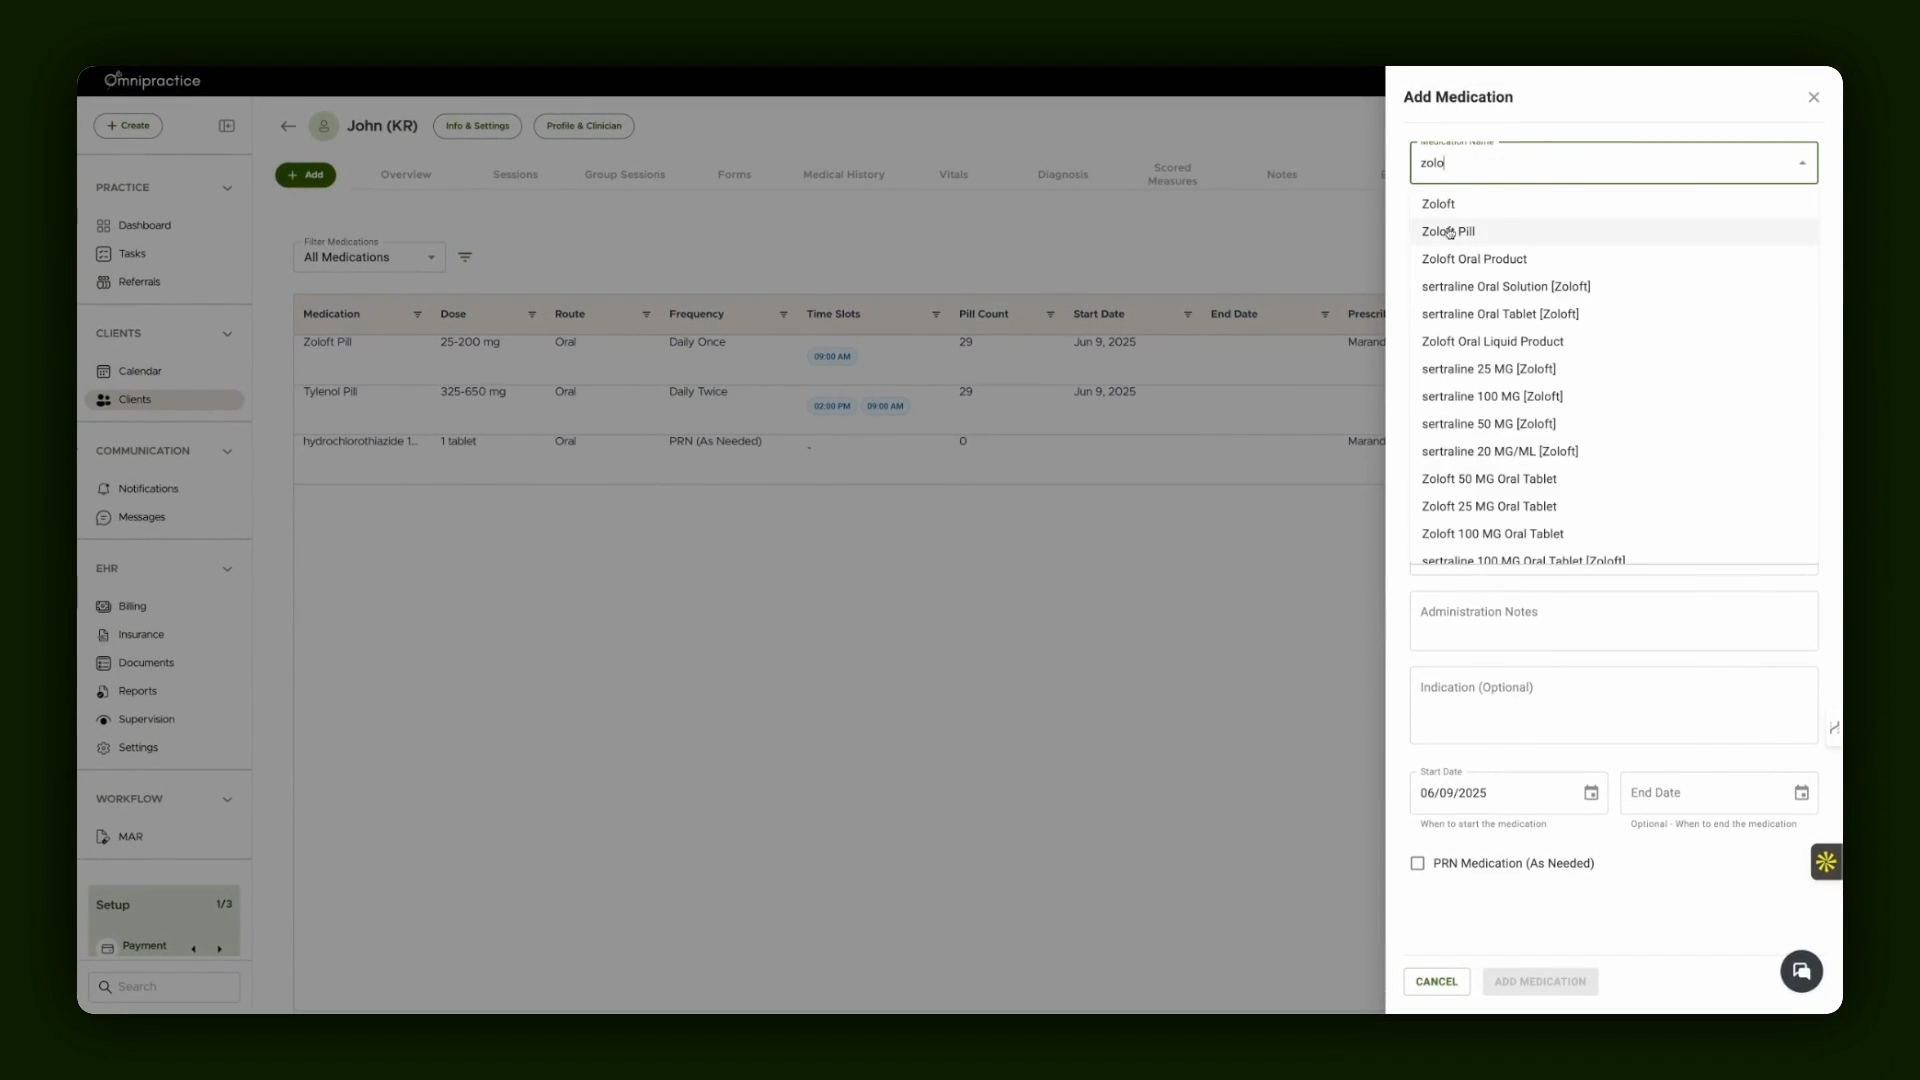
Step 2: Add a New Medication Entry
Click Add Medication to begin a new entry. Use the search box to find and select the appropriate medication from the list.
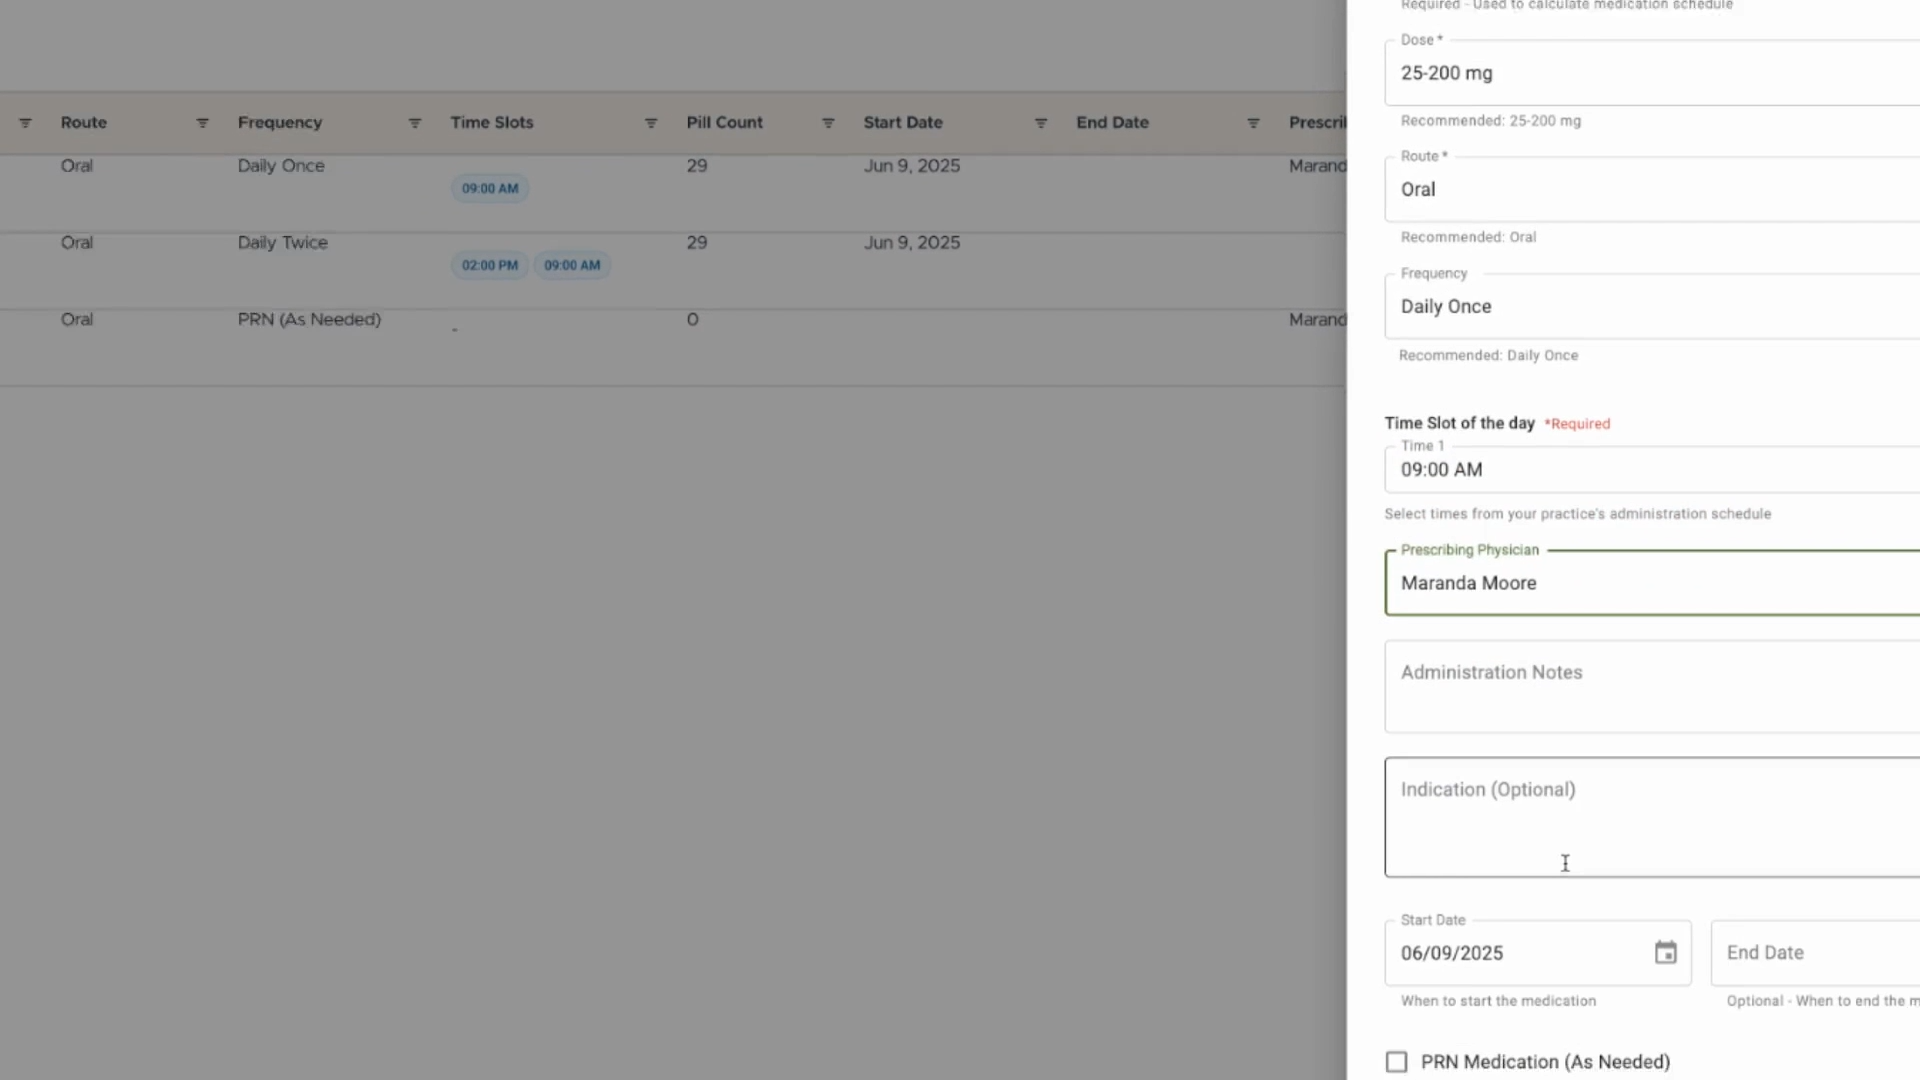
Step 3: Set Dosage and Frequency Recommendations
Review the recommended dosage and frequency that appear after selecting a medication. Make necessary adjustments as needed.
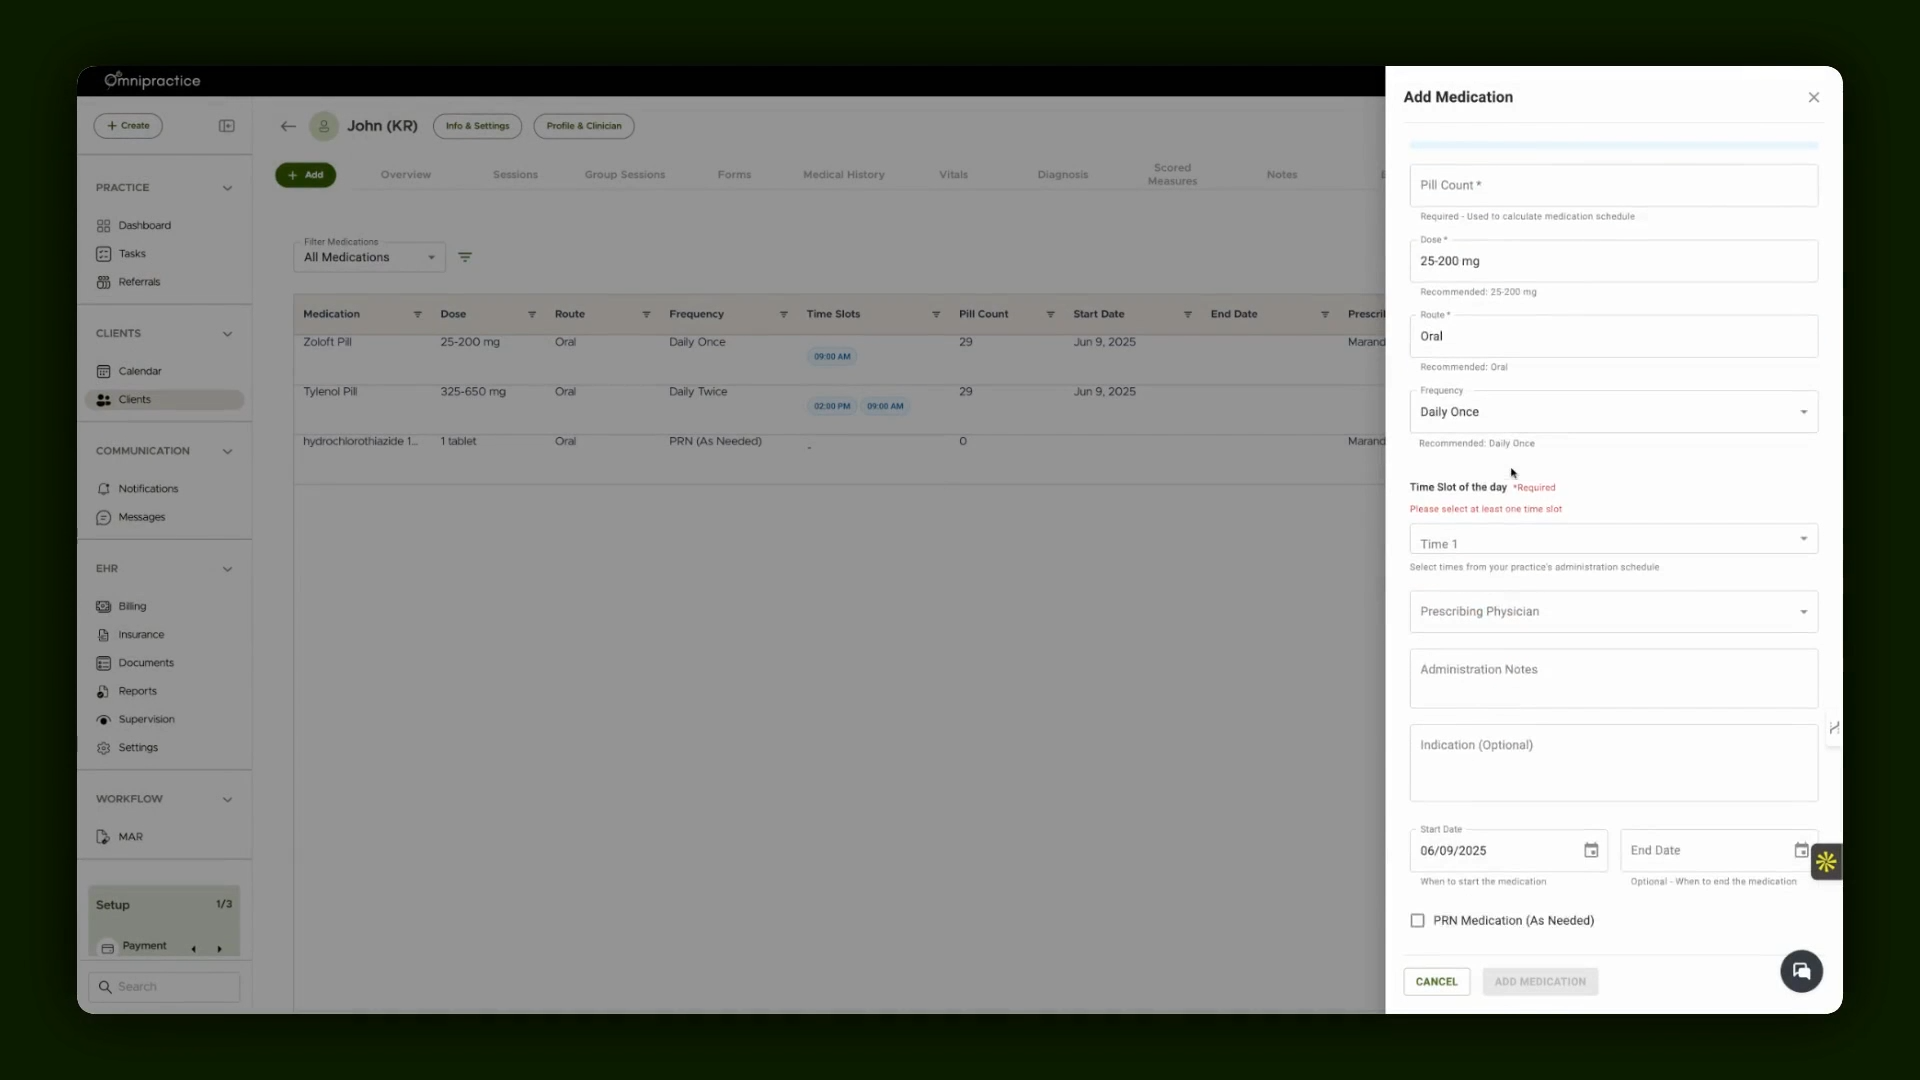
Step 4: Track Administration and Refills
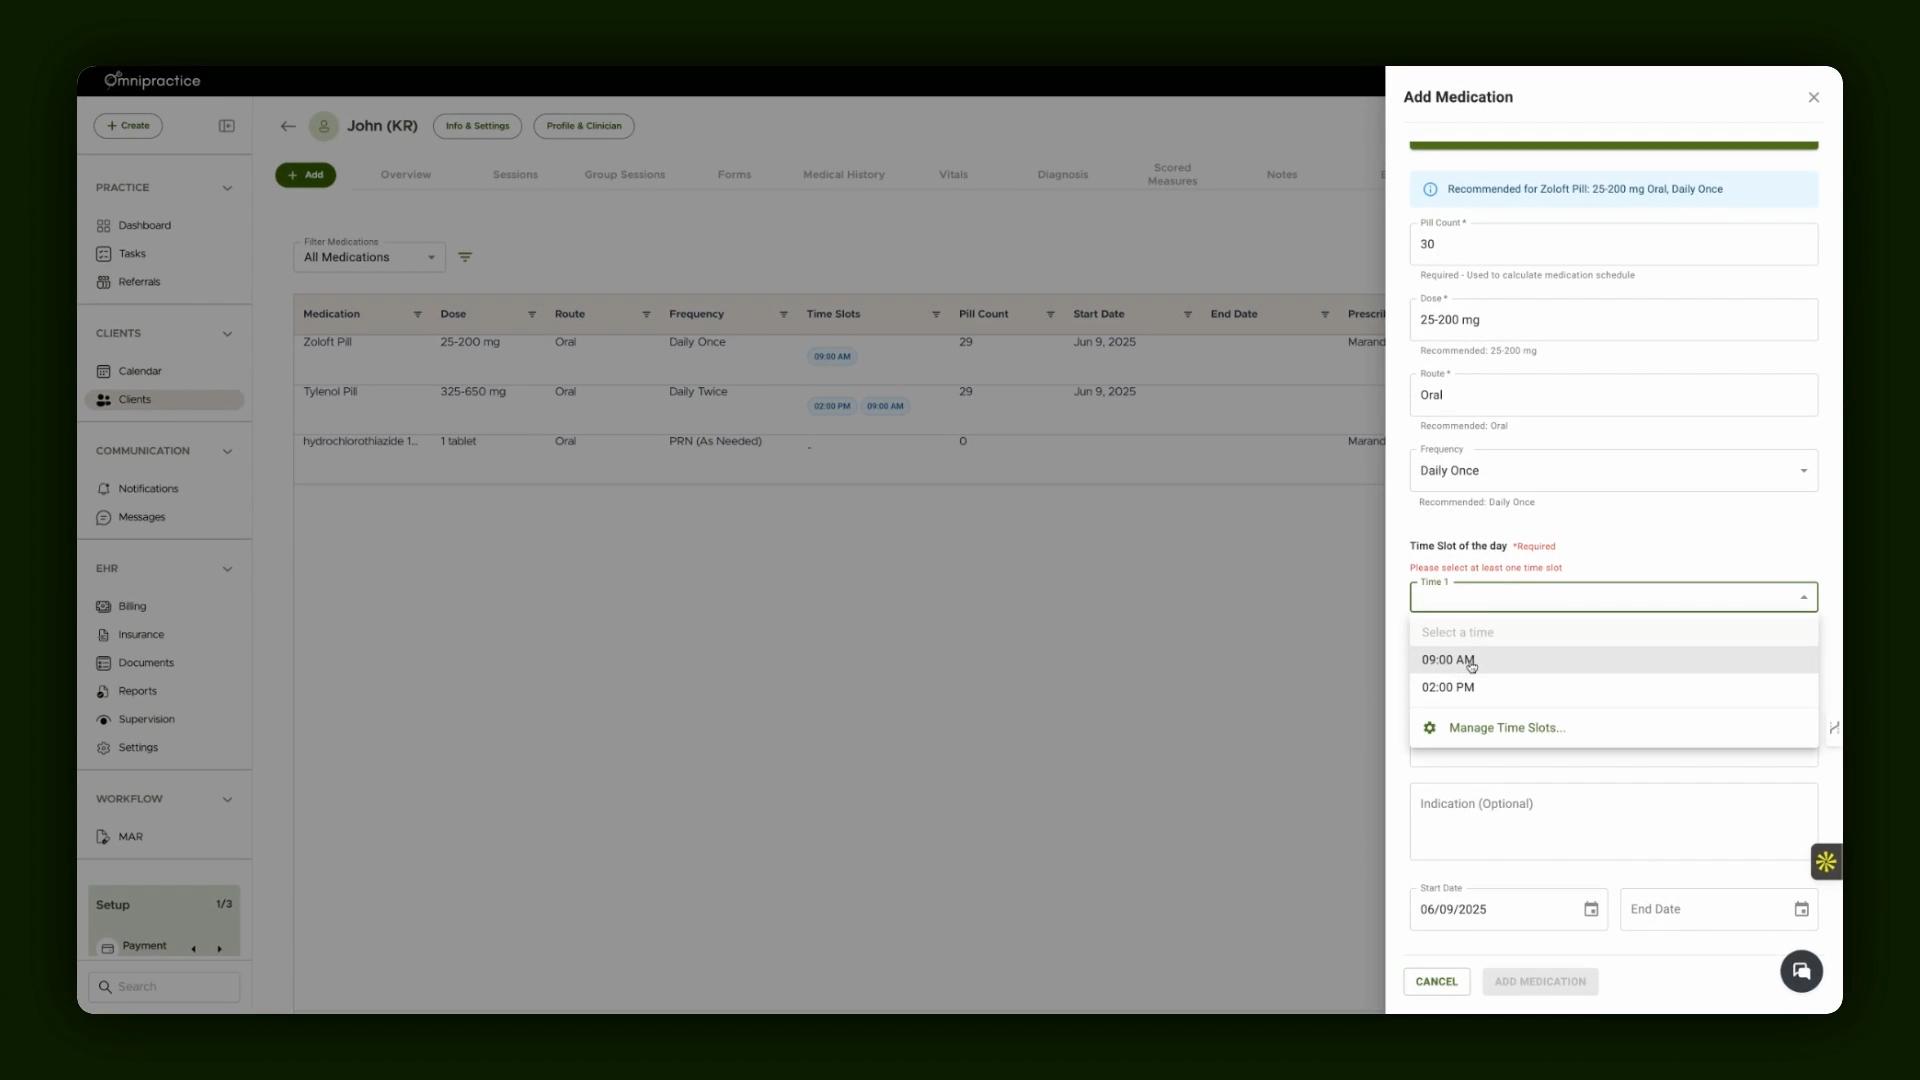
To help monitor usage, add the current pill count. Select the administration time slots that match when the medication will be given (e.g., daily at 9 a.m.).
Step 5: Complete the Medication Entry Details
Add the prescribing physician by selecting from the list. Enter any relevant notes in the space provided.
Once all details are filled in, finalize by clicking Add Medication. The new medication now appears in the client's medication list.
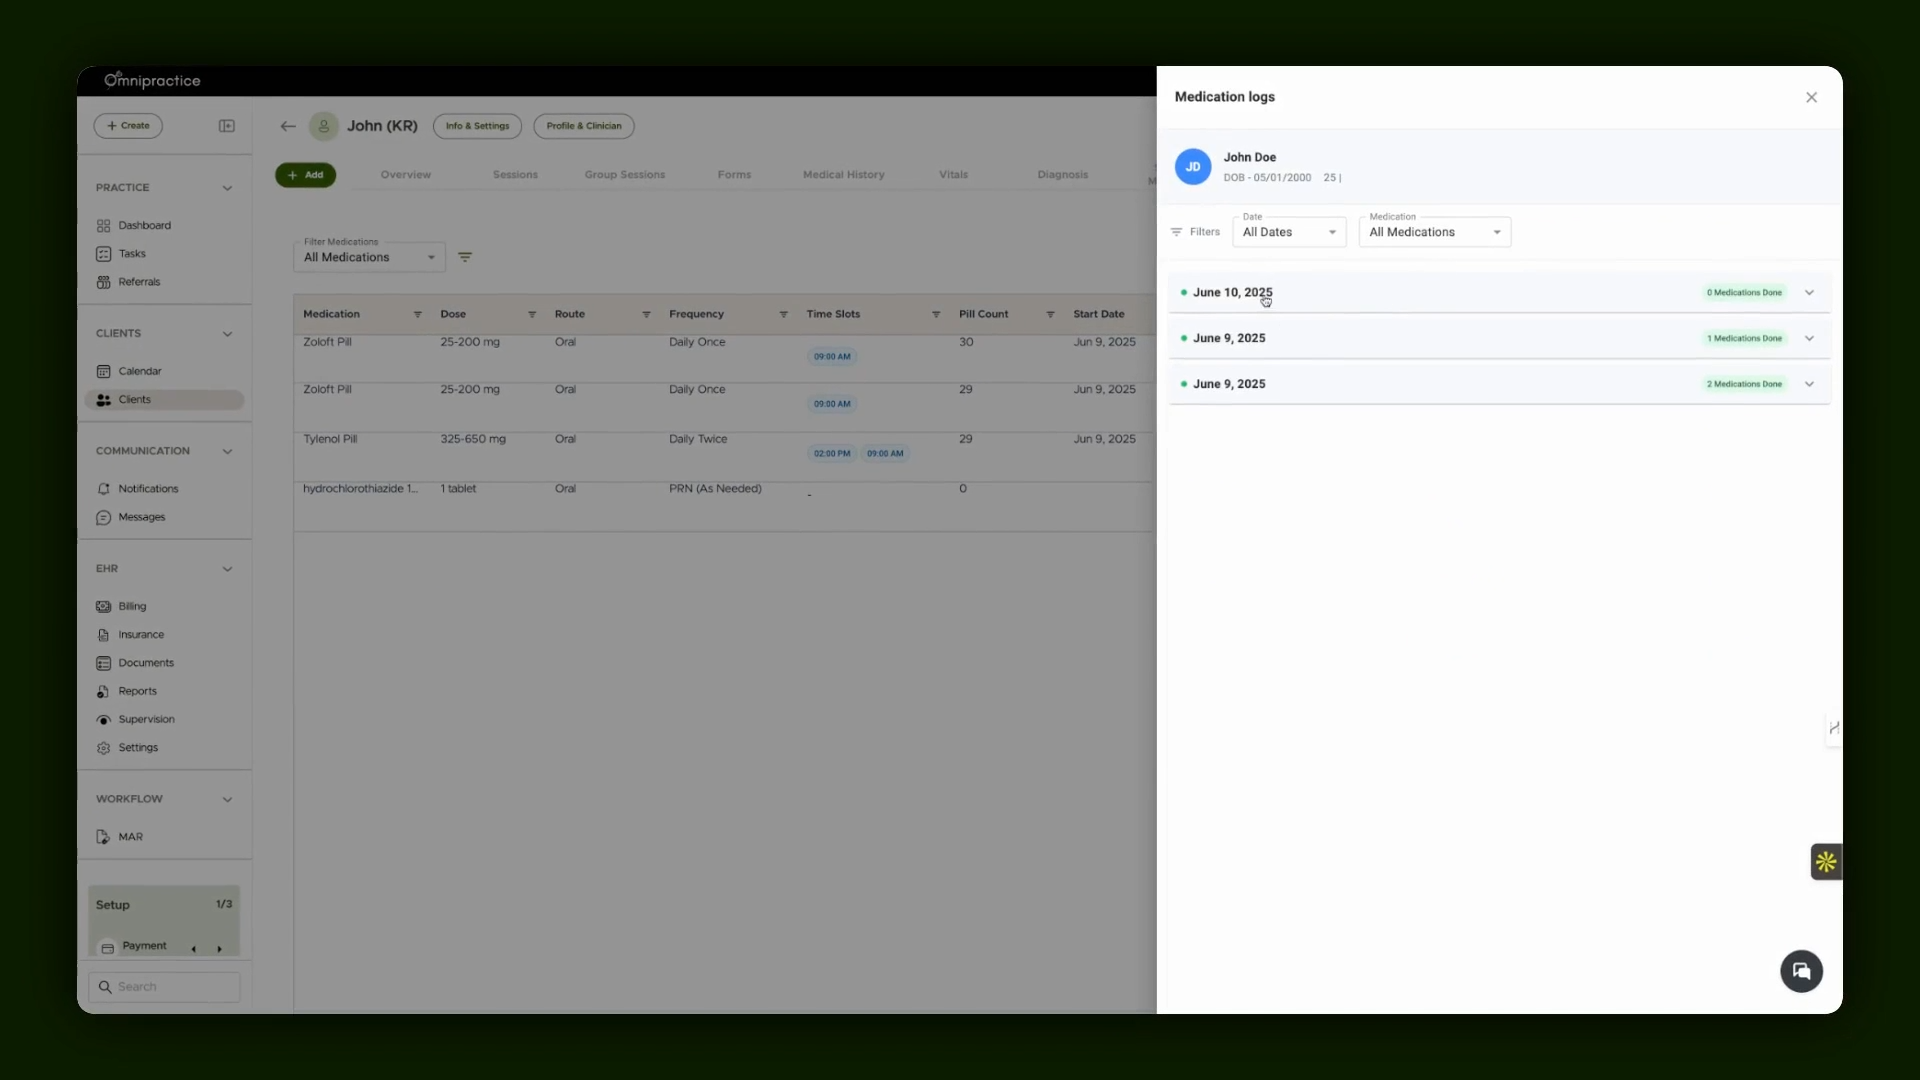
Step 6: Review Past Medications and Filter Records
Easily review a list of all previously administered medications for the client from See Logs button. Apply filters to narrow down the data according to your needs.
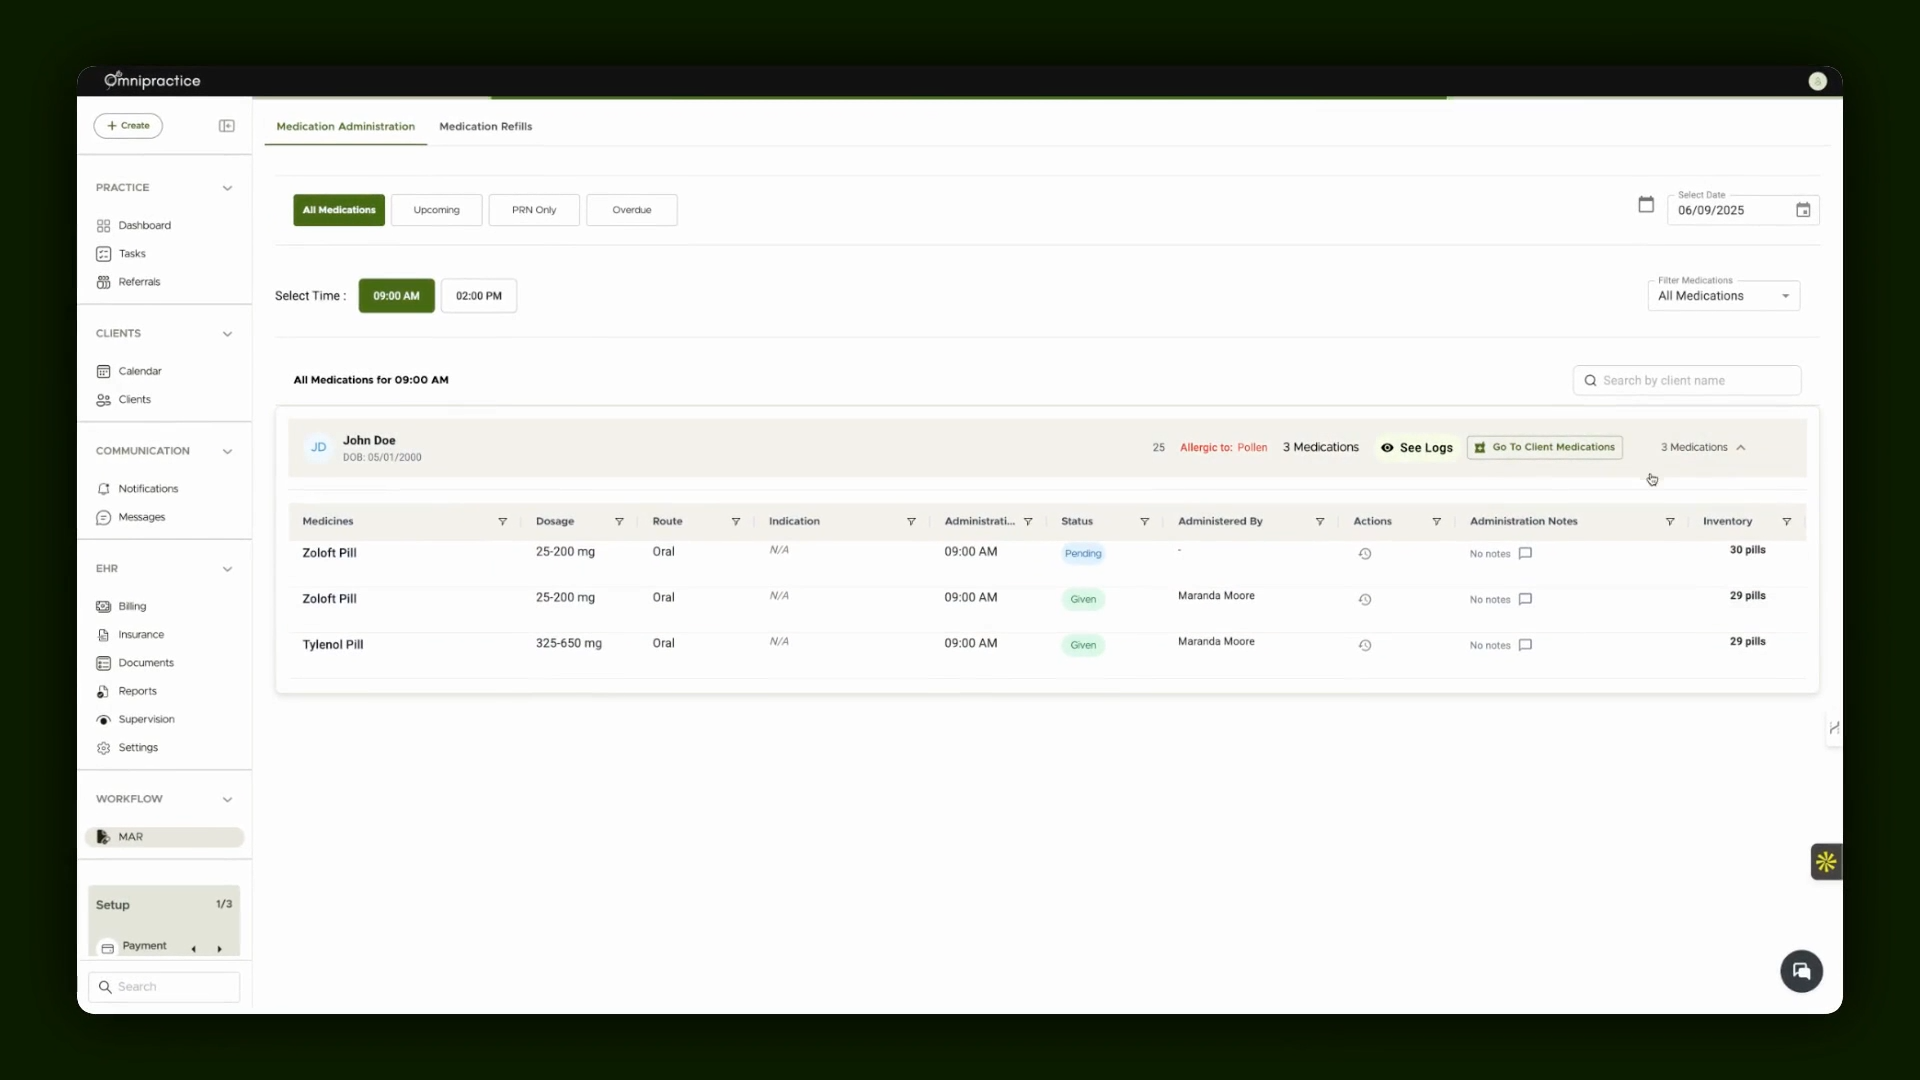
Step 7: Access the Medication Administration Workflow
From the client's chart, either select the administration chart or use the sidebar to access the Medication Administration(MAR) workflow. Here, see all medications and clients in the system.

Step 8: Administer Medication at Scheduled Times
Within the workflow, locate the specific medication and administration slot (e.g., 9 a.m.). Use the dropdown to see all current medications for each client. Click the status area next to the scheduled dose to begin administration.
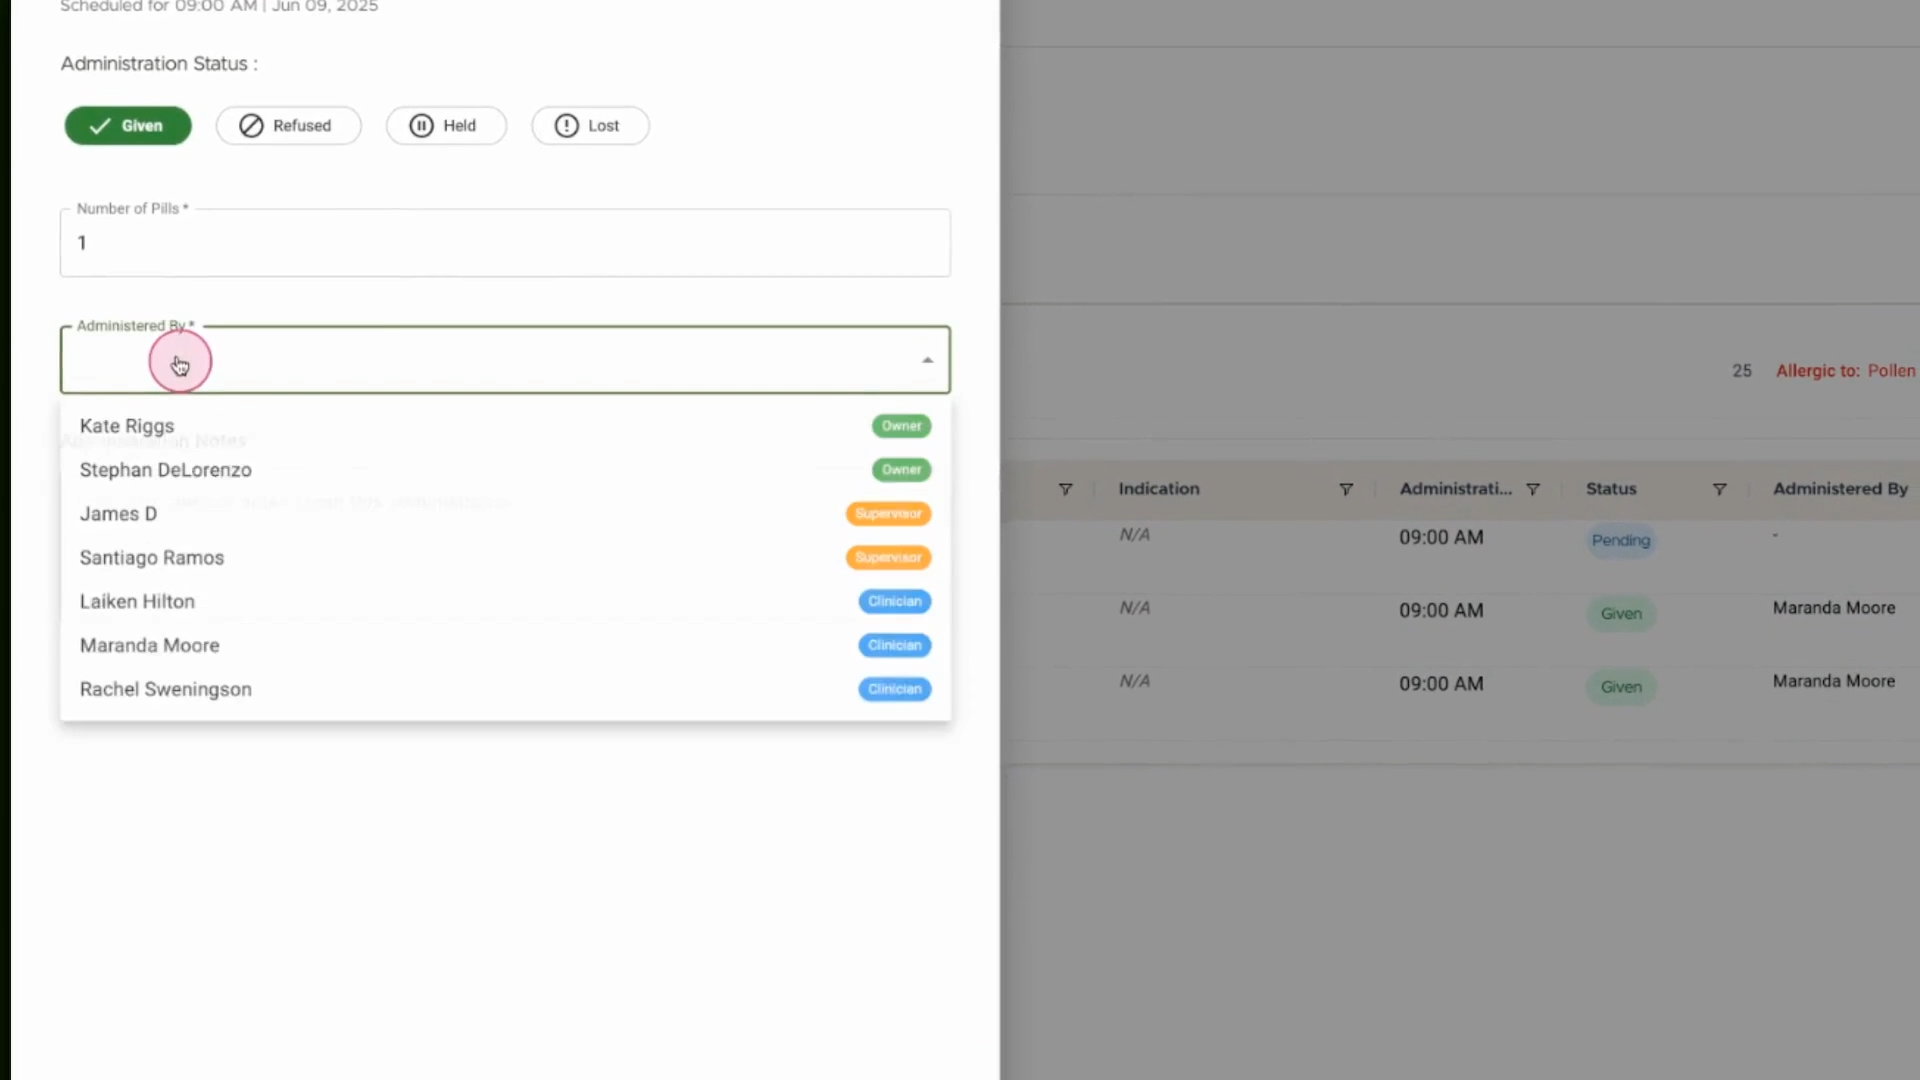
Step 9: Document Medication Administration
Enter details for the current admin: mark the medication as given, note the number of pills dispensed, and specify who administered it. Optionally, write additional administration notes. Finalize the record by documenting the administration.
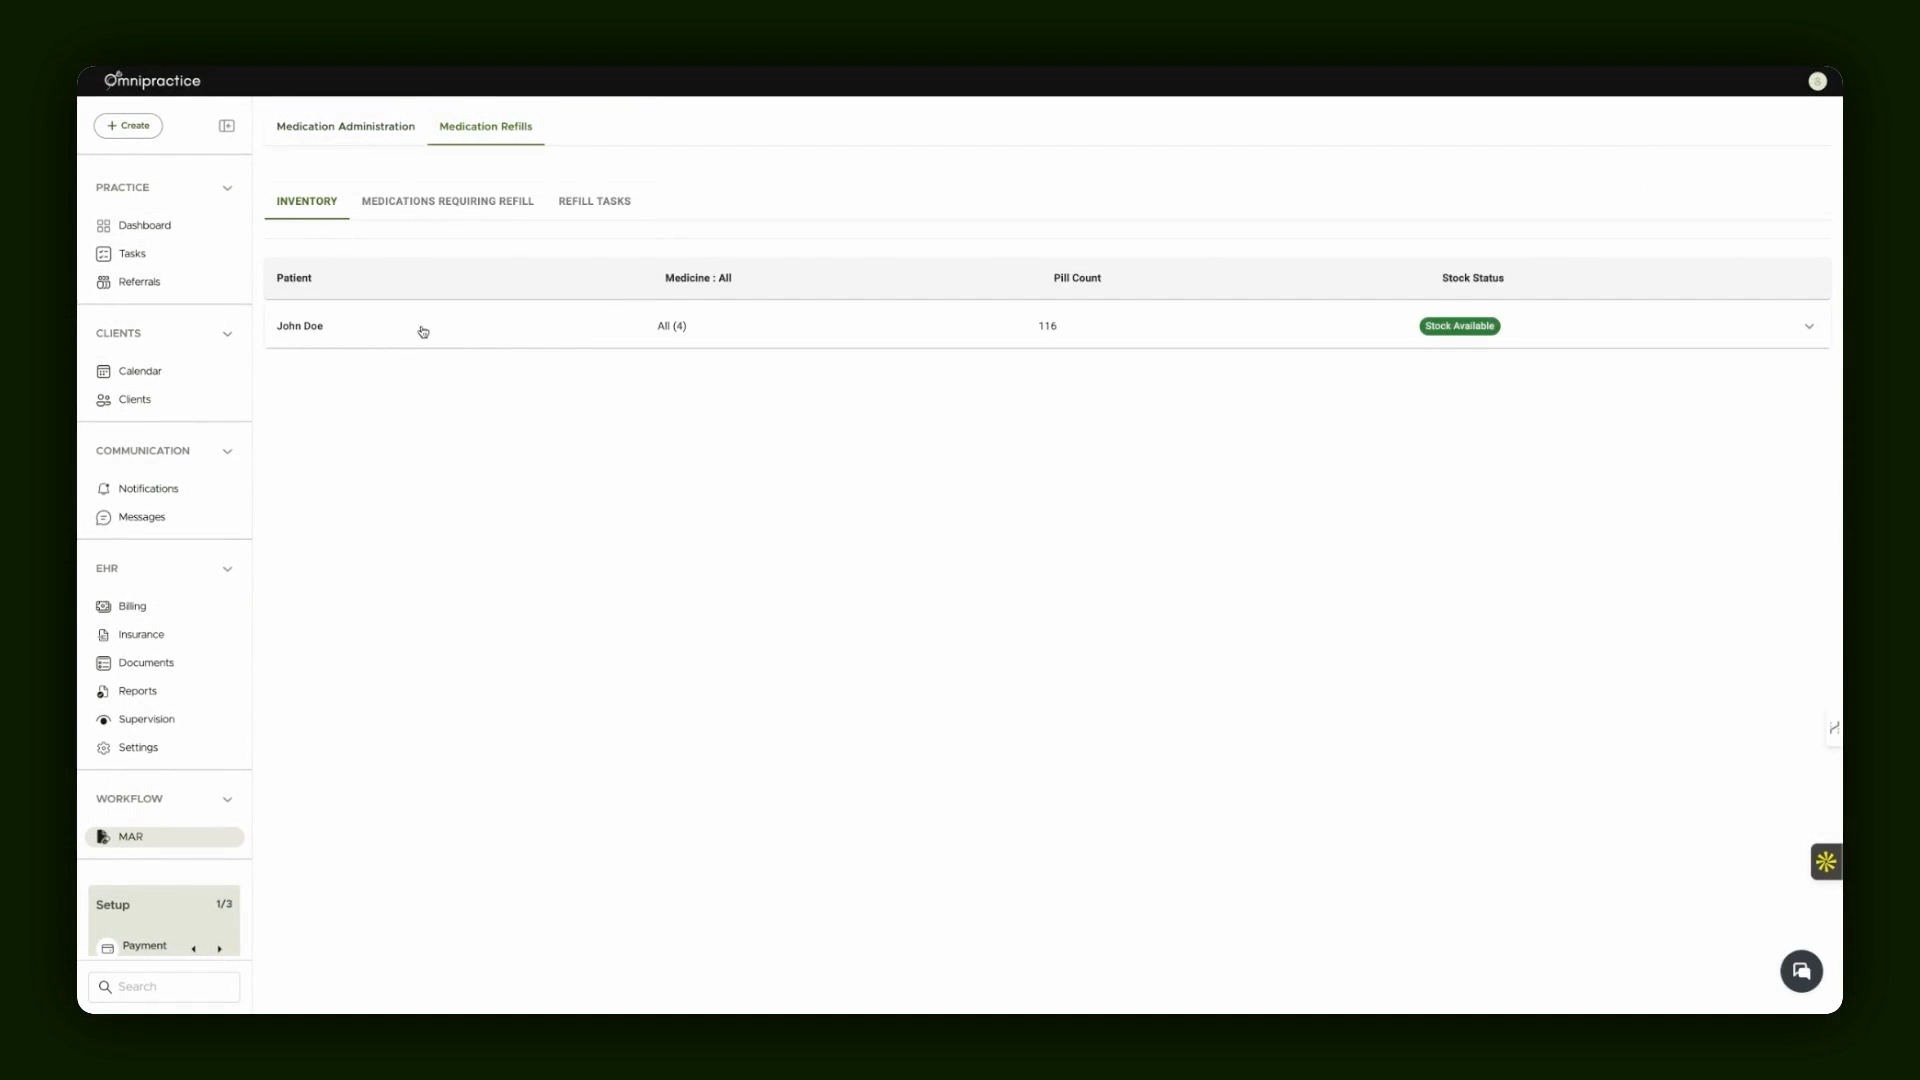
Step 10: Monitor Medication Inventory and Manage Refills
Access the inventory view to review current medication levels and deliveries. Navigate to the Refills workflow as needed.
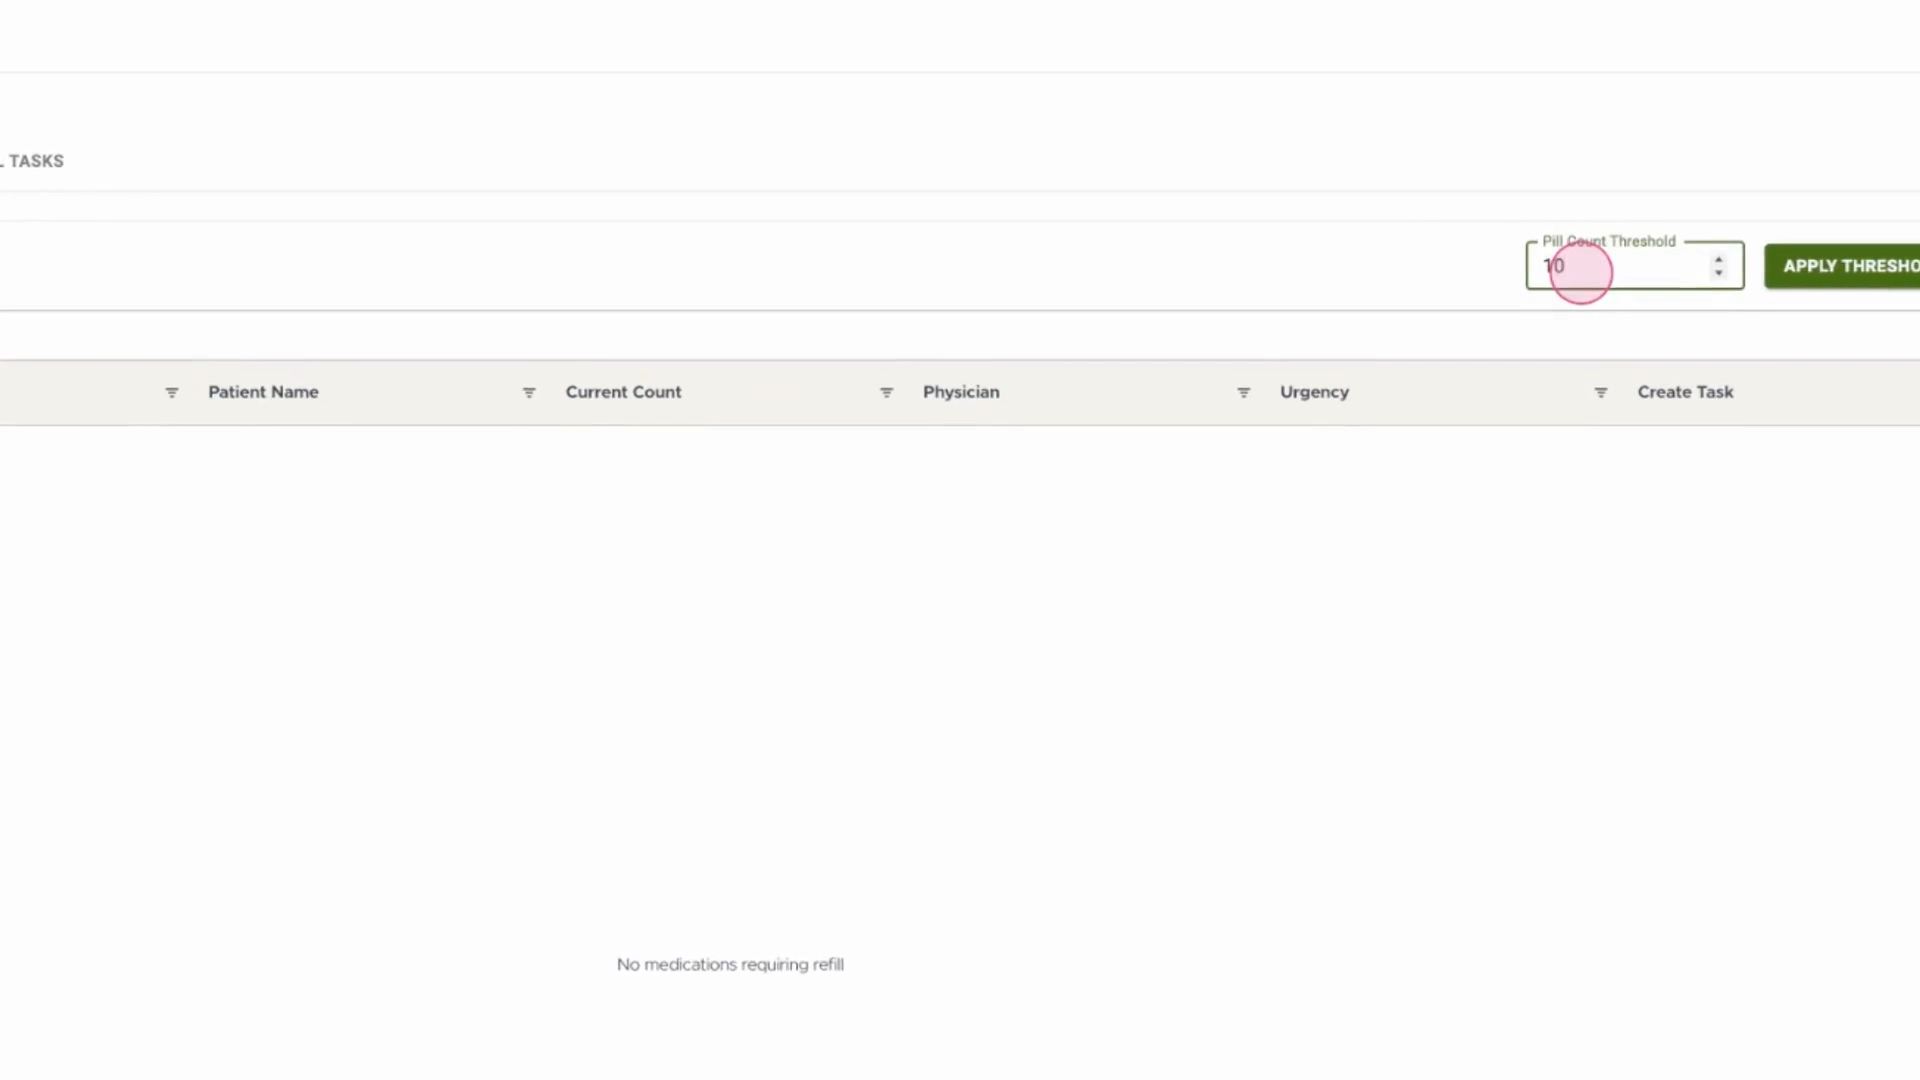
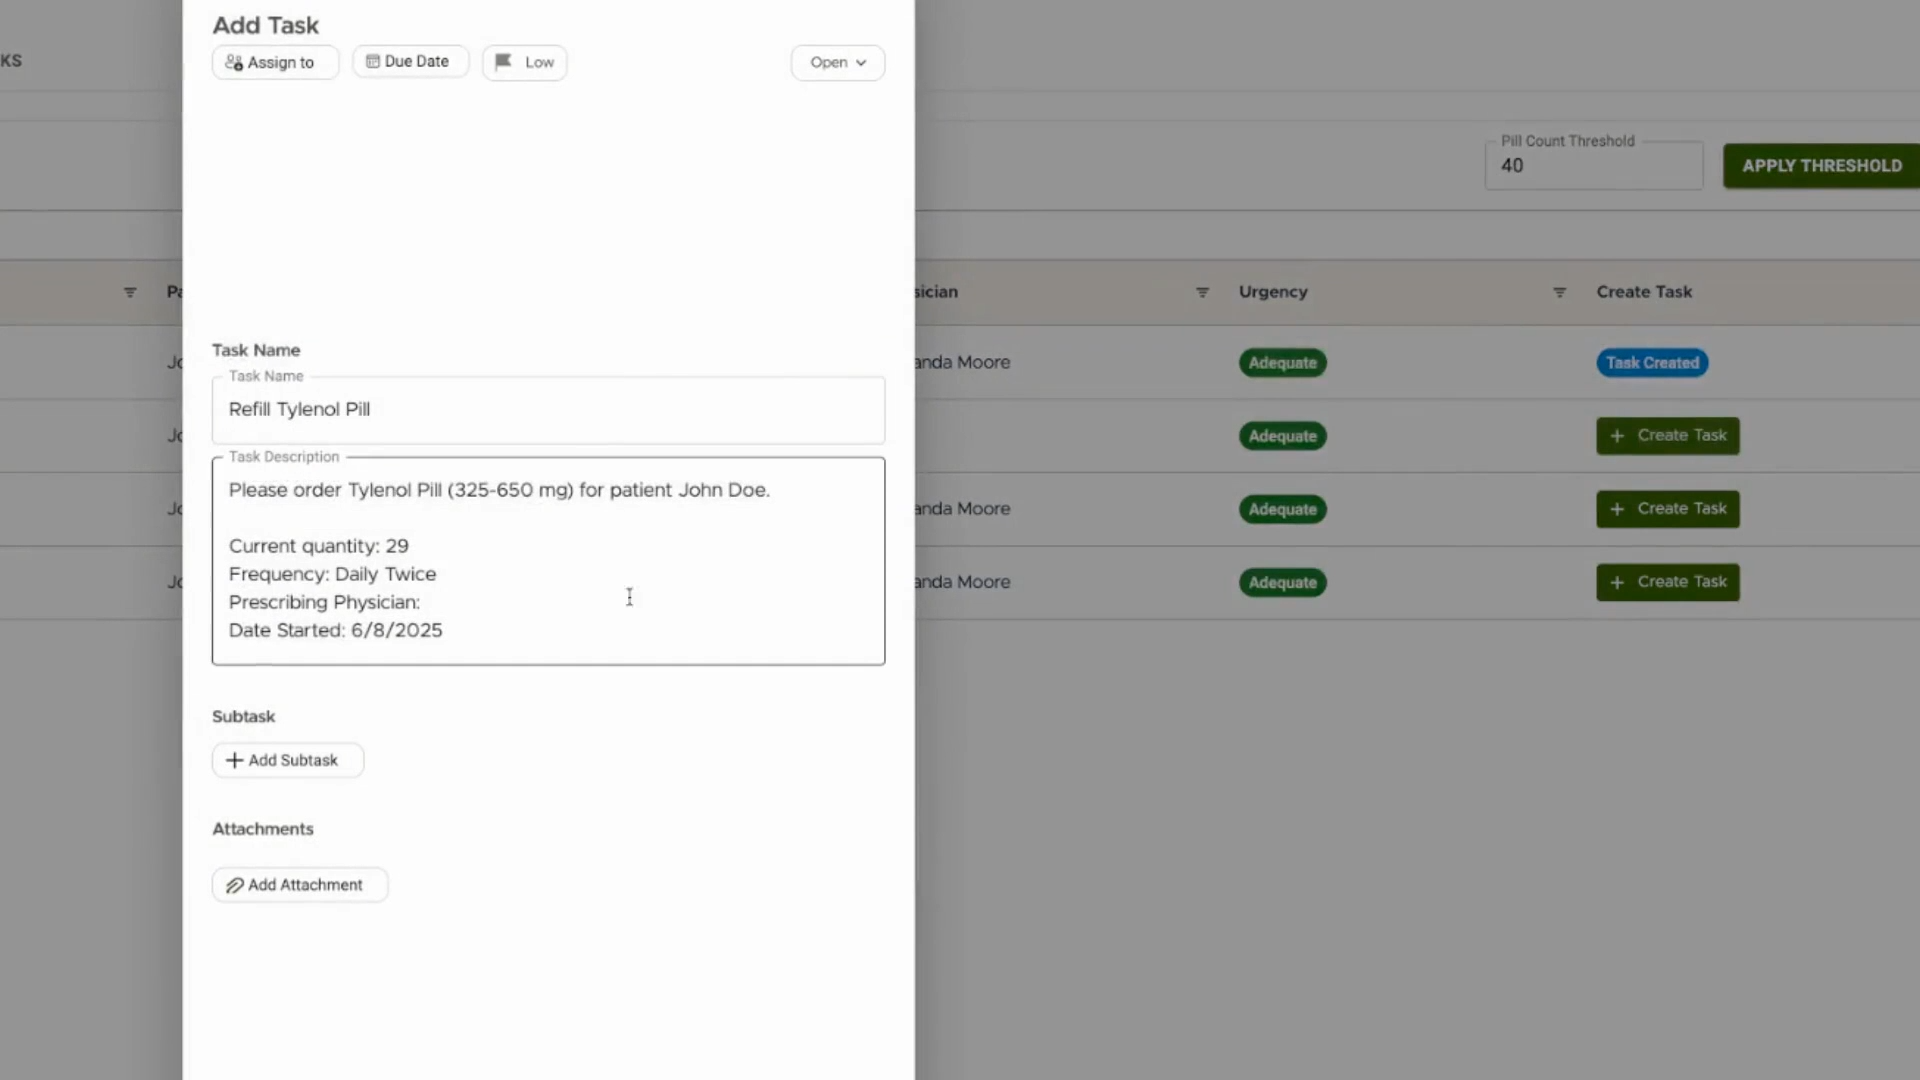
Step 11: Set Refill Thresholds and Create Refill Tasks
Set a threshold (e.g., 40 pills) to flag medications requiring refills. Any medications with inventory below this amount display on the refill list.
Create a refill task for the needed medication. Assign the task to the appropriate staff member so they're notified to refill. The created task appears in the task list.
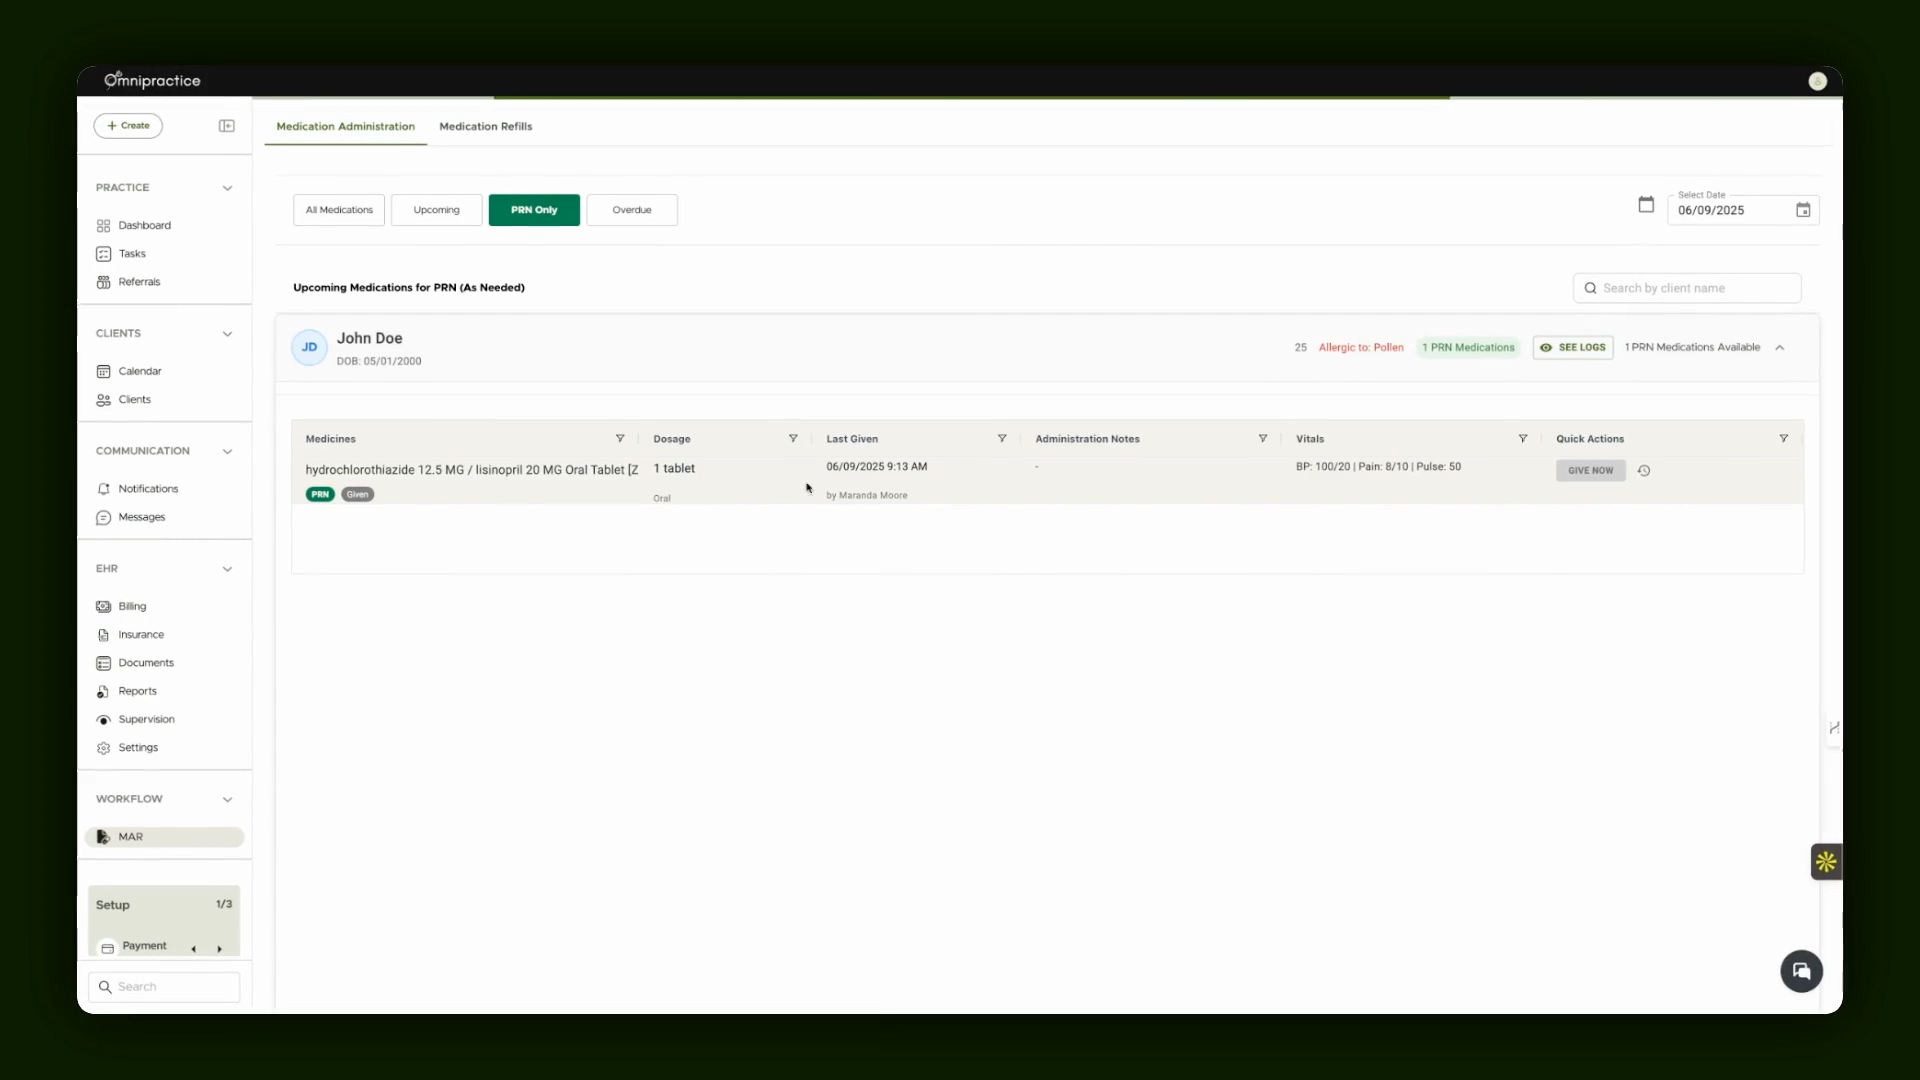
Step 12: Administer PRN (As Needed) Medications
PRN medications are listed separately. When a PRN dose is needed, administer the medication and the system logs it for tracking.
By following these steps, you'll efficiently add new medications, administer scheduled and PRN medications, and handle inventory and refills to ensure optimal care for your clients.