Customizable Appointment & Note Status and Reports
Easily track appointment and note completion with fully customizable status and Use AI-driven reports to monitor practice activity, and set up automated daily email schedules.
Step 1: Open the Calendar
Go to the Calendar view to see your appointments.

Step 2: Use Filters to View Appointments by Status
Check the top of the calendar for filter options.
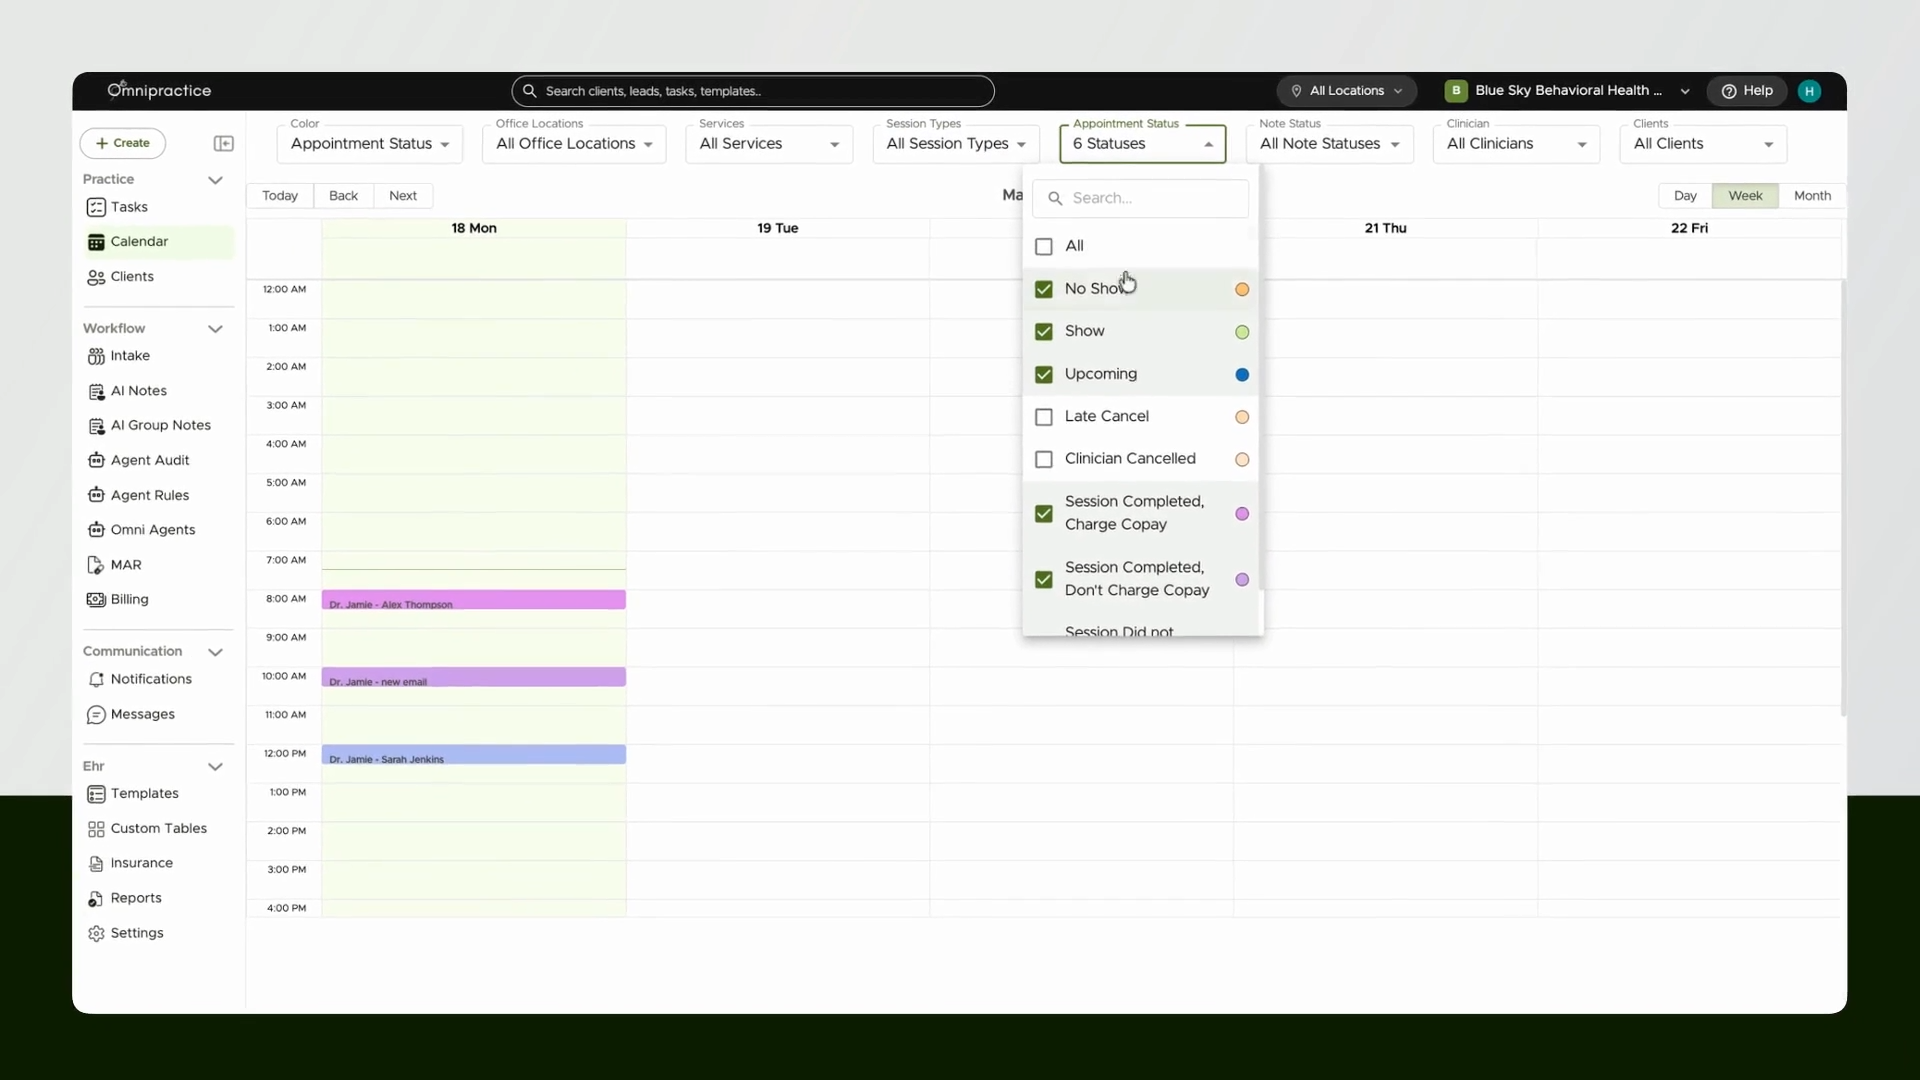
Click the Appointment Status filter to view and select custom appointment statuses.
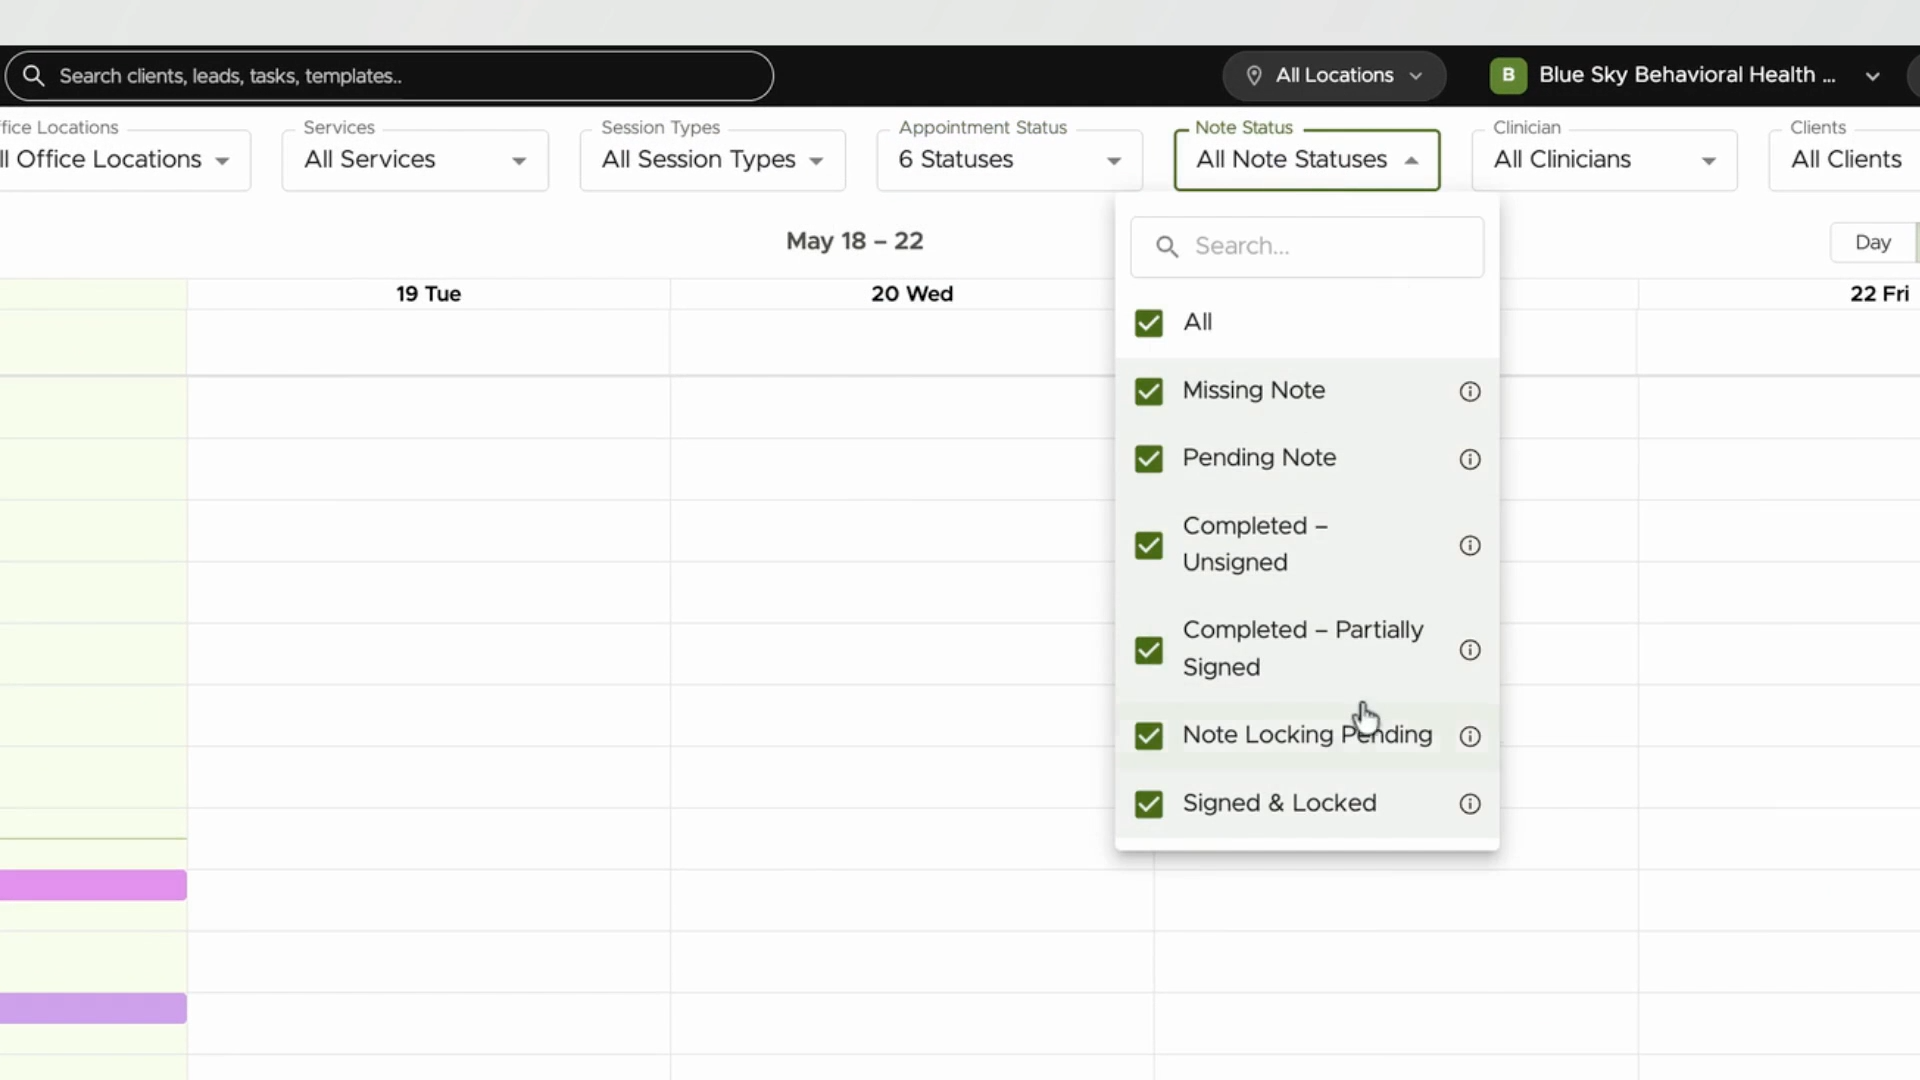
Step 3: Filter by Note Status
Click the Note Status filter to view appointments by the documentation status.
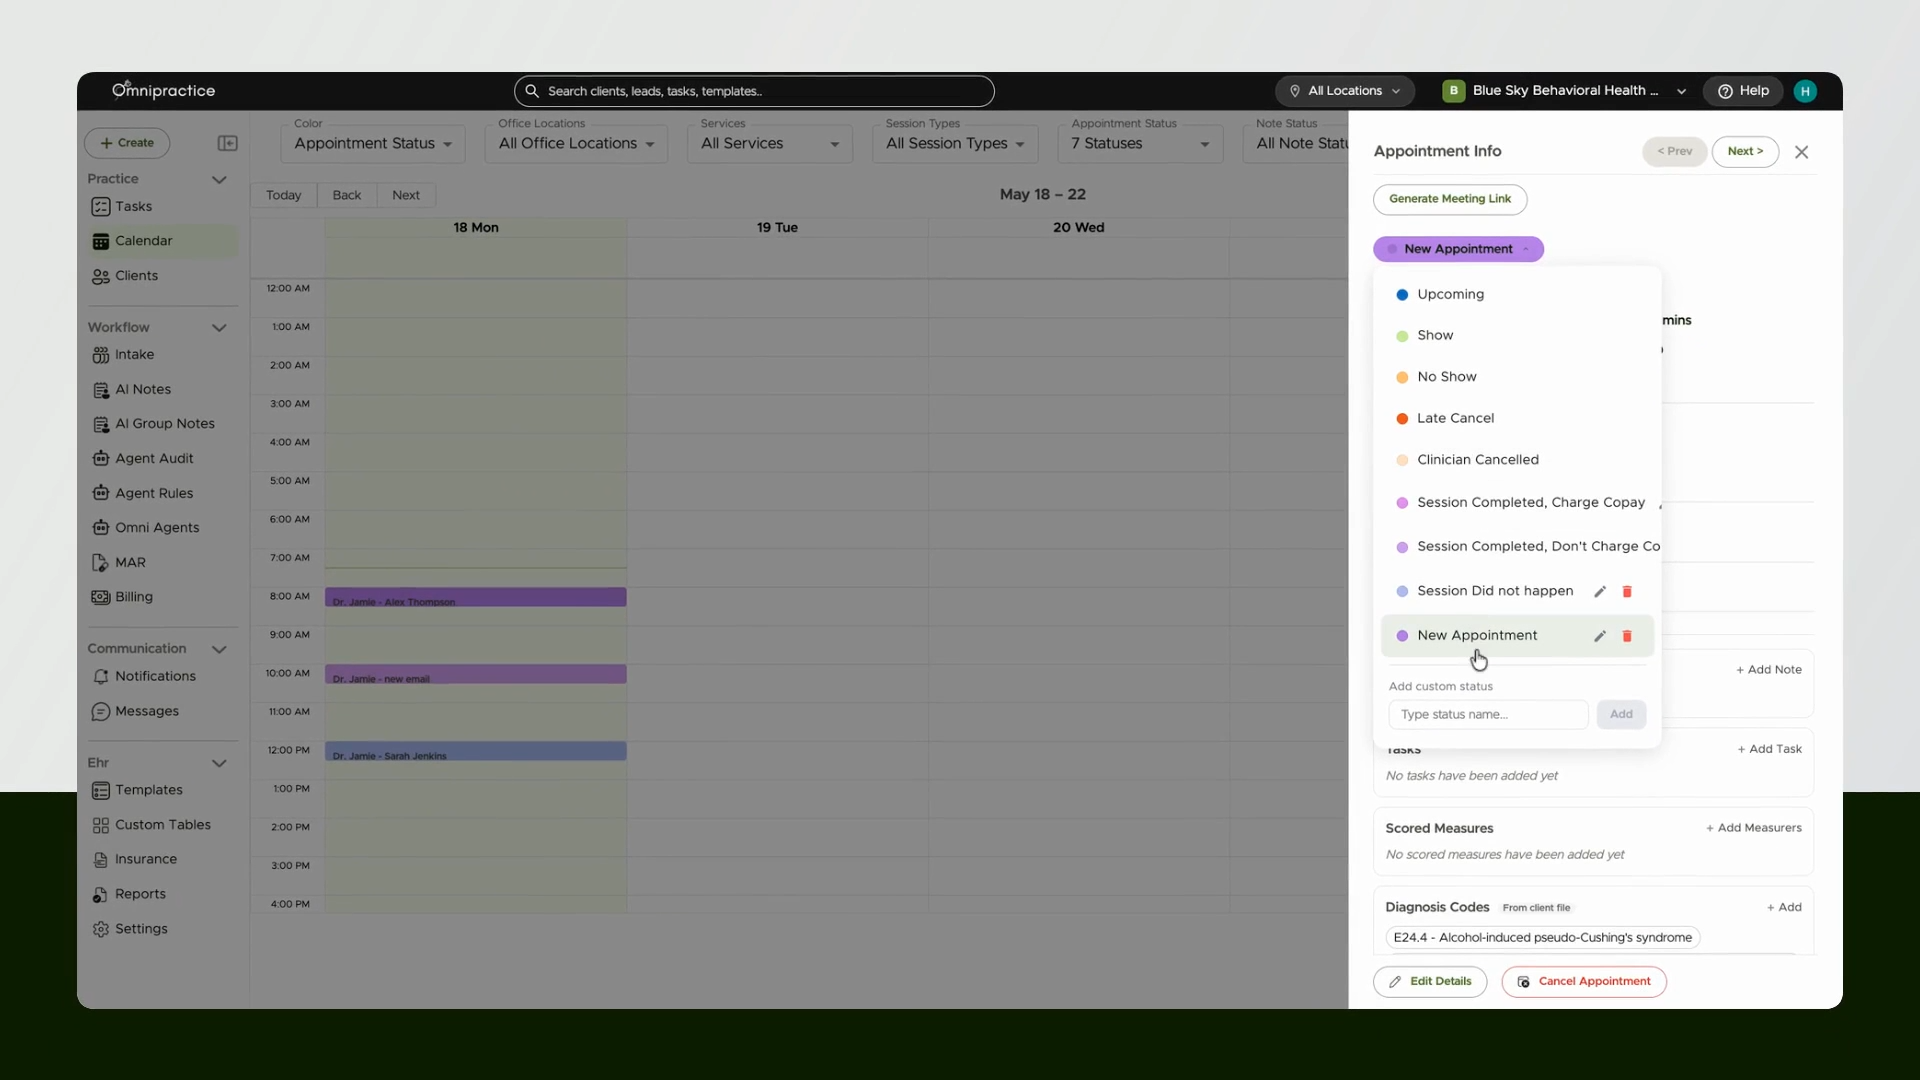
Step 4: Customize Appointment Statuses
Click any appointment to open its details.
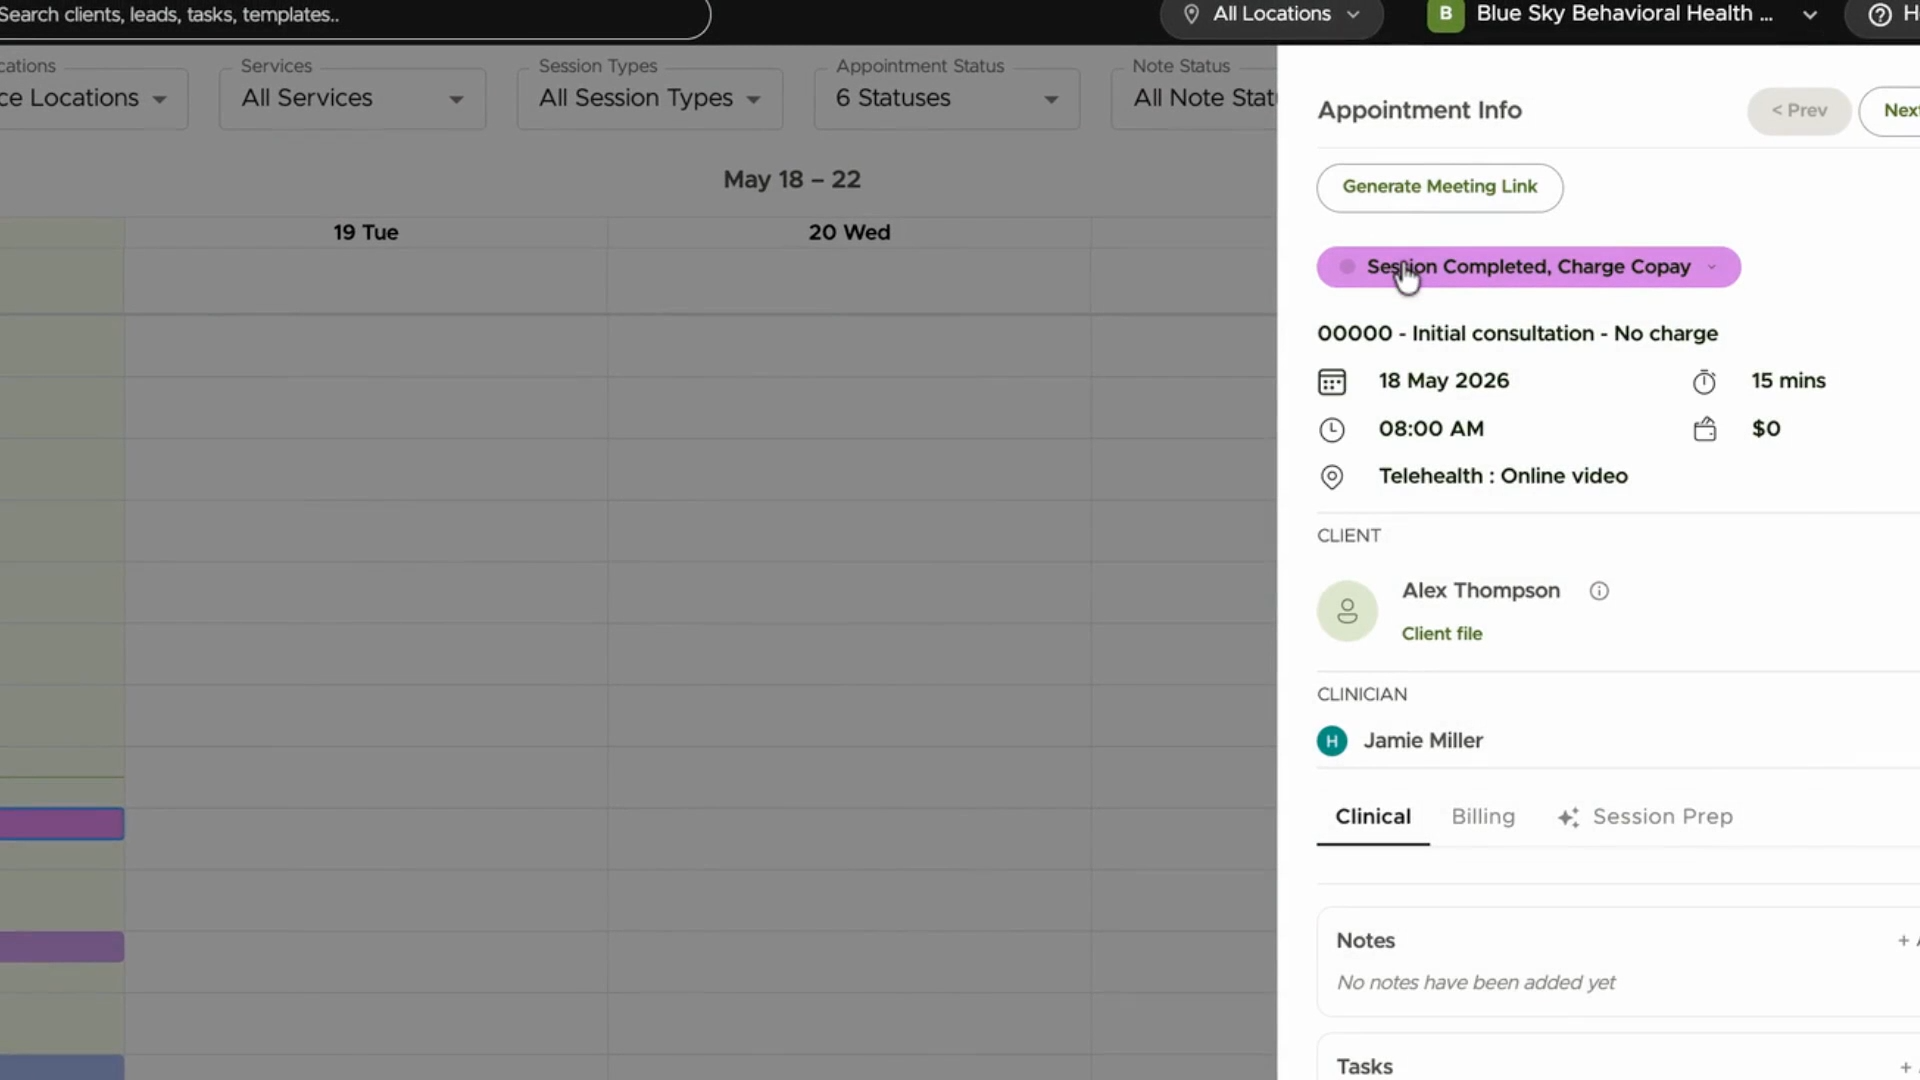
Add a new status or select an existing one.
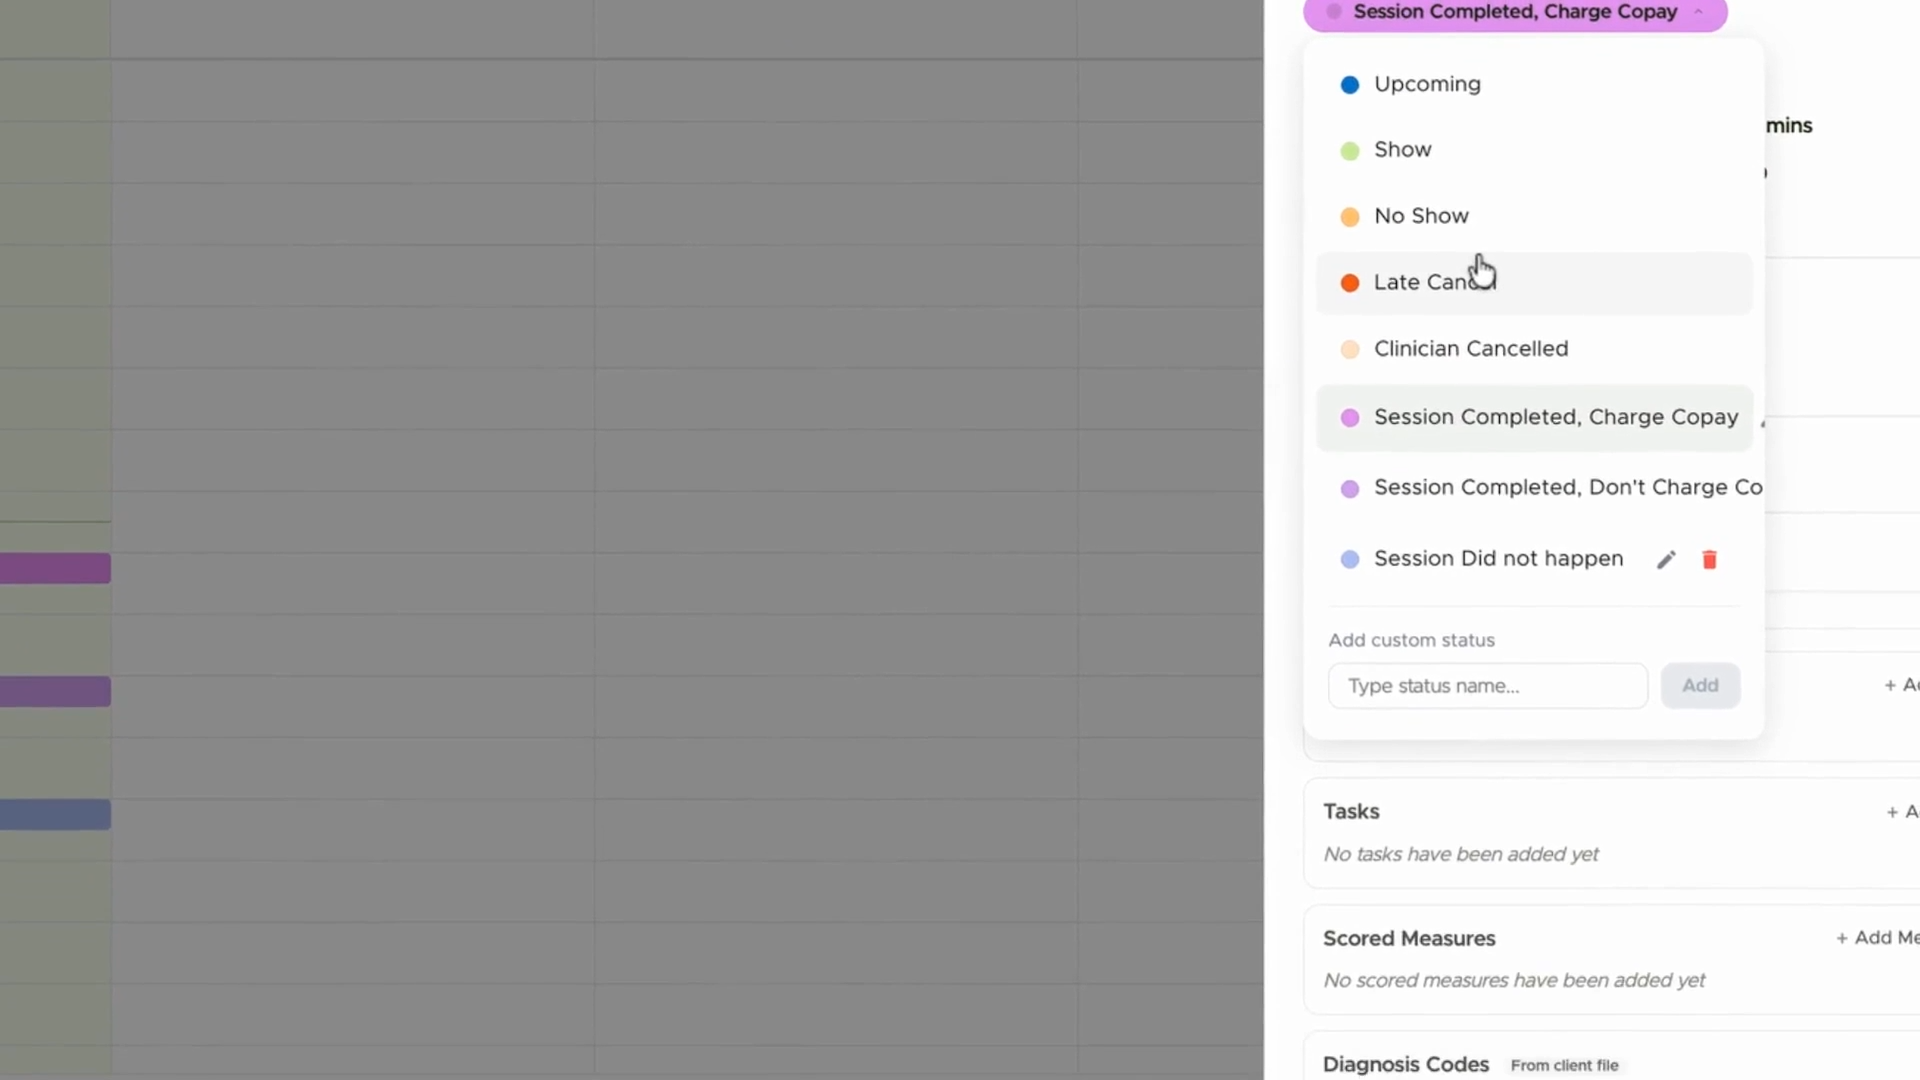
Choose the appropriate status for the appointment. This change updates the status in your calendar and filter dropdowns instantly.
Step 5: Generate and Schedule Appointment Status Reports
Navigate to Reports.
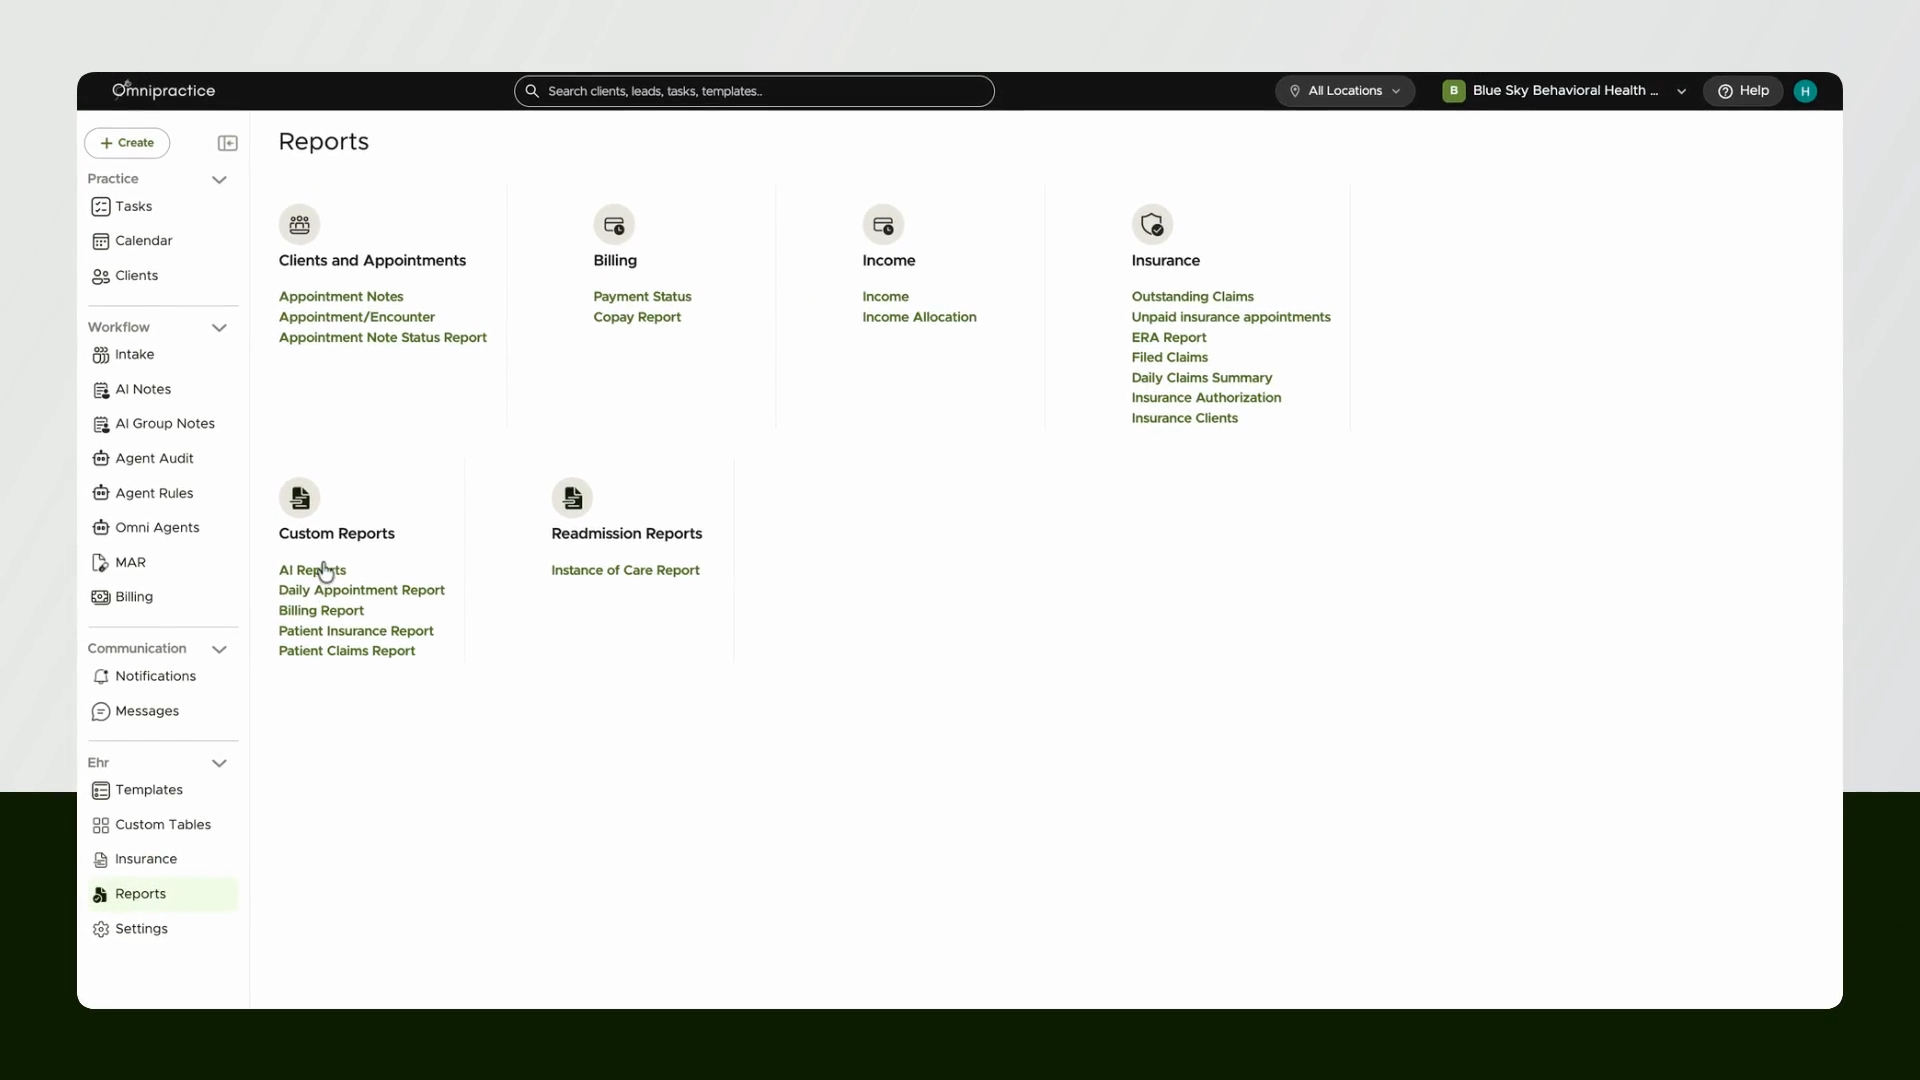
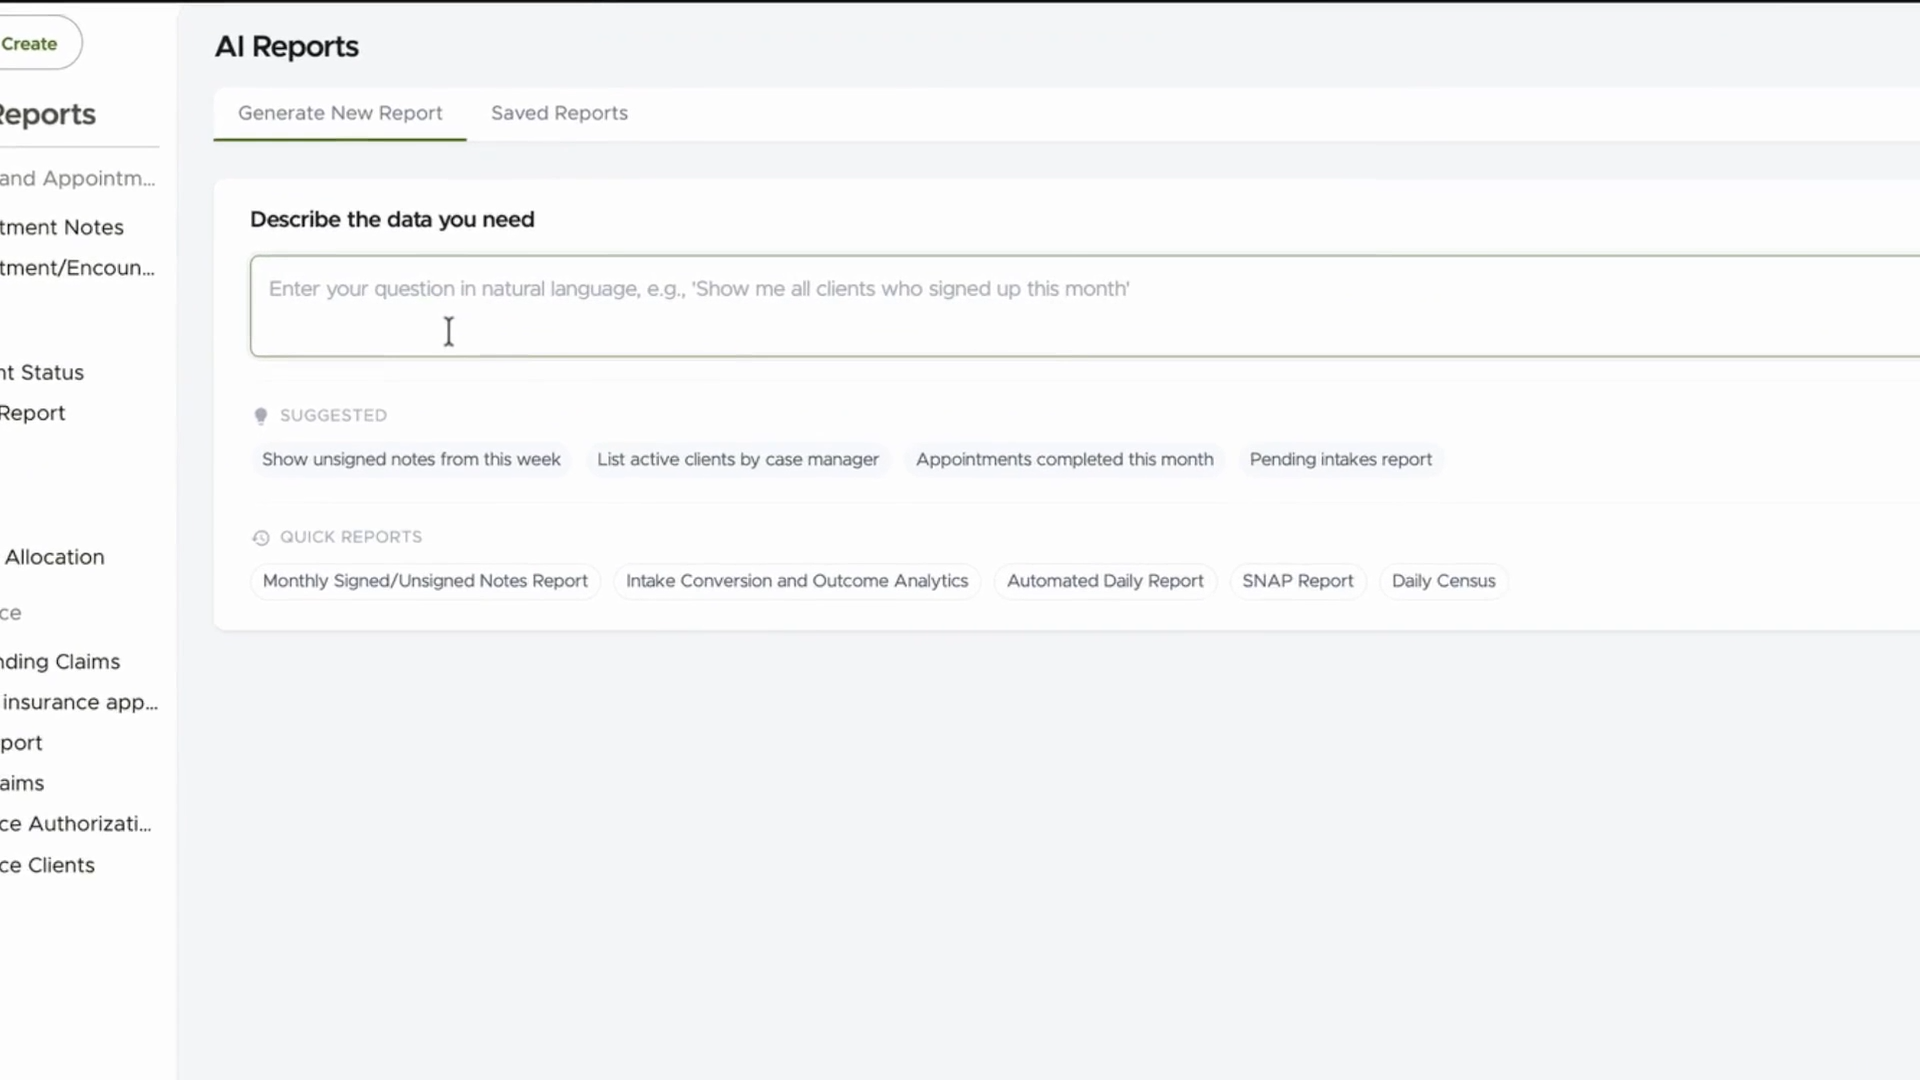
Select AI Reports to open the report builder.
Describe what you need (e.g., daily appointment status report). The system generates a customizable report with columns like date, time, service code, client name, clinician name, and appointment status.
Step 6: Schedule Report Delivery via Email
Schedule reports for a single user or select multiple recipients.
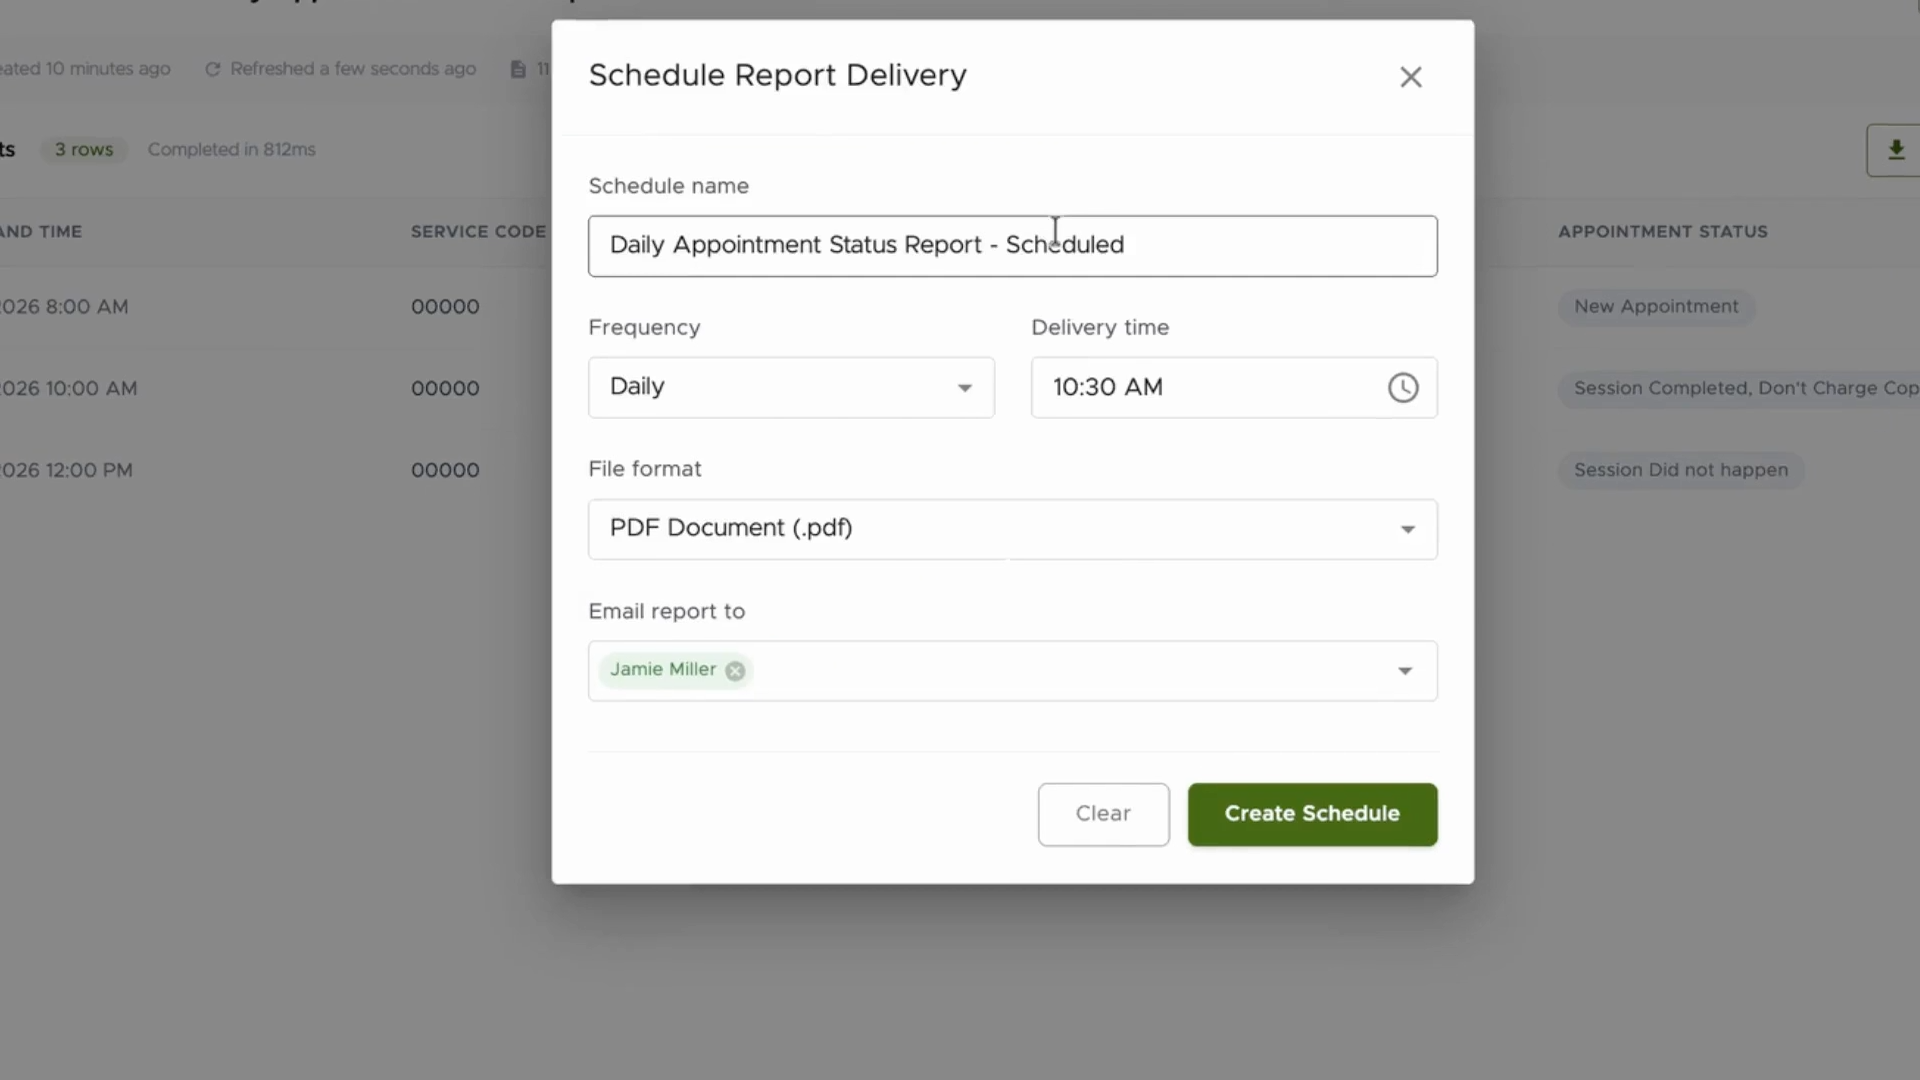
Set your preferred time and frequency. Reports will be emailed automatically.
Step 7: Monitor Note Status with Reports
To track the documentation status for each appointment, go to Reports.
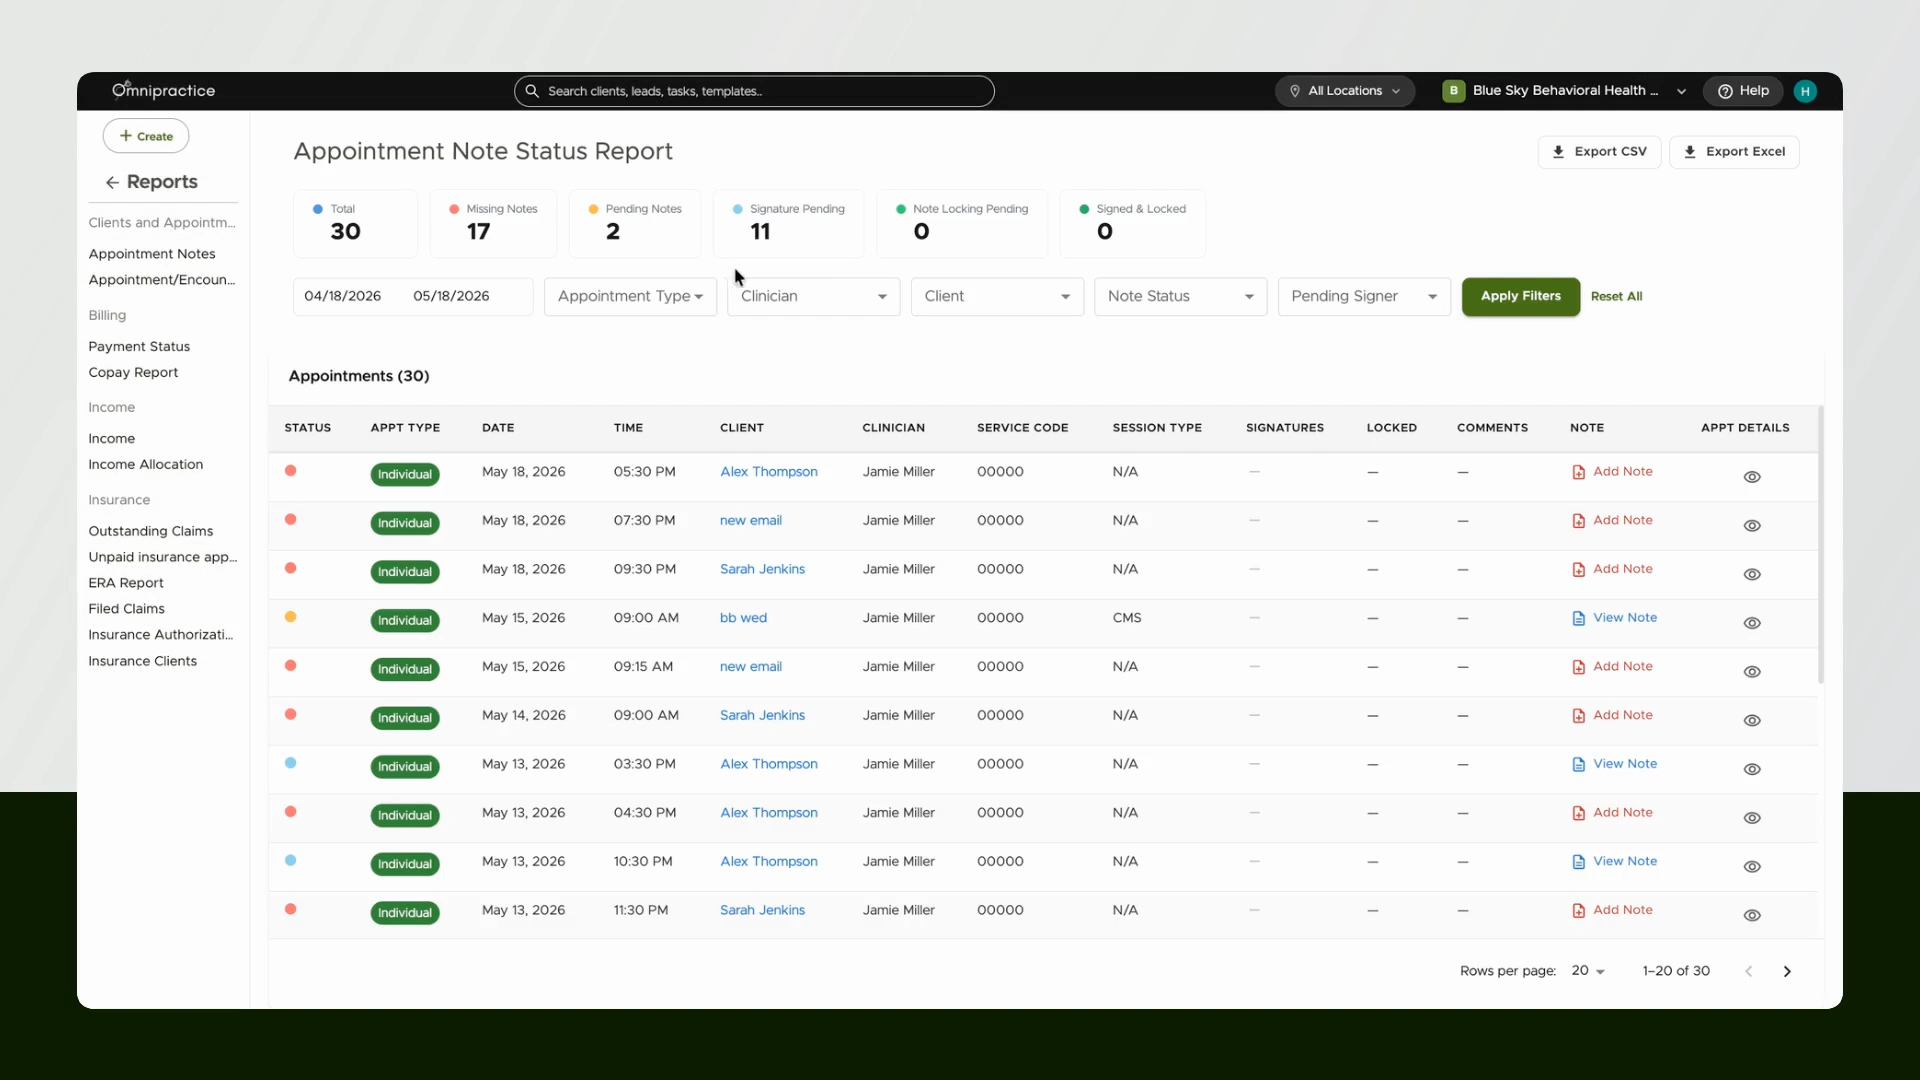
Find and select the Appointment Note Status Report.
Here, you’ll see the status for all appointment notes—whether pending, awaiting signatures, or complete. This table keeps your documentation up to date.
Managing customizable appointment statuses makes it easier to organize your practice and ensure documentation is always current. Automated report emails help everyone stay informed without extra effort. Try customizing your statuses and set up scheduled reports to streamline your routine.