AI Group Notes Tutorial
AI group notes help streamline the process of documenting group appointments and client interactions. Follow this step-by-step guide to learn how to set up and use AI Group Notes, from initial configuration to generating automated notes after your session.
Step 1: Set Up AI Group Notes Default Options
Begin by configuring the basic settings for AI group notes to ensure consistency across sessions.
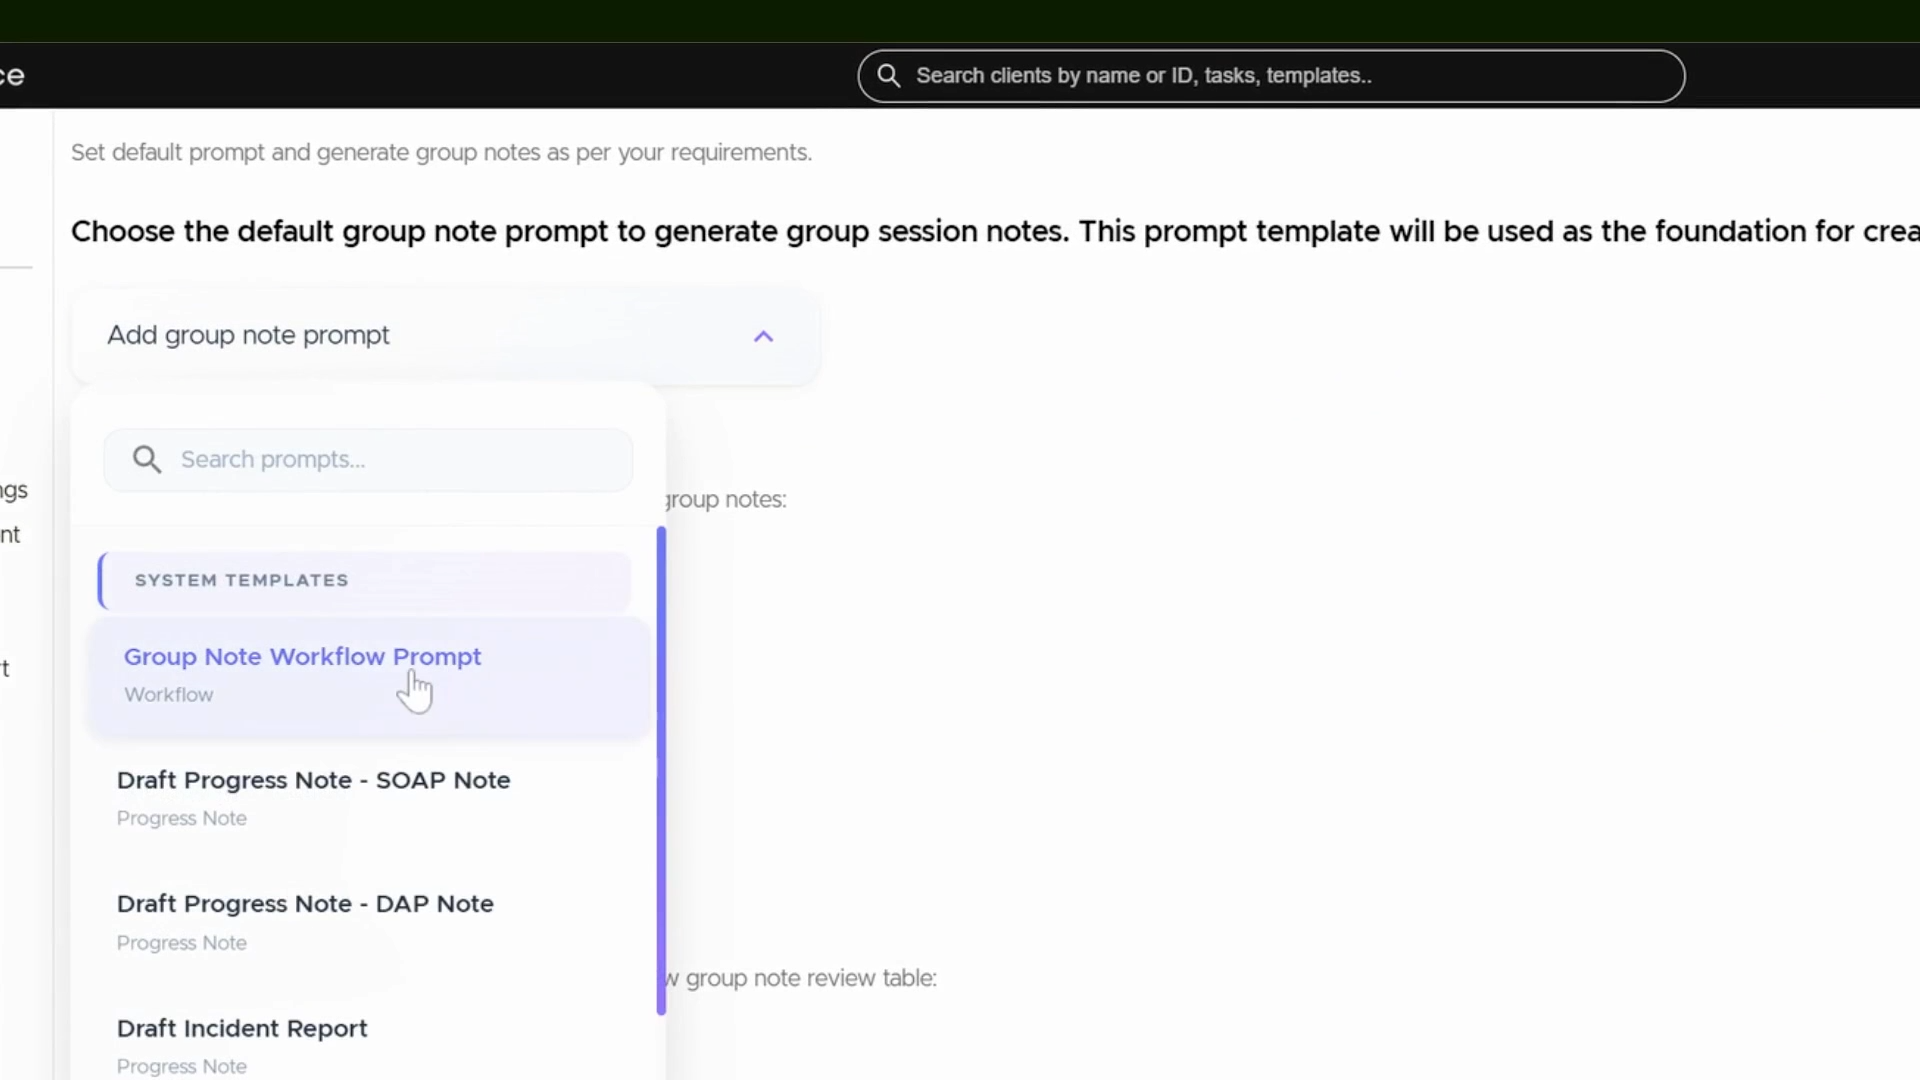
Go to Settings and locate the AI Group Notes section. Pick an existing prompt or edit it to suit your needs. Select the Group Note Prompt. This standard, built-in system prompt helps structure your group notes.
You can choose which data fields AI uses to generate group notes. Adjust these fields to capture the specific information relevant to your sessions.
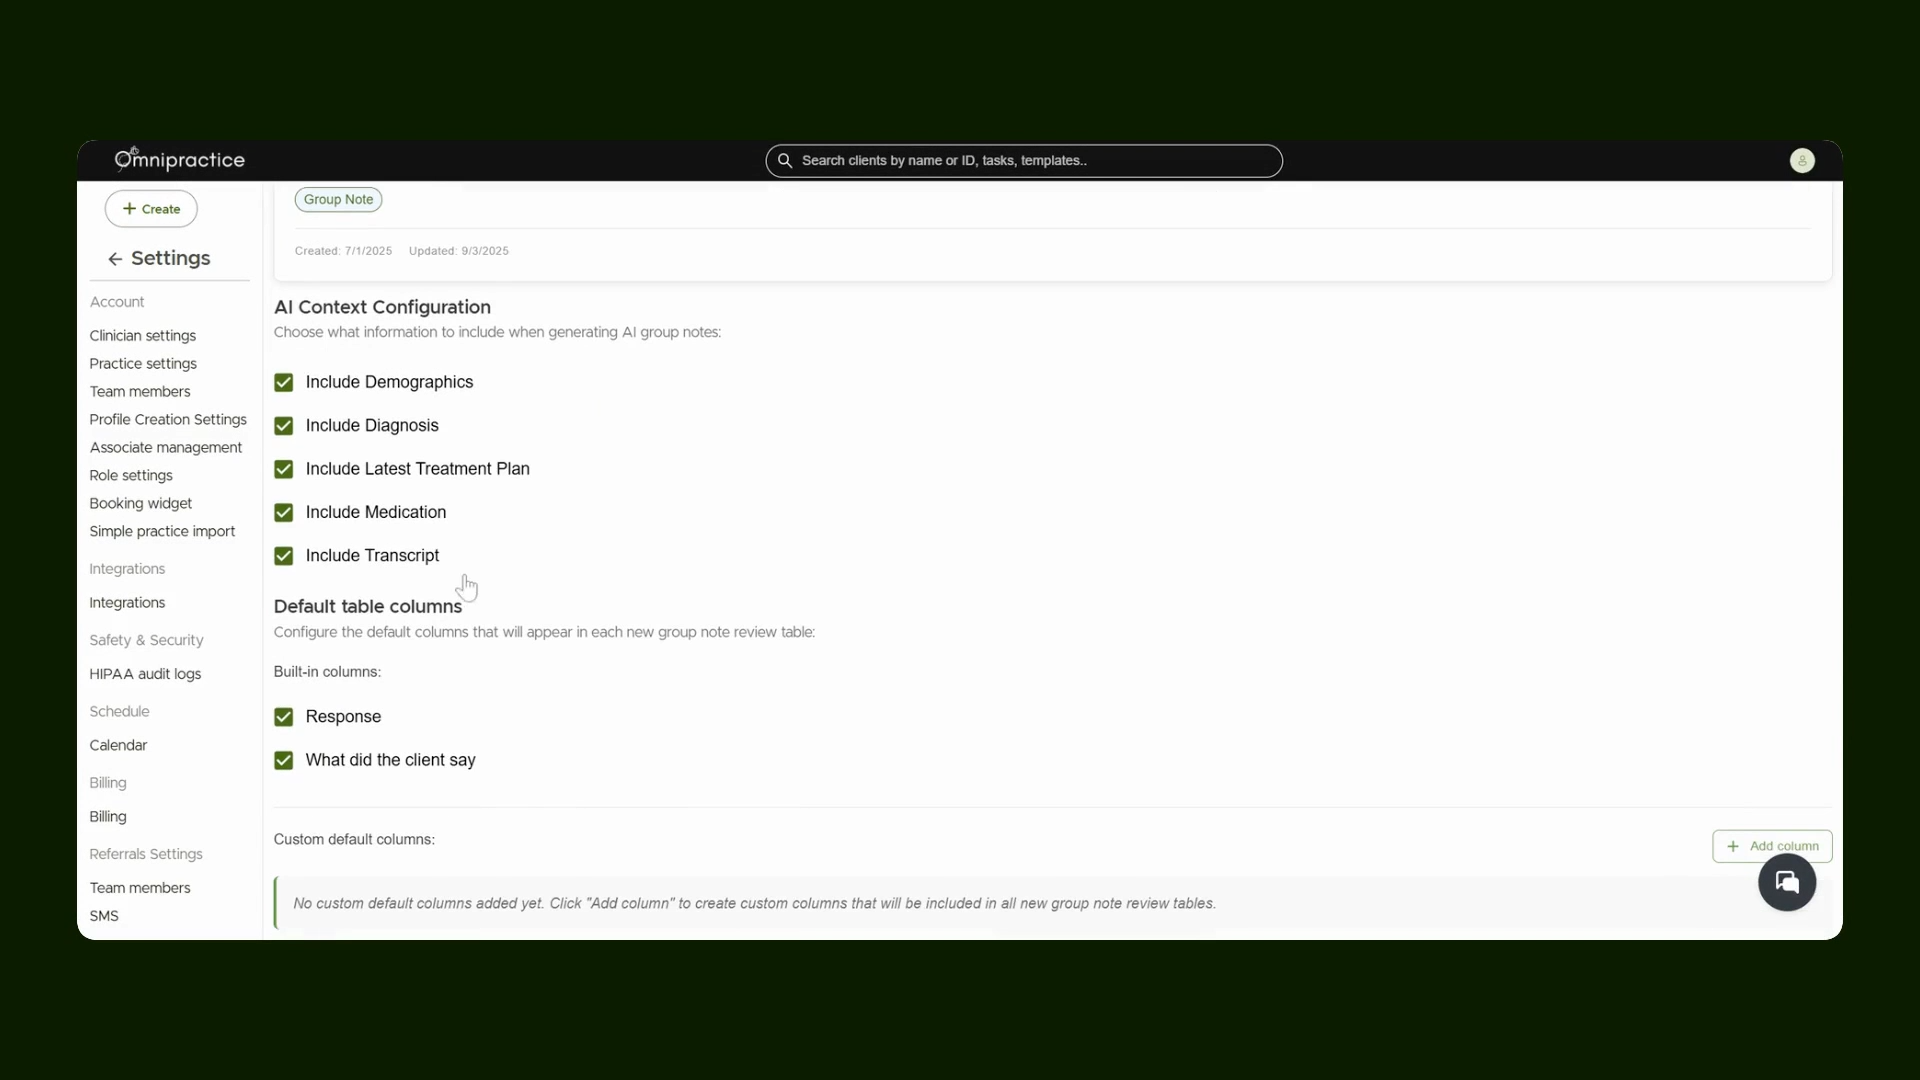
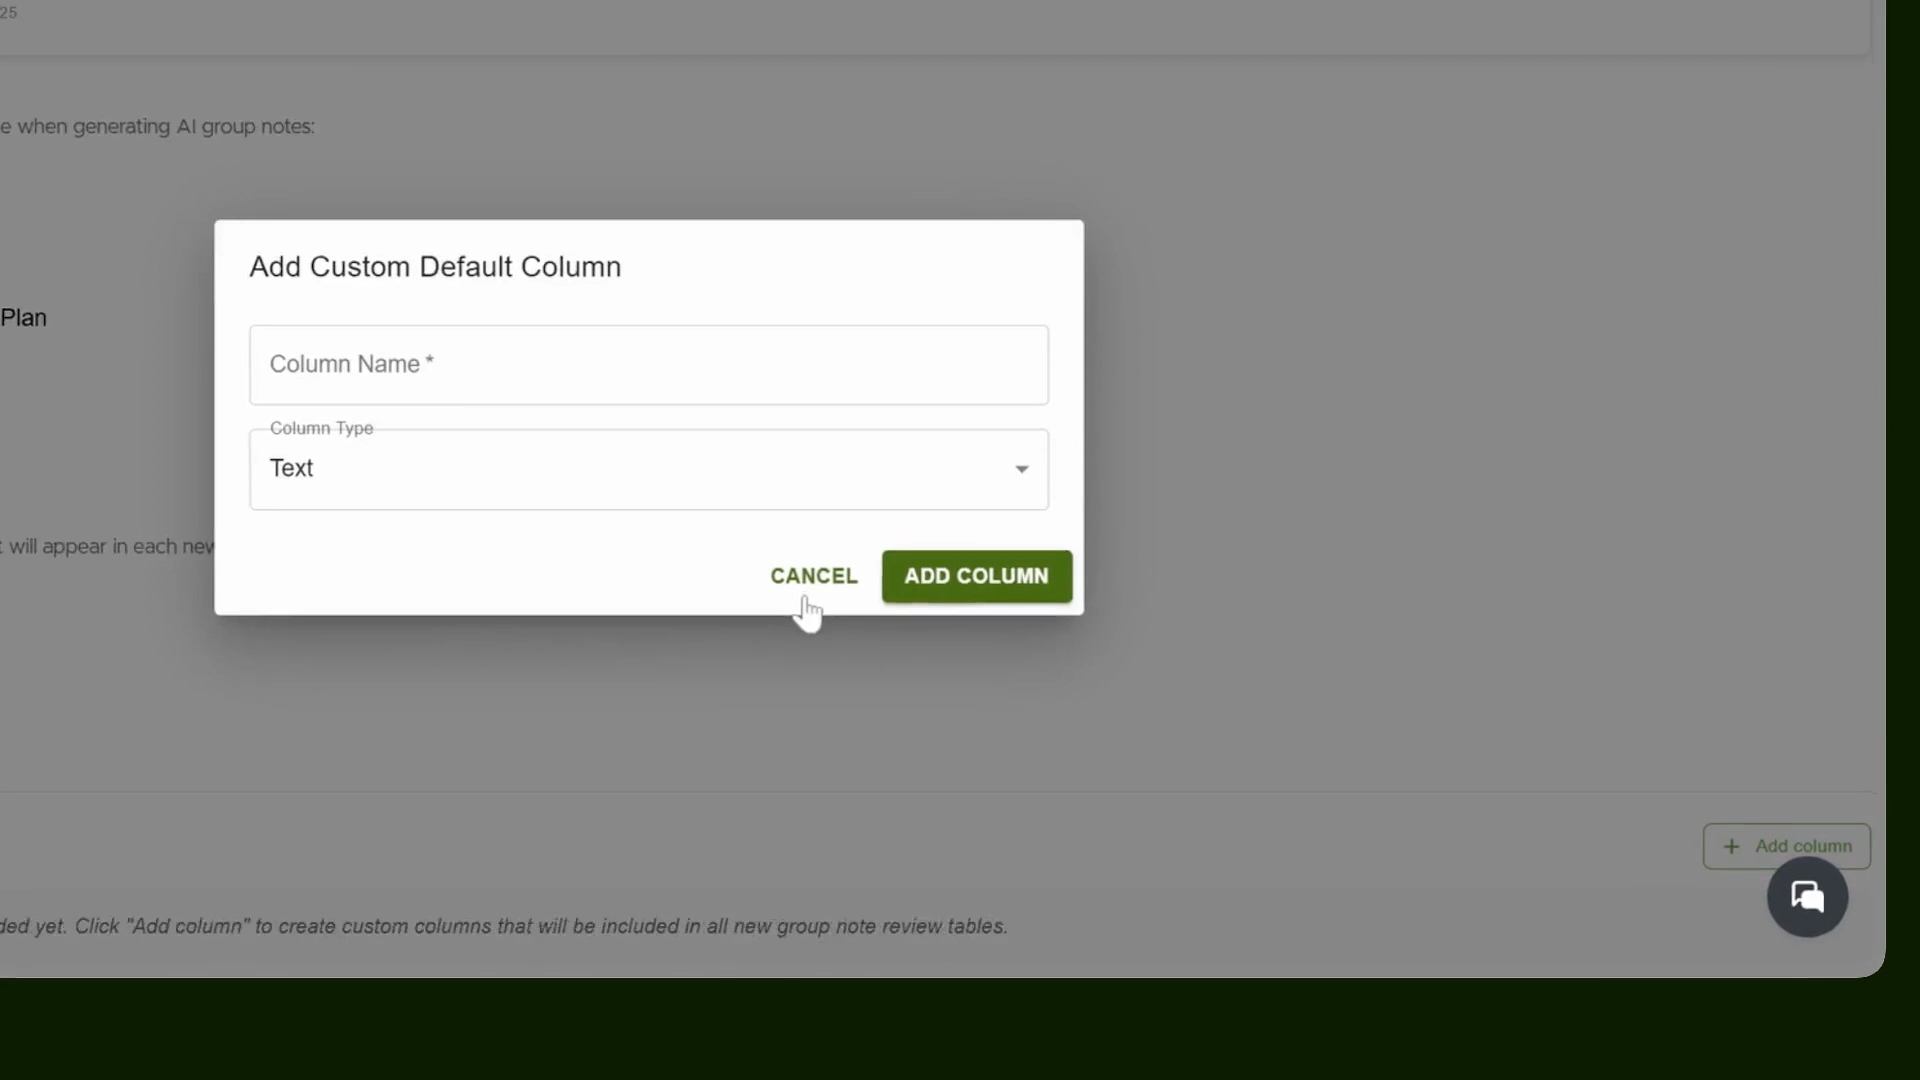
Add more columns if your workflow requires extra details. Just use the Add Column button.
Save your settings when finished.
Step 2: Create a Group Appointment
Select the button on the left side to initiate a new group appointment. Click on Create Group Appointment.

Enter a name for your group session. Next, add your clients to the group appointment. Include all clients participating in the group session.
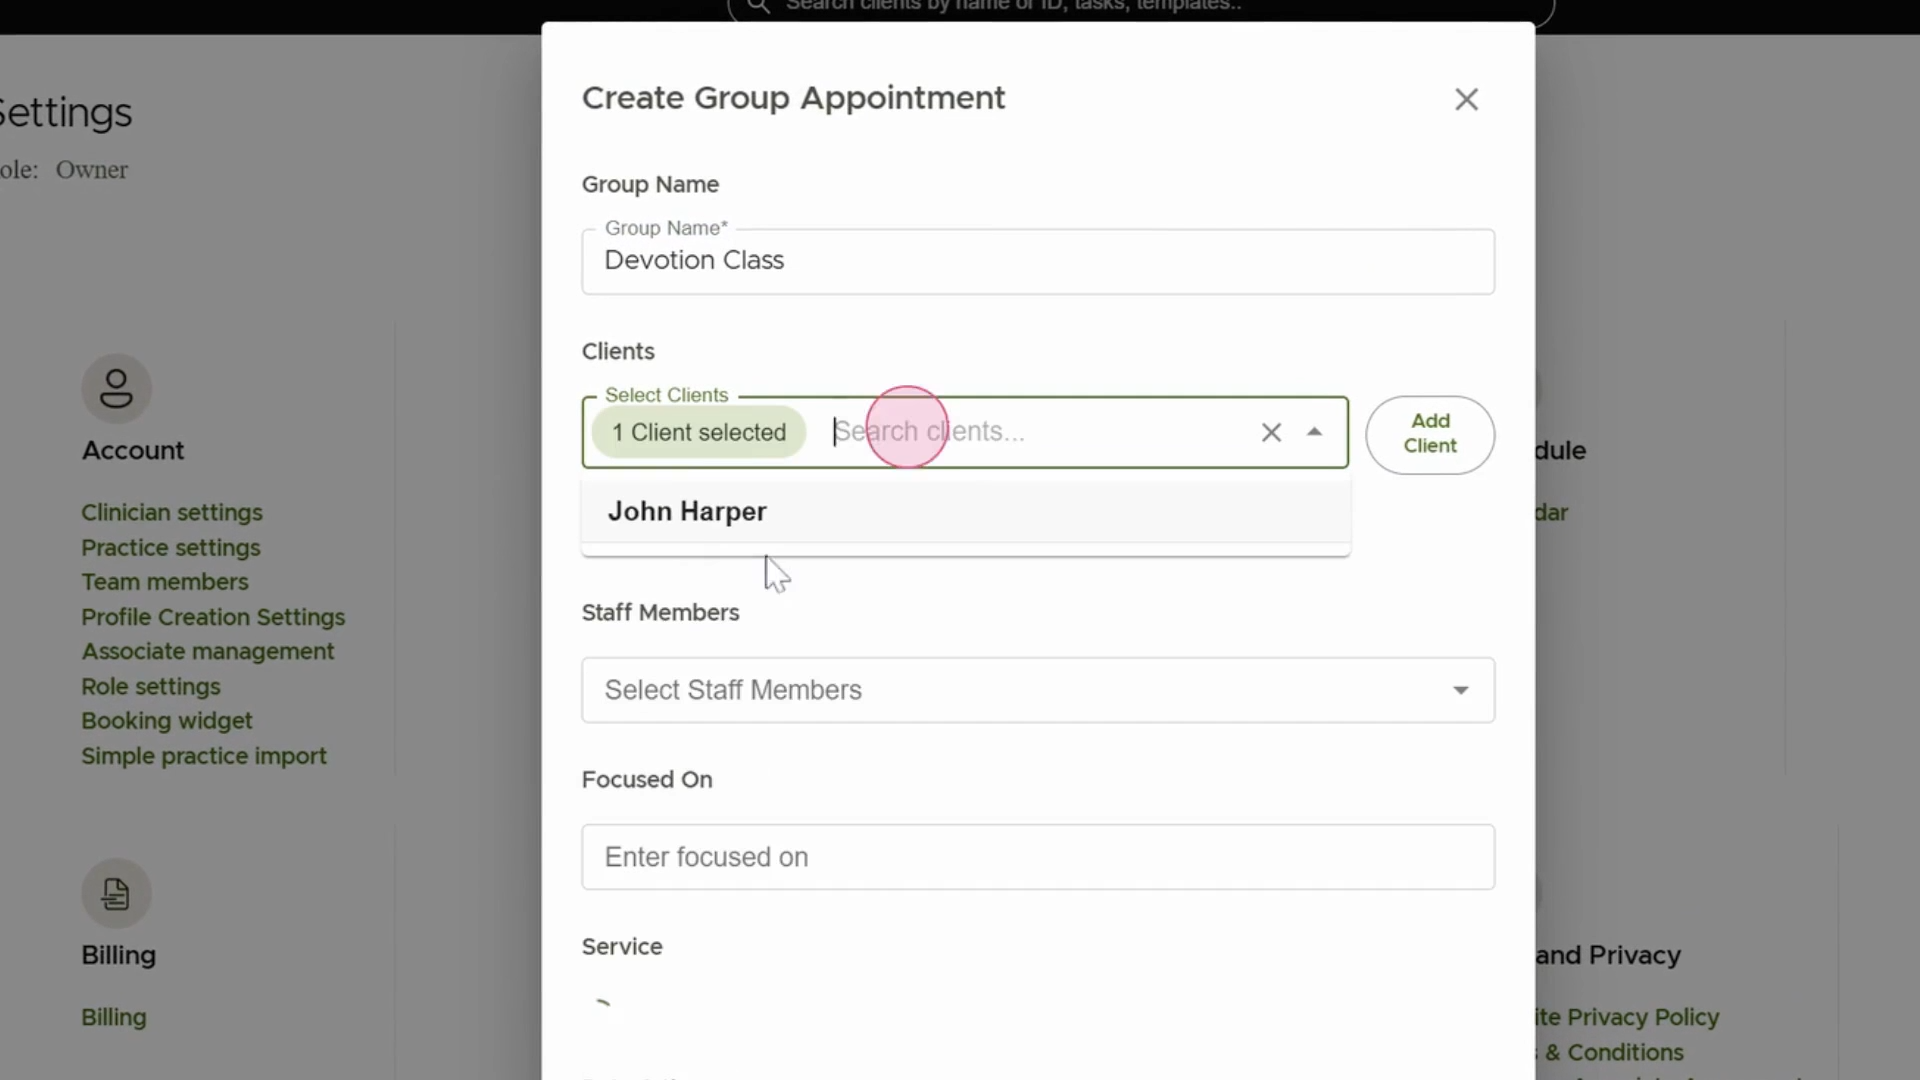
Add staff members to the appointment. The first staff selected becomes the primary clinician. Optionally assign a secondary clinician if needed. For example, if this group session is focused on a specific theme (like praying), specify that in the appointment details.

When finished, click to create the appointment.
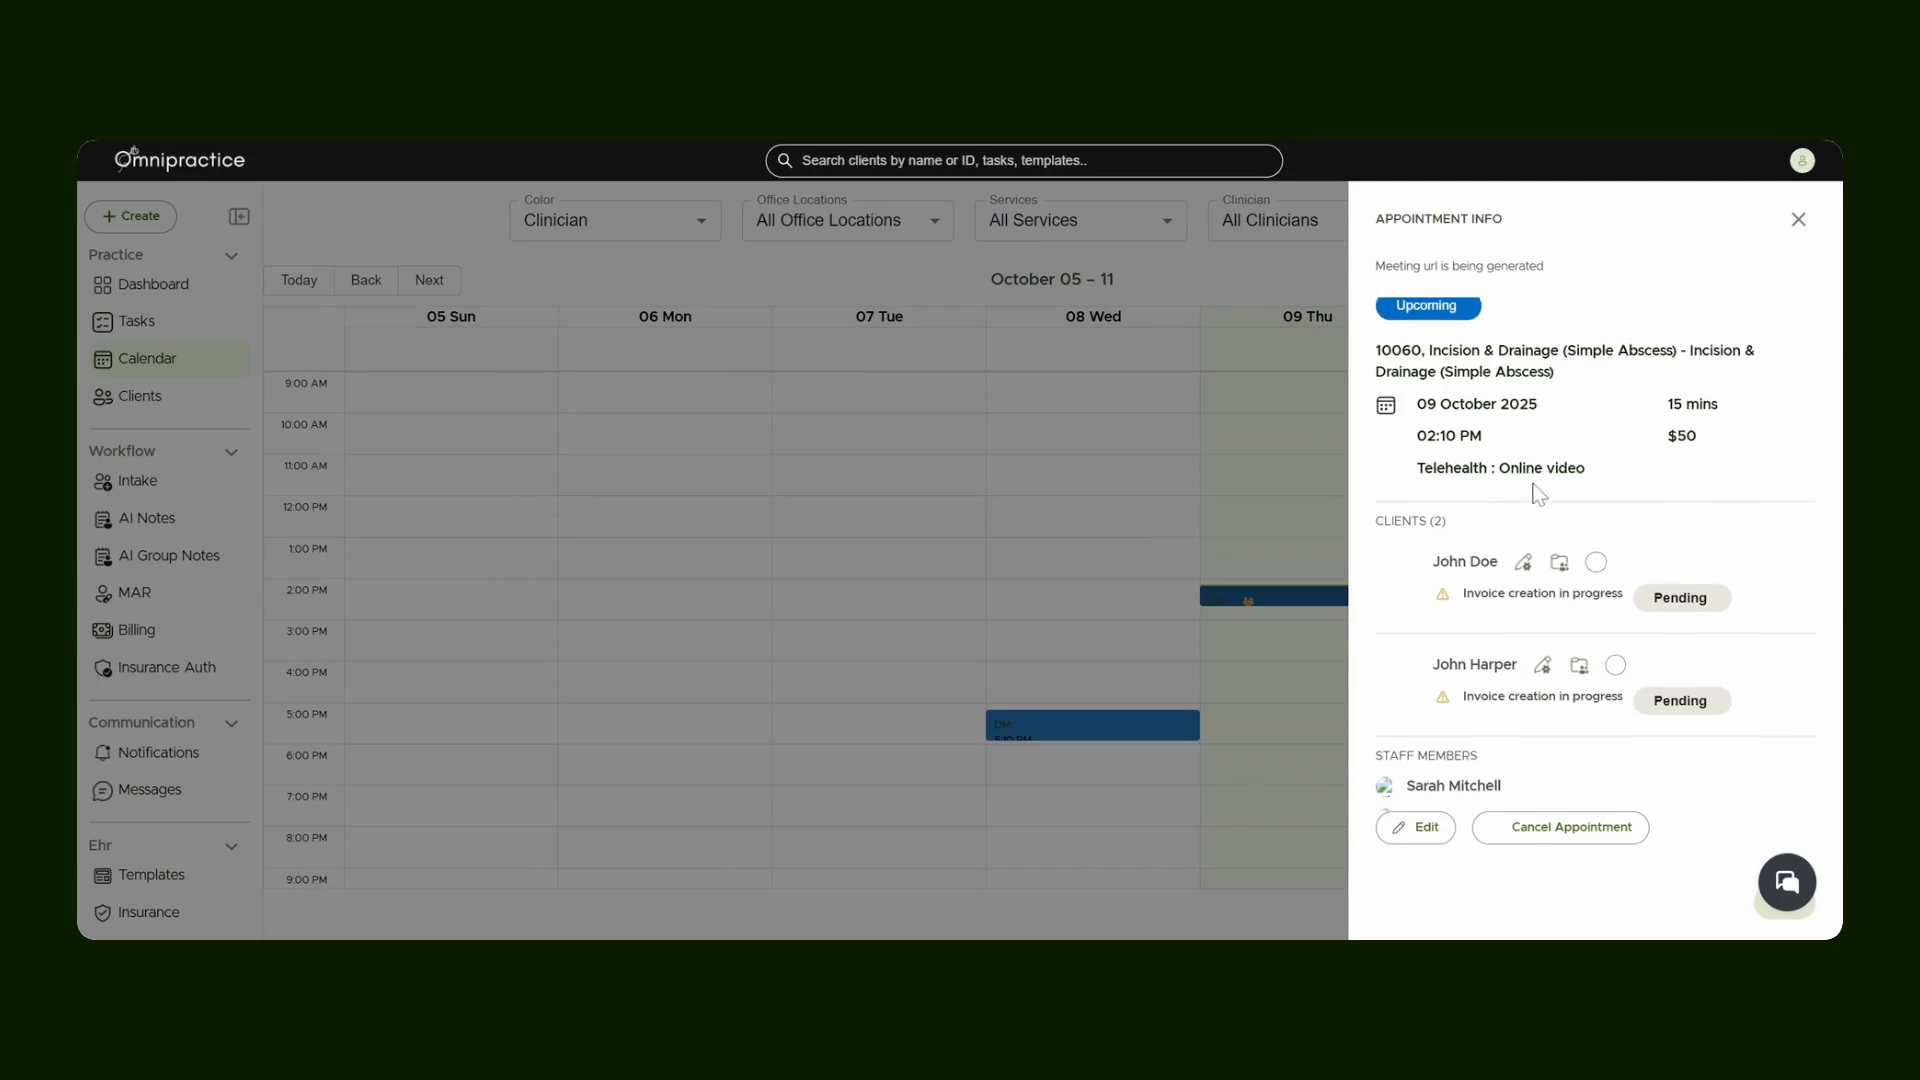
Step 3: View Appointment and Details
The appointment shows up on your calendar for easy management. Click the appointment to view its full details.
Step 4: Access the AI Group Notes Tab
Navigate to the dedicated tab for managing and generating notes. Open the AI Group Notes tab. You'll see your scheduled group appointment listed there. After the appointment is done and the session is recorded, access the session transcript from this view.
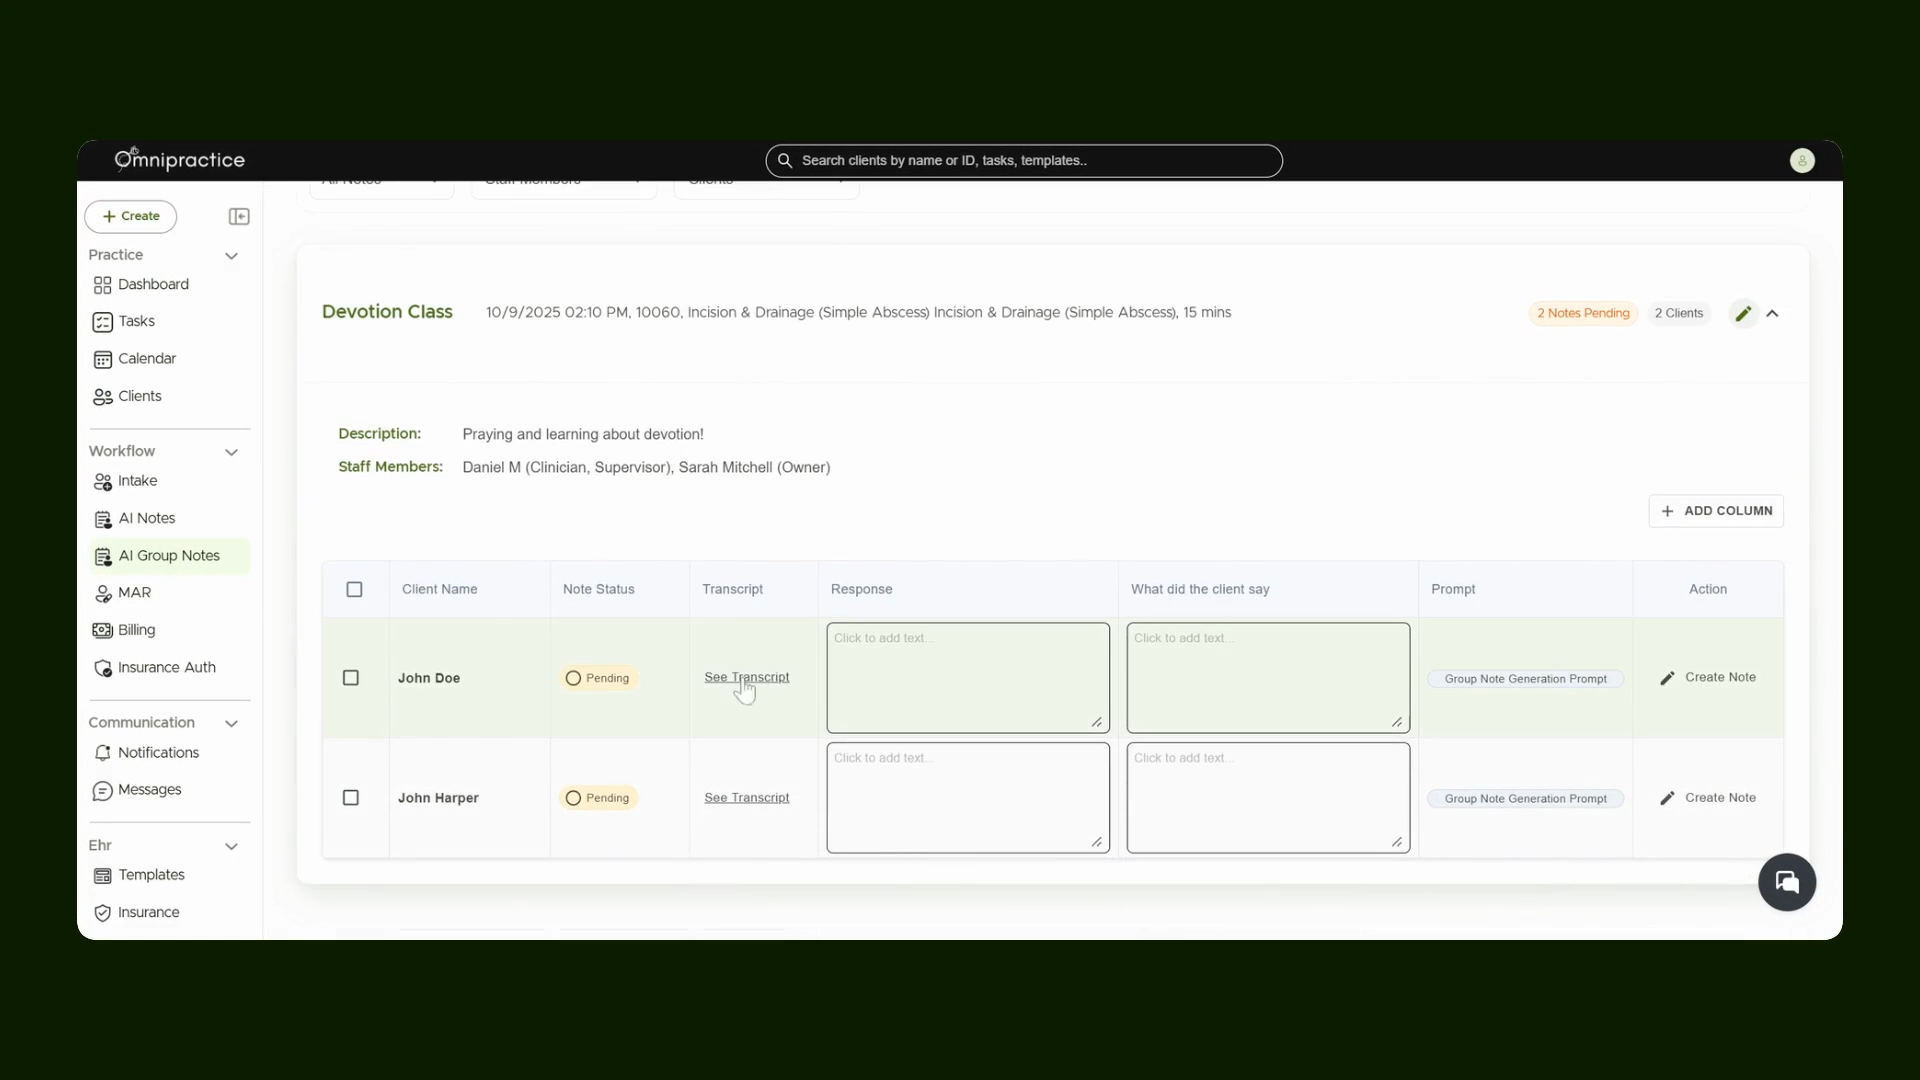
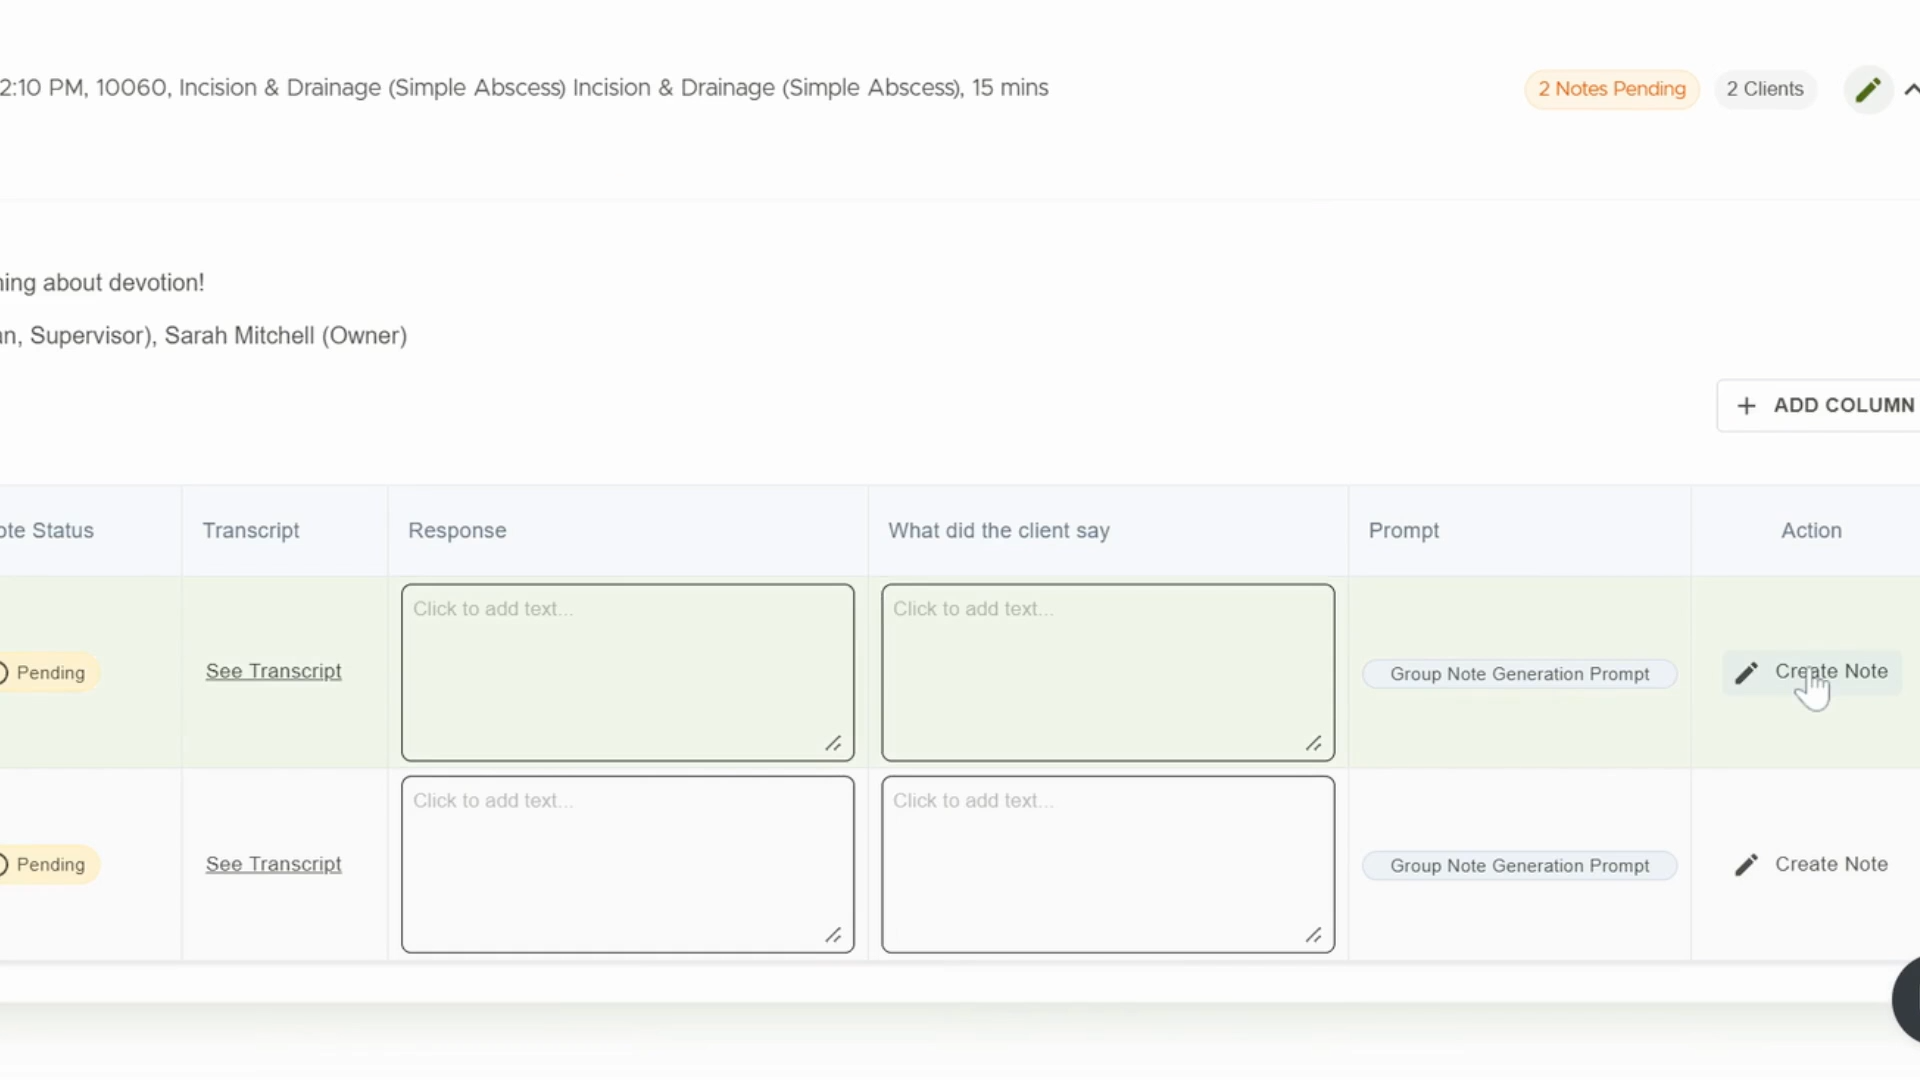
Step 5: Complete Group Note Details
Fill in or confirm necessary columns using the available session transcript. Enter responses under the Response column and log what the client said in the "What did client say" column. Confirm which prompt you're using for AI-generated notes. You can update this if needed. Once ready, create the note for each client. Client Create Note, an empty note will be created in a few seconds.
Step 6: Generate and Save AI Notes
Finish by creating and saving individual notes for each client based on the group session transcript.

Use the Generate with AI button to automatically draft notes from the transcript. If you’d like, select Run Workflow for All Clients to generate notes for the entire group. After reviewing, save each note to the corresponding client chart.
You’ve now completed the AI Group Notes workflow! These steps ensure every group session is accurately and efficiently documented for each client. Thanks for following along!