Medication Management Tutorial - One Time and Scheduled Medications
Managing Medications in Omnipractice
Omnipractice makes it easy to add, administer, and track both one-time and scheduled medications for your clients. This guide will walk you through each process step by step, using existing screenshots as visual aids to help you get comfortable with the medication module.
Adding a One-Time Medication
Use this workflow when a client needs a medication administered just once, such as an as-needed allergy pill or antibiotic injection.
Step 1: Open the Medication tab in the client’s file.
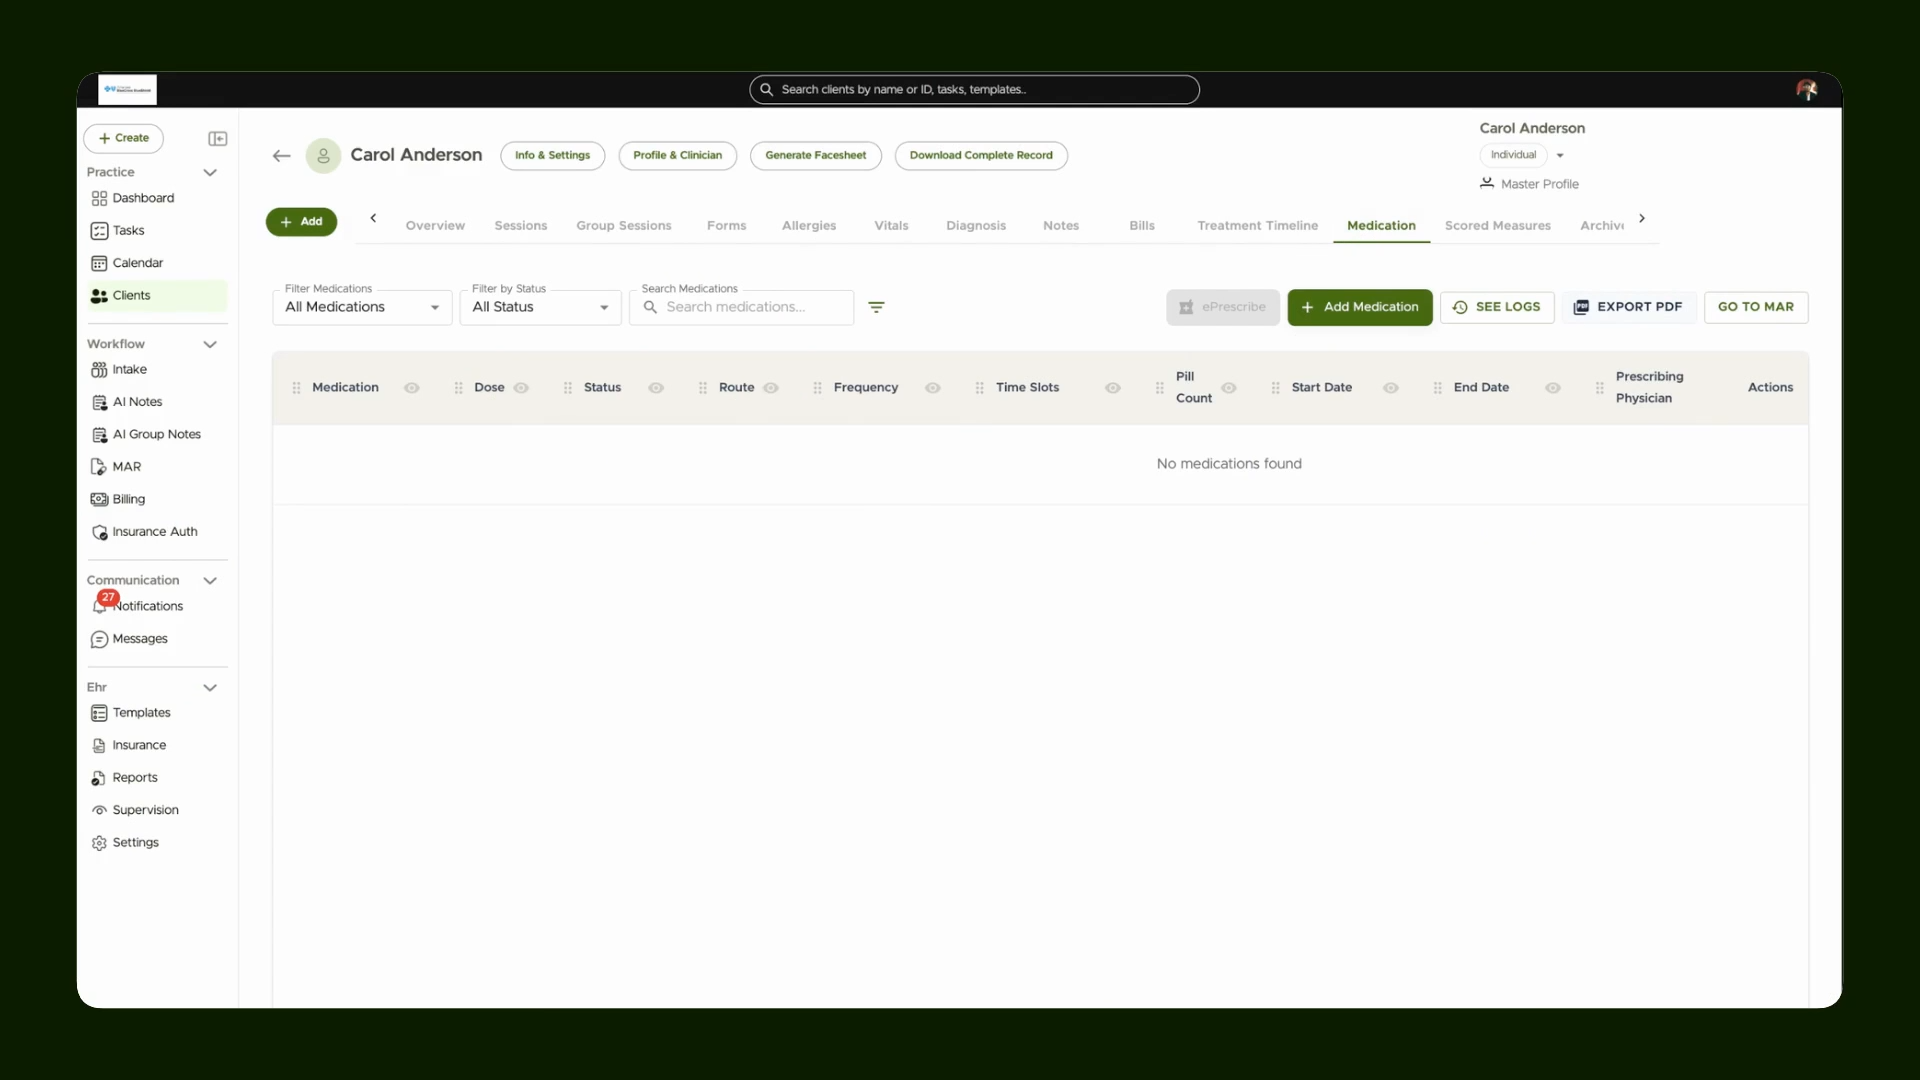
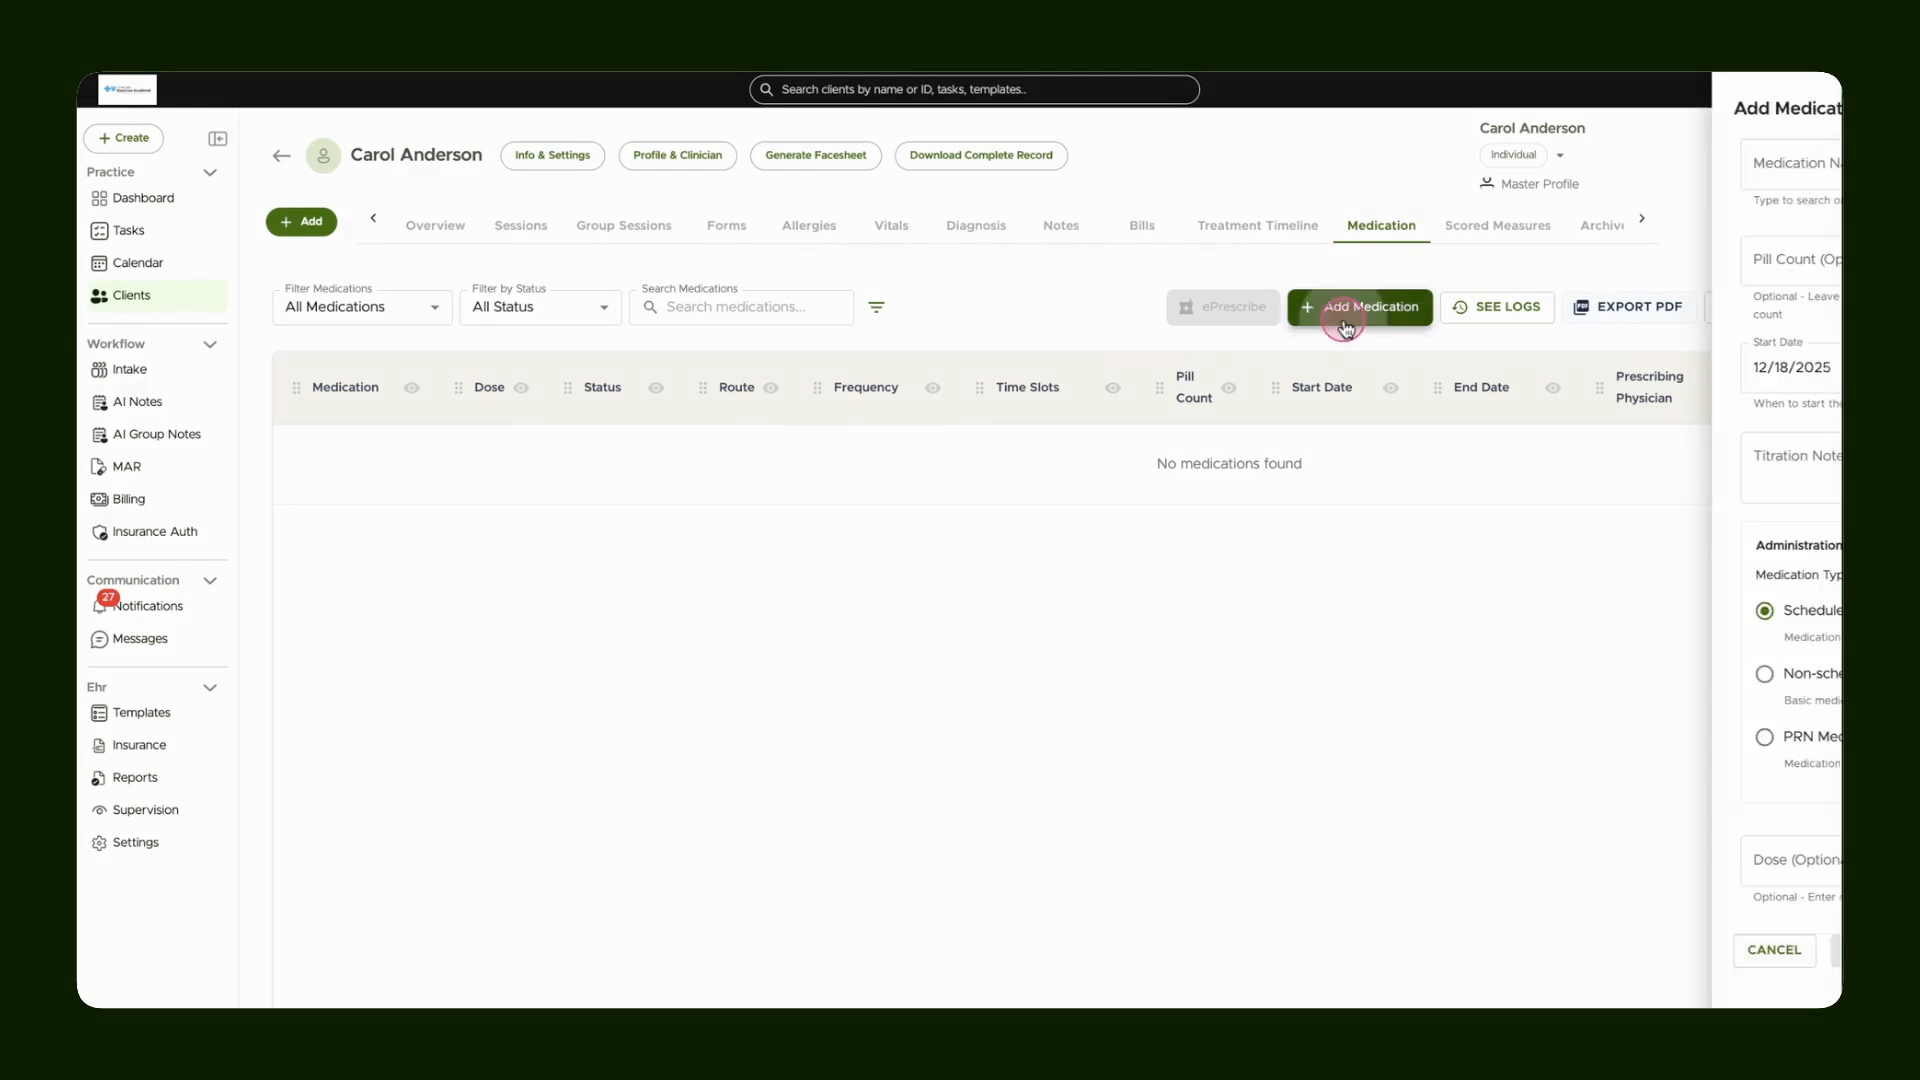
Step 2: Click Add Medication to begin entering a new medication.
Step 3: In the search field, start typing the medication’s name and select it from the results or type manually.
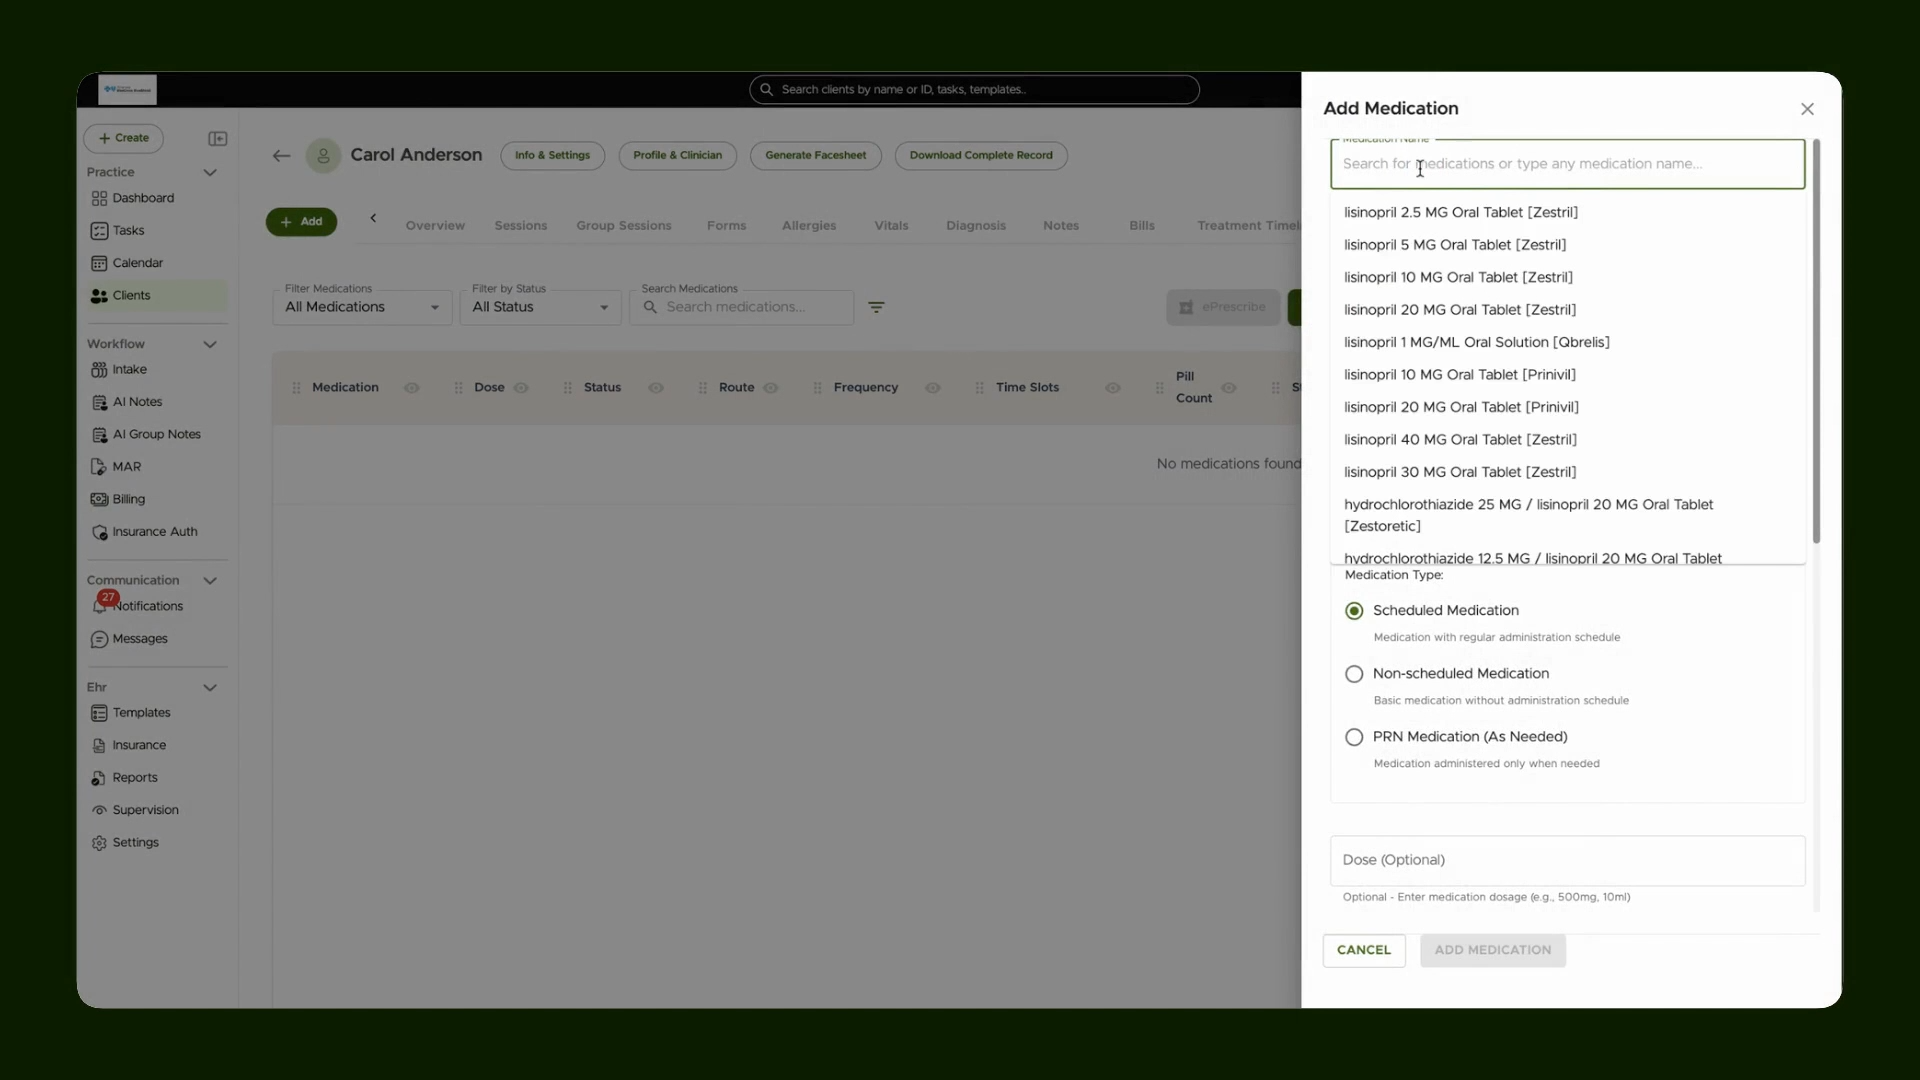
Step 4: Choose Administer Once to set this as a one-time dose.
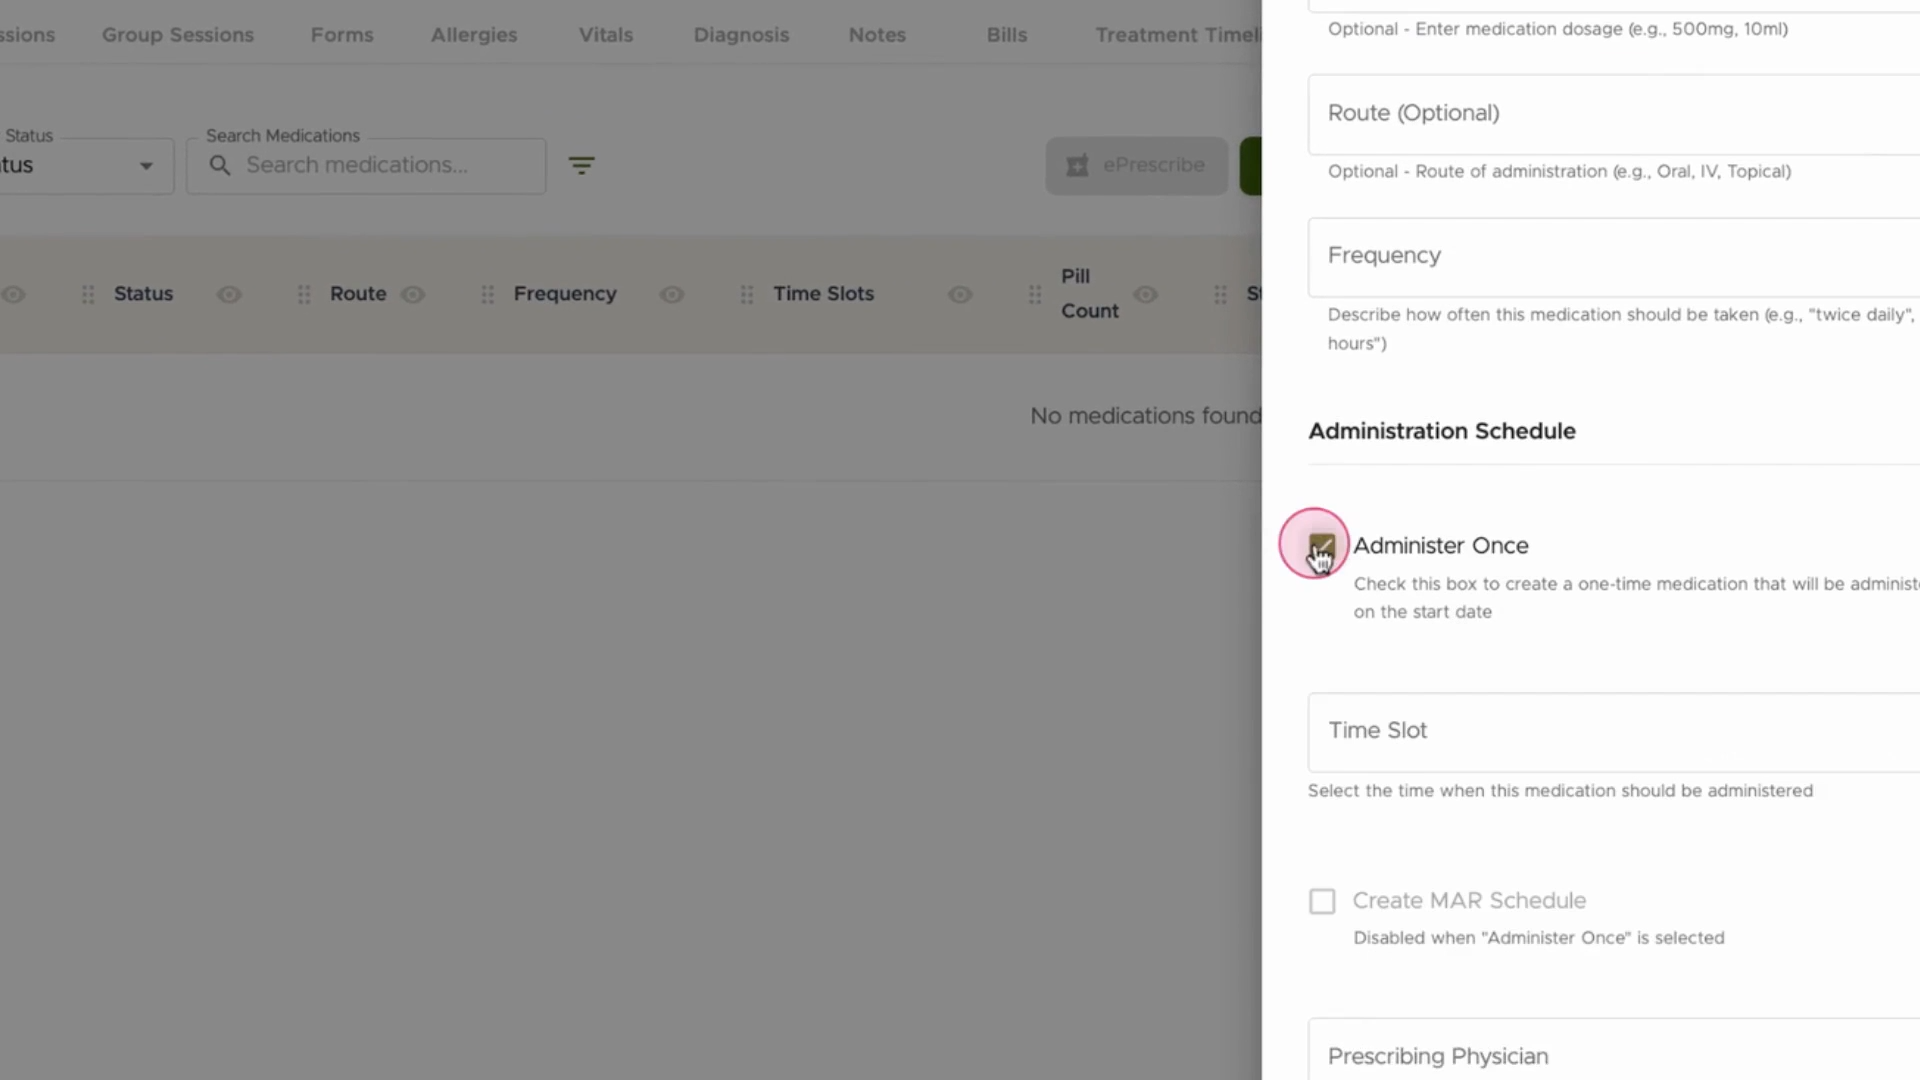
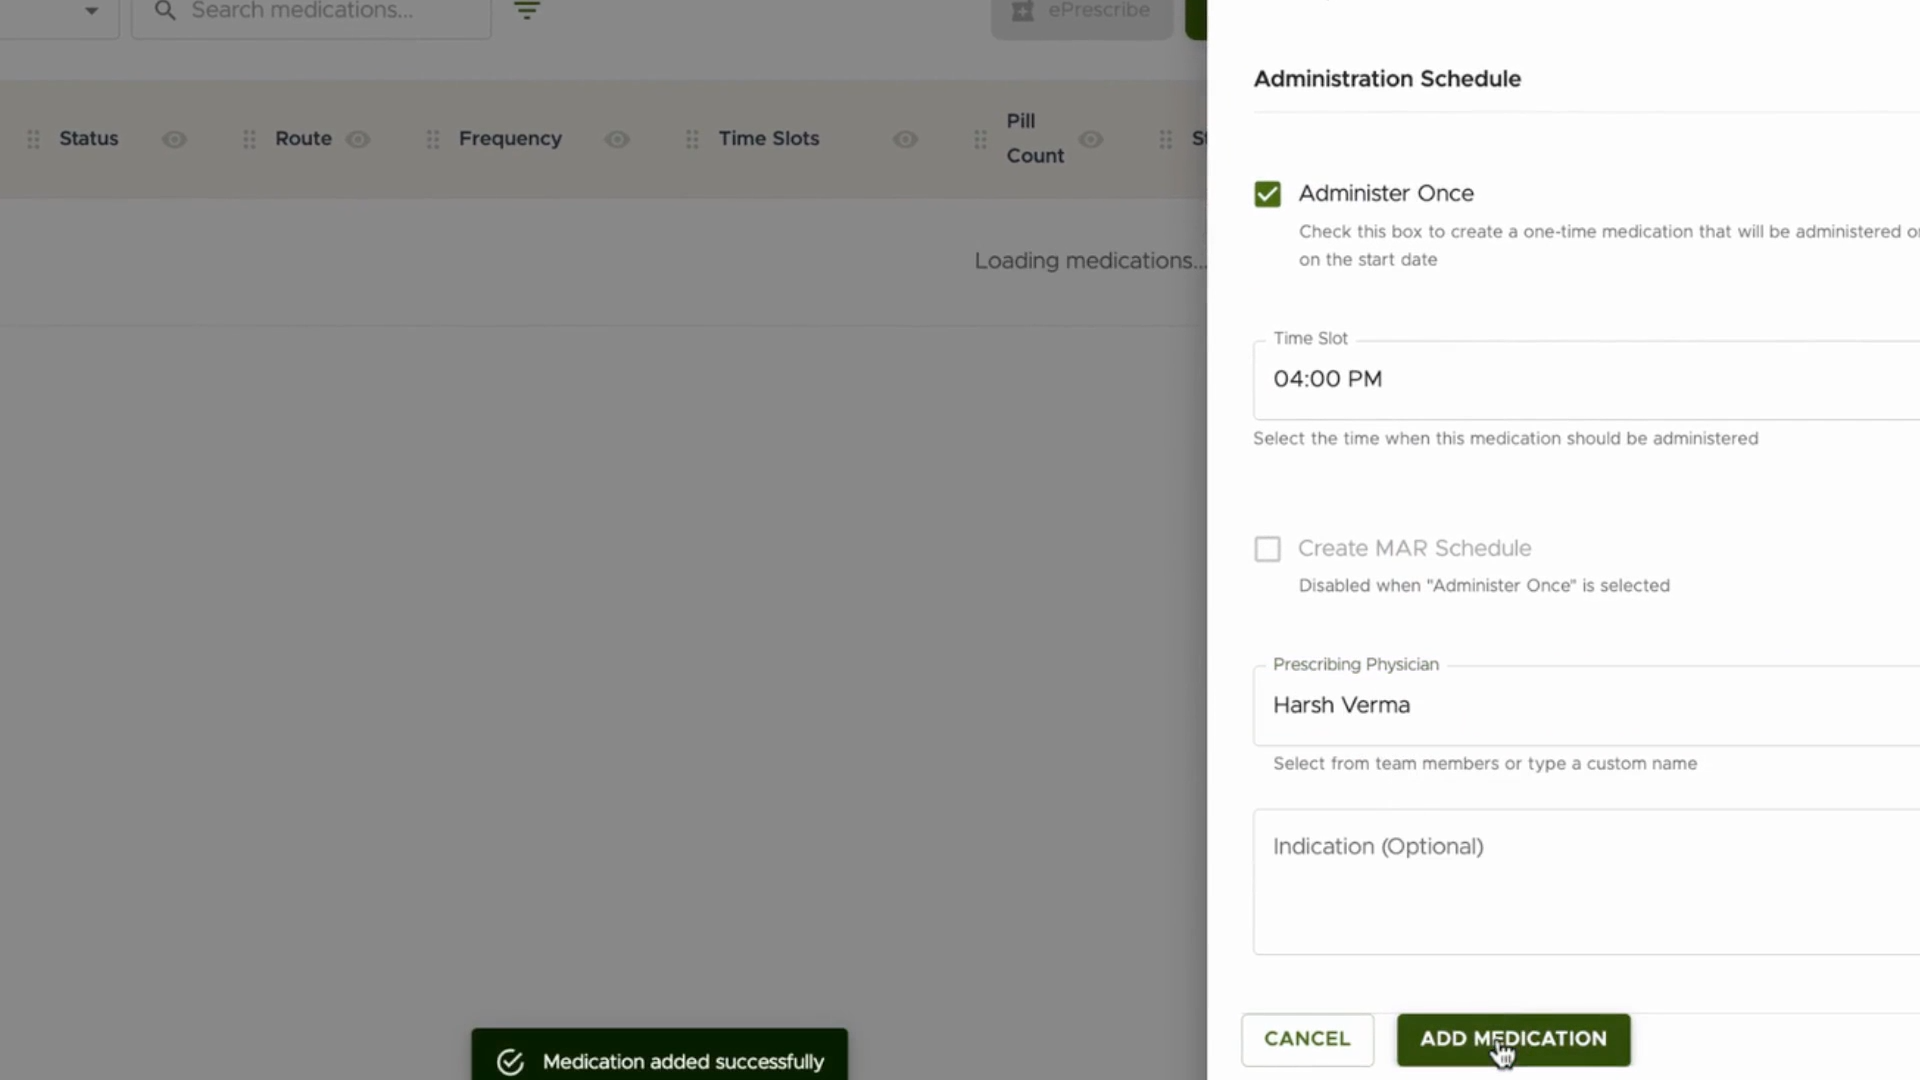
Step 5: Select the intended Time Slot for giving the medication.
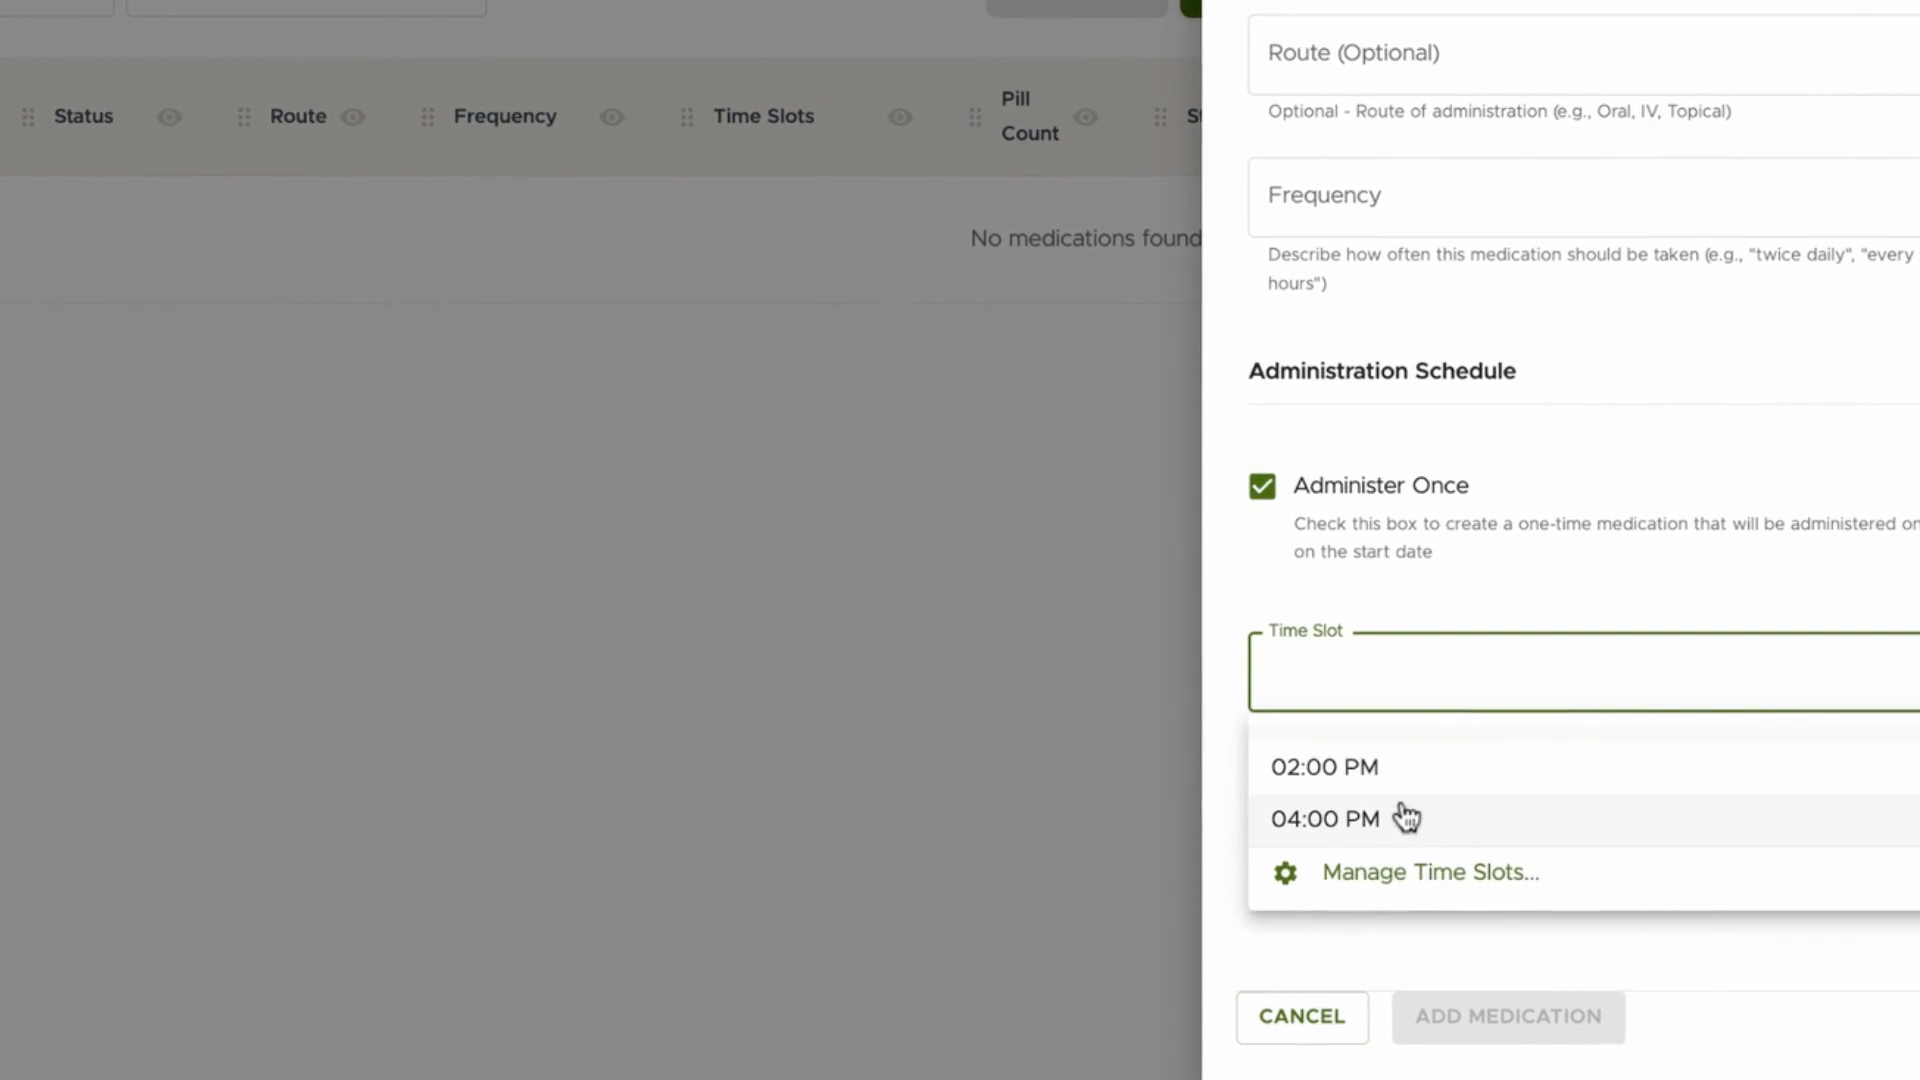
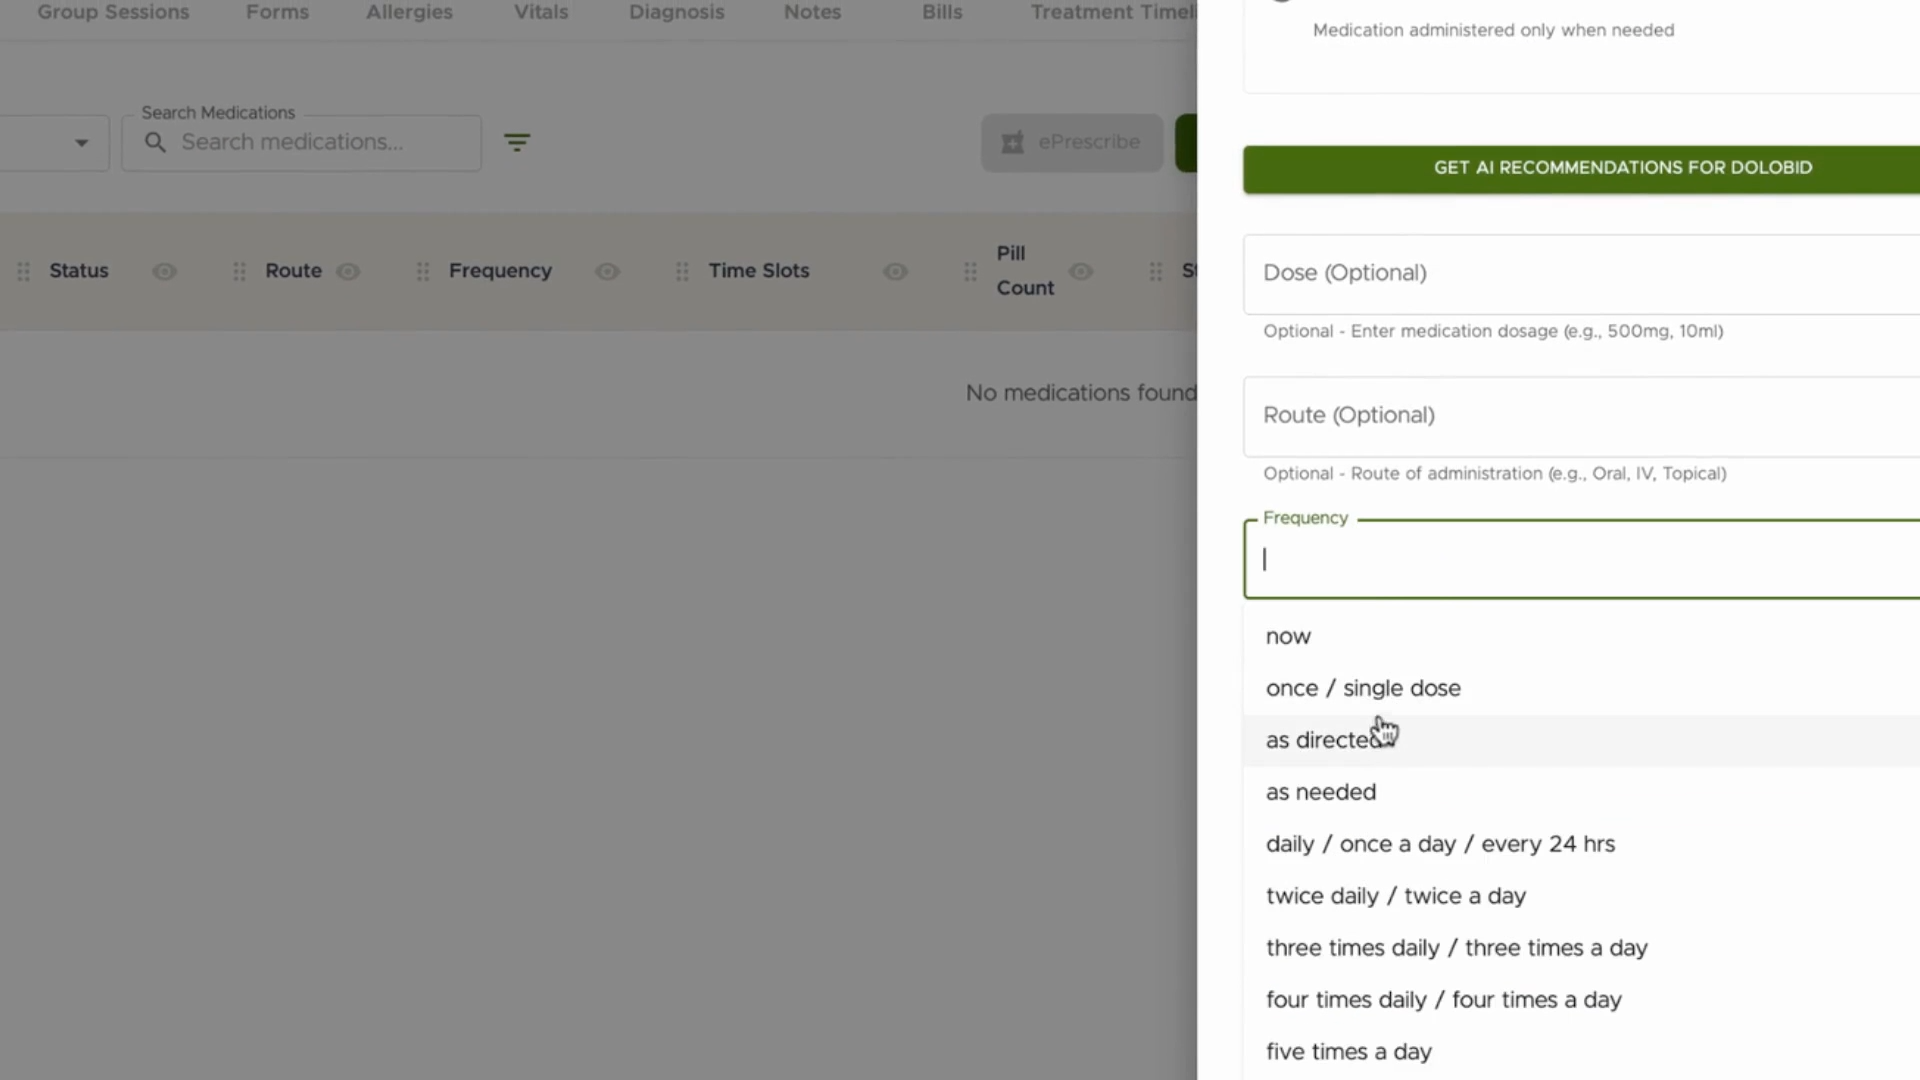
Step 6: Set the Frequency to Once/Single Dose to ensure it’s not part of a schedule.
Step 7: Pick the Prescribing Physician and click Add to save your entry.
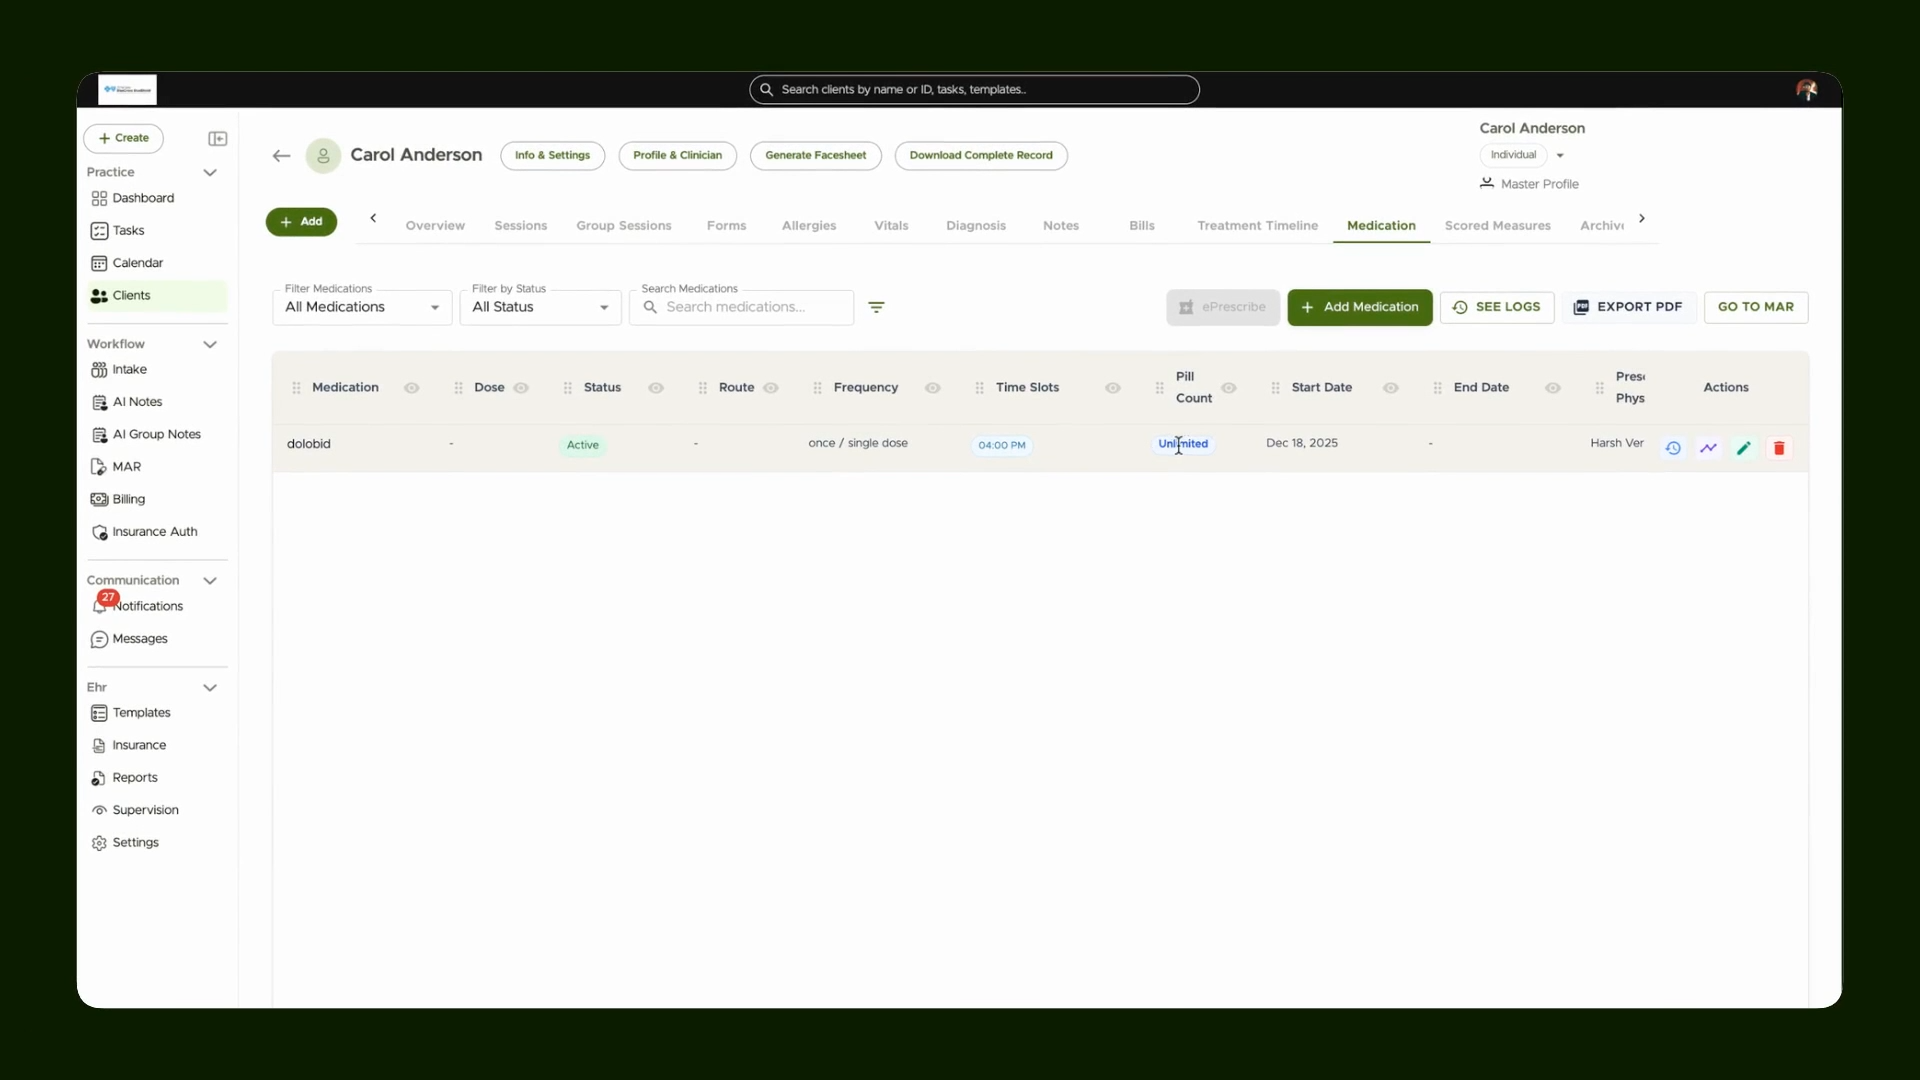
Step 8: Review the new entry in your medication list. Omnipractice will default the pill count to zero, which is considered unlimited for one-time medications.
Step 9: Head to the MAR (Medication Administration Record) to see the medication pending for administration.
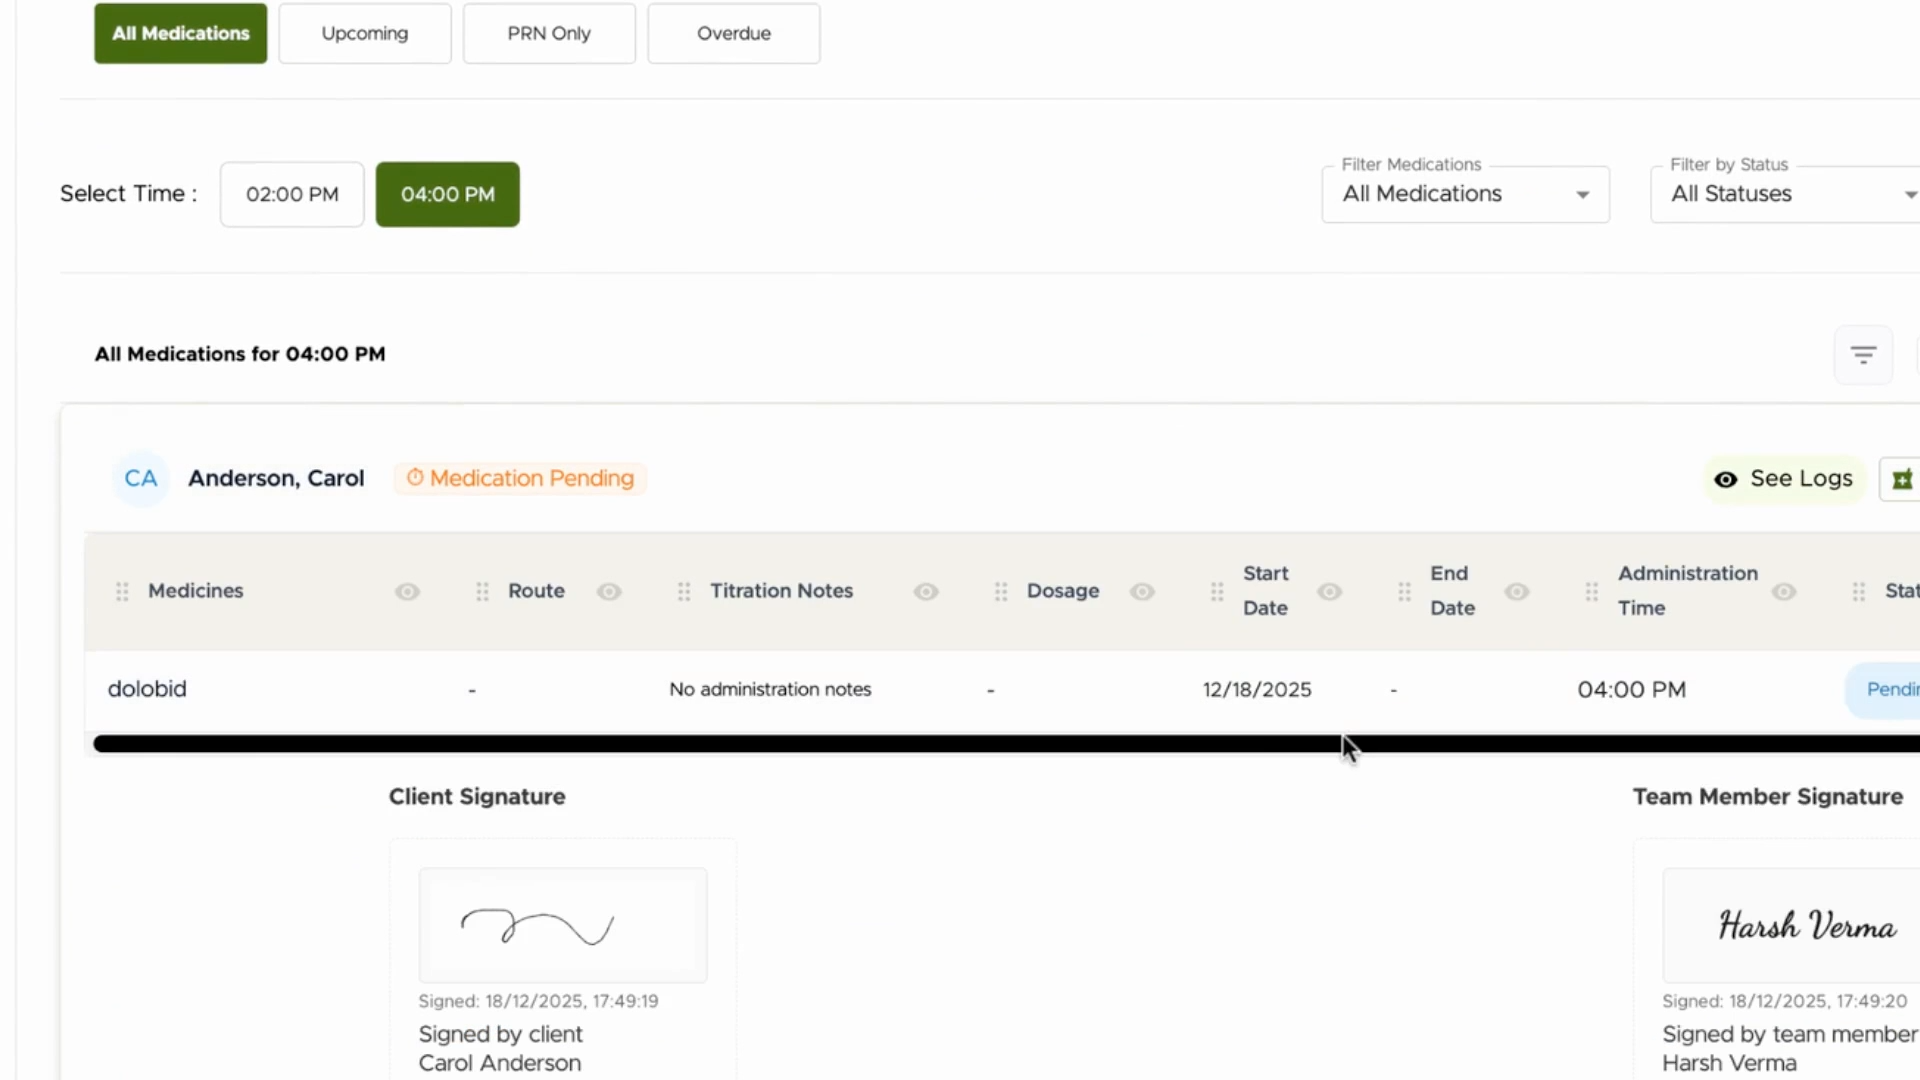
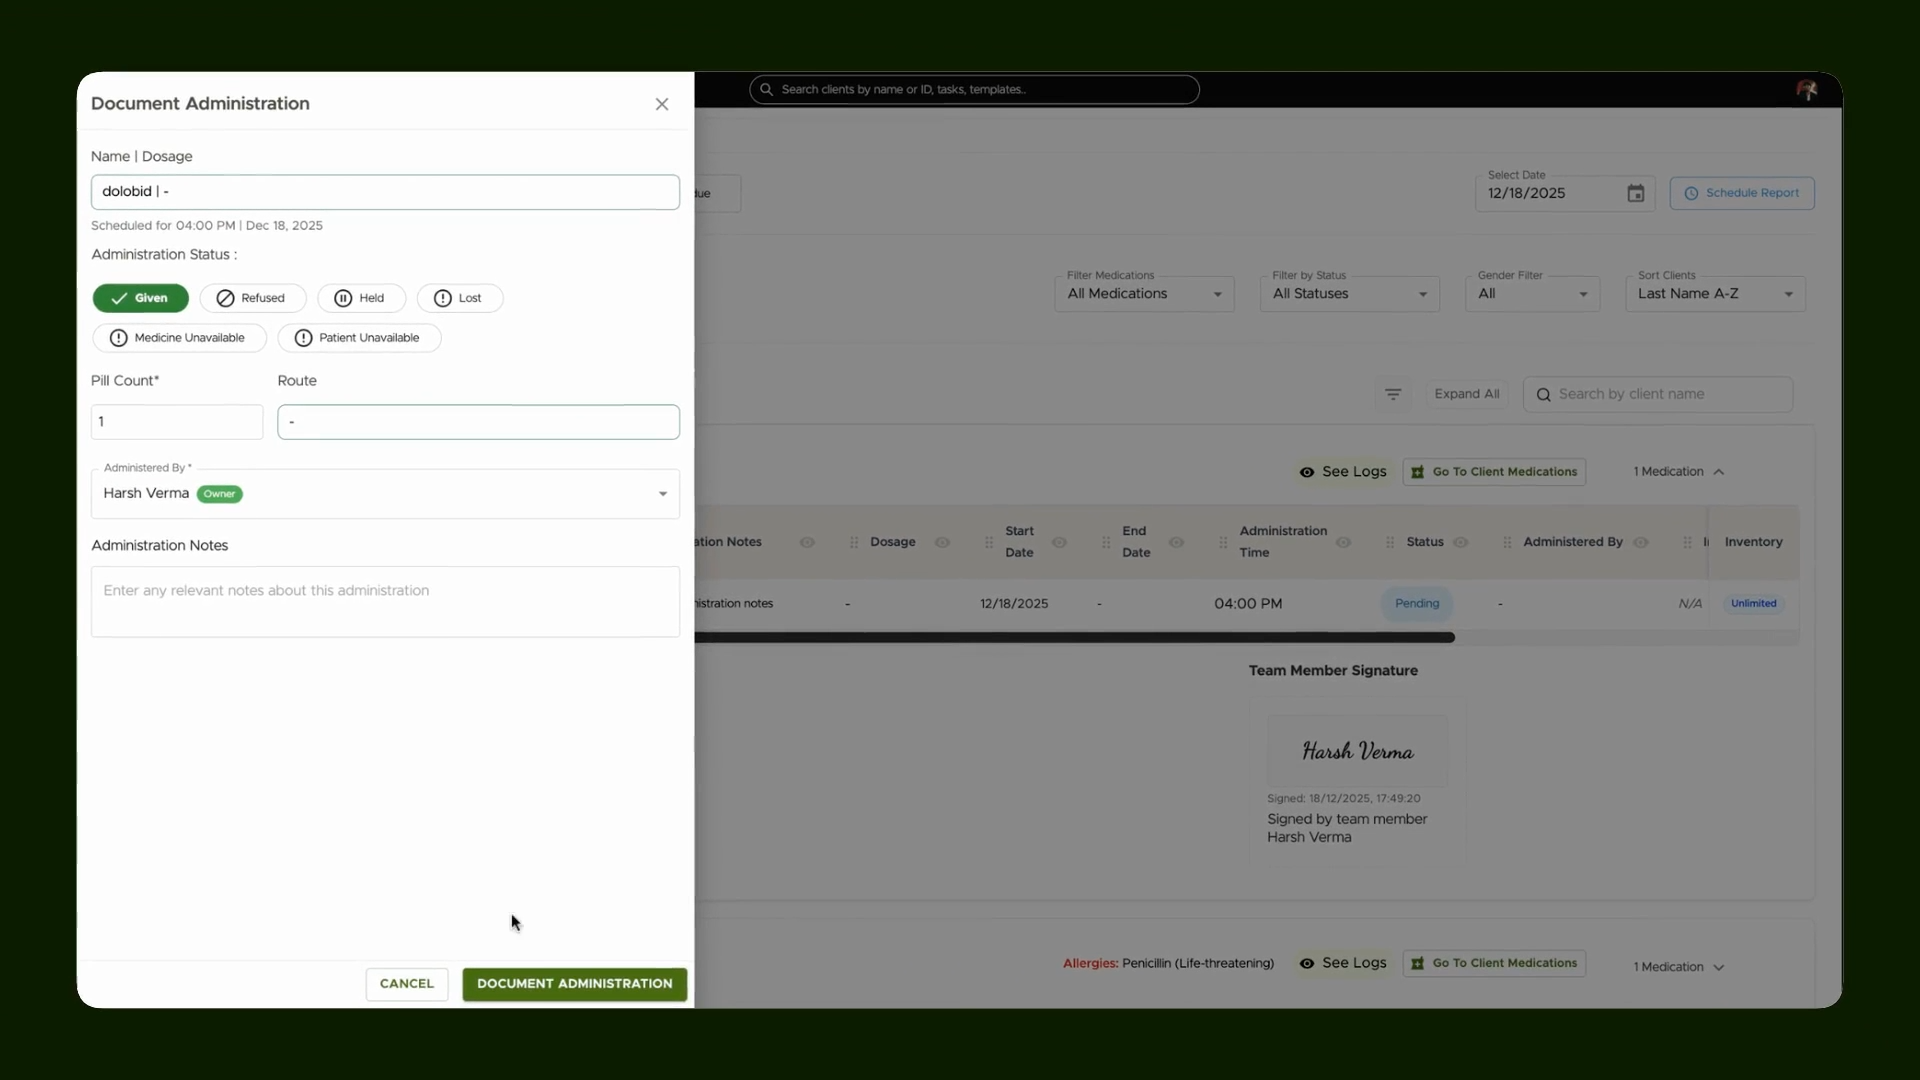
Step 10: Administer the dose directly from the MAR to complete the process.
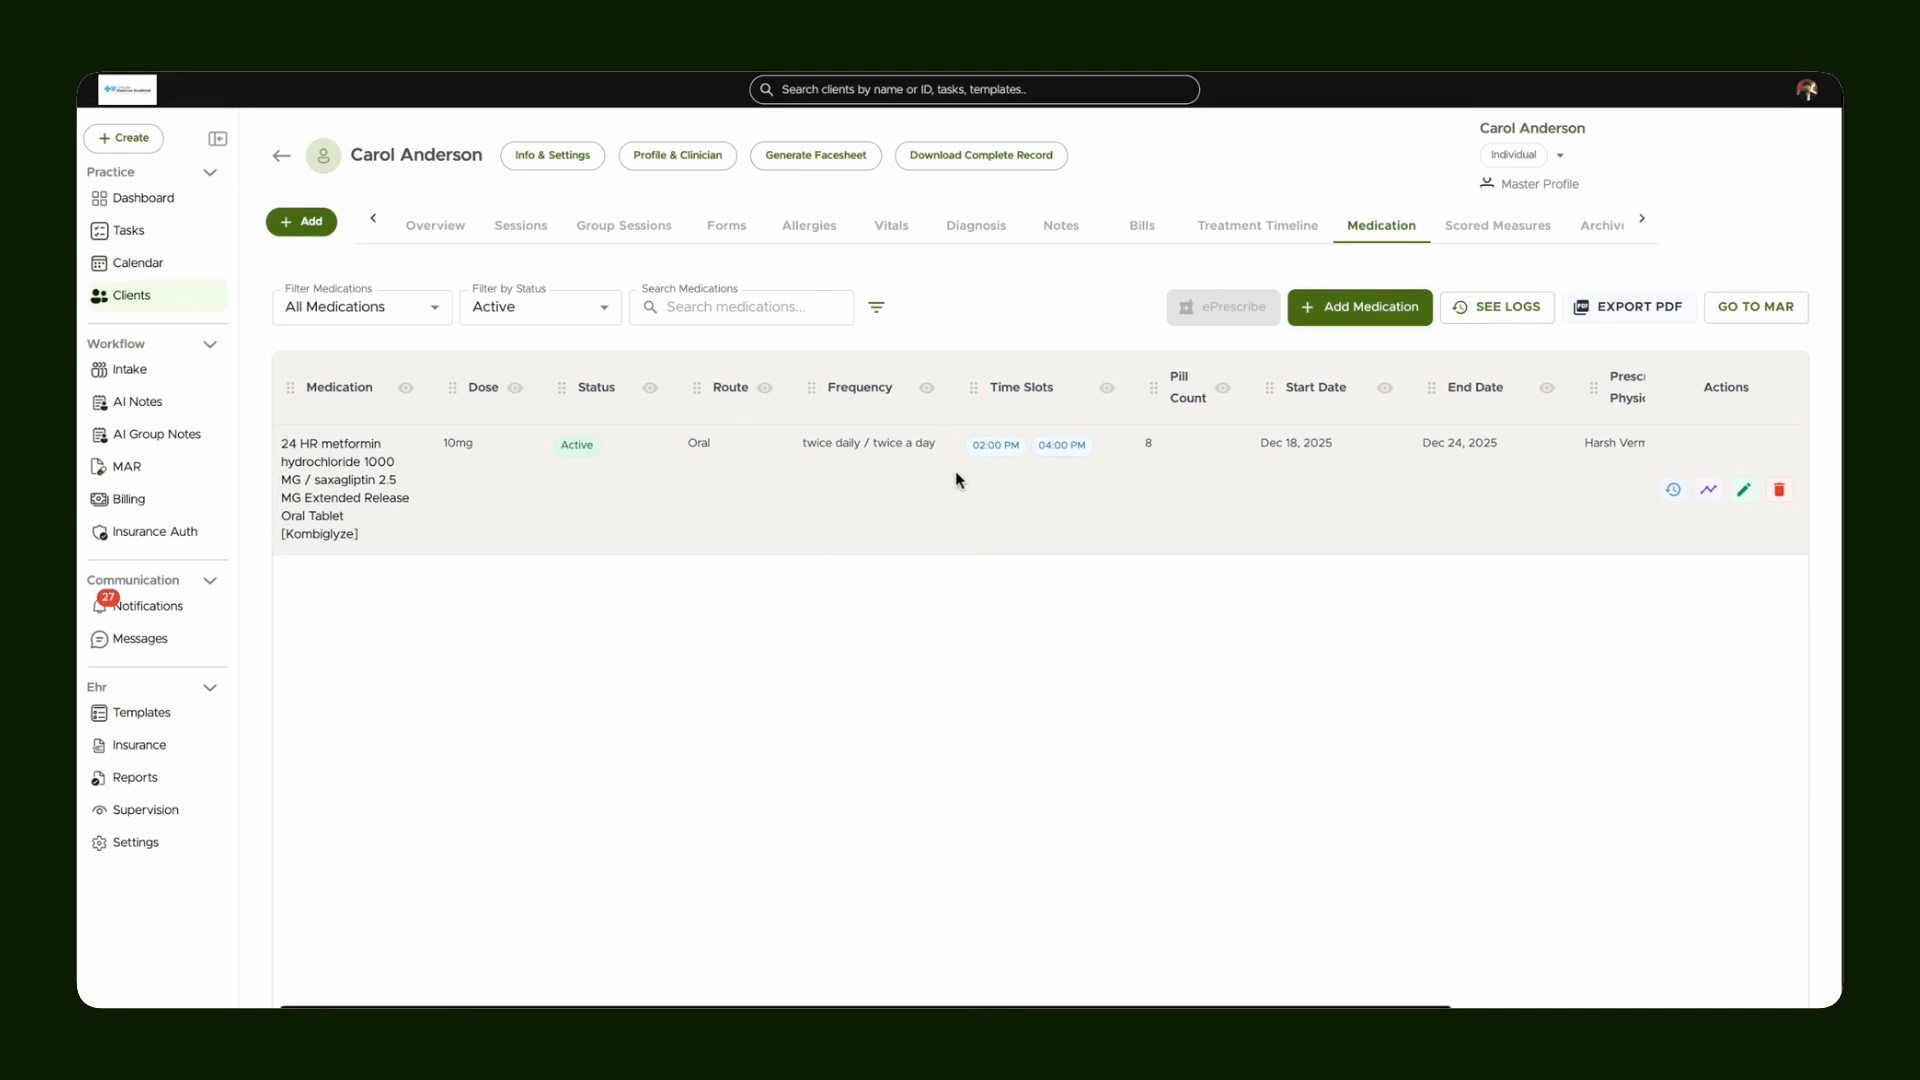
Step 11: Return to the client chart and change the Status from Active to All to see both completed and pending medications.

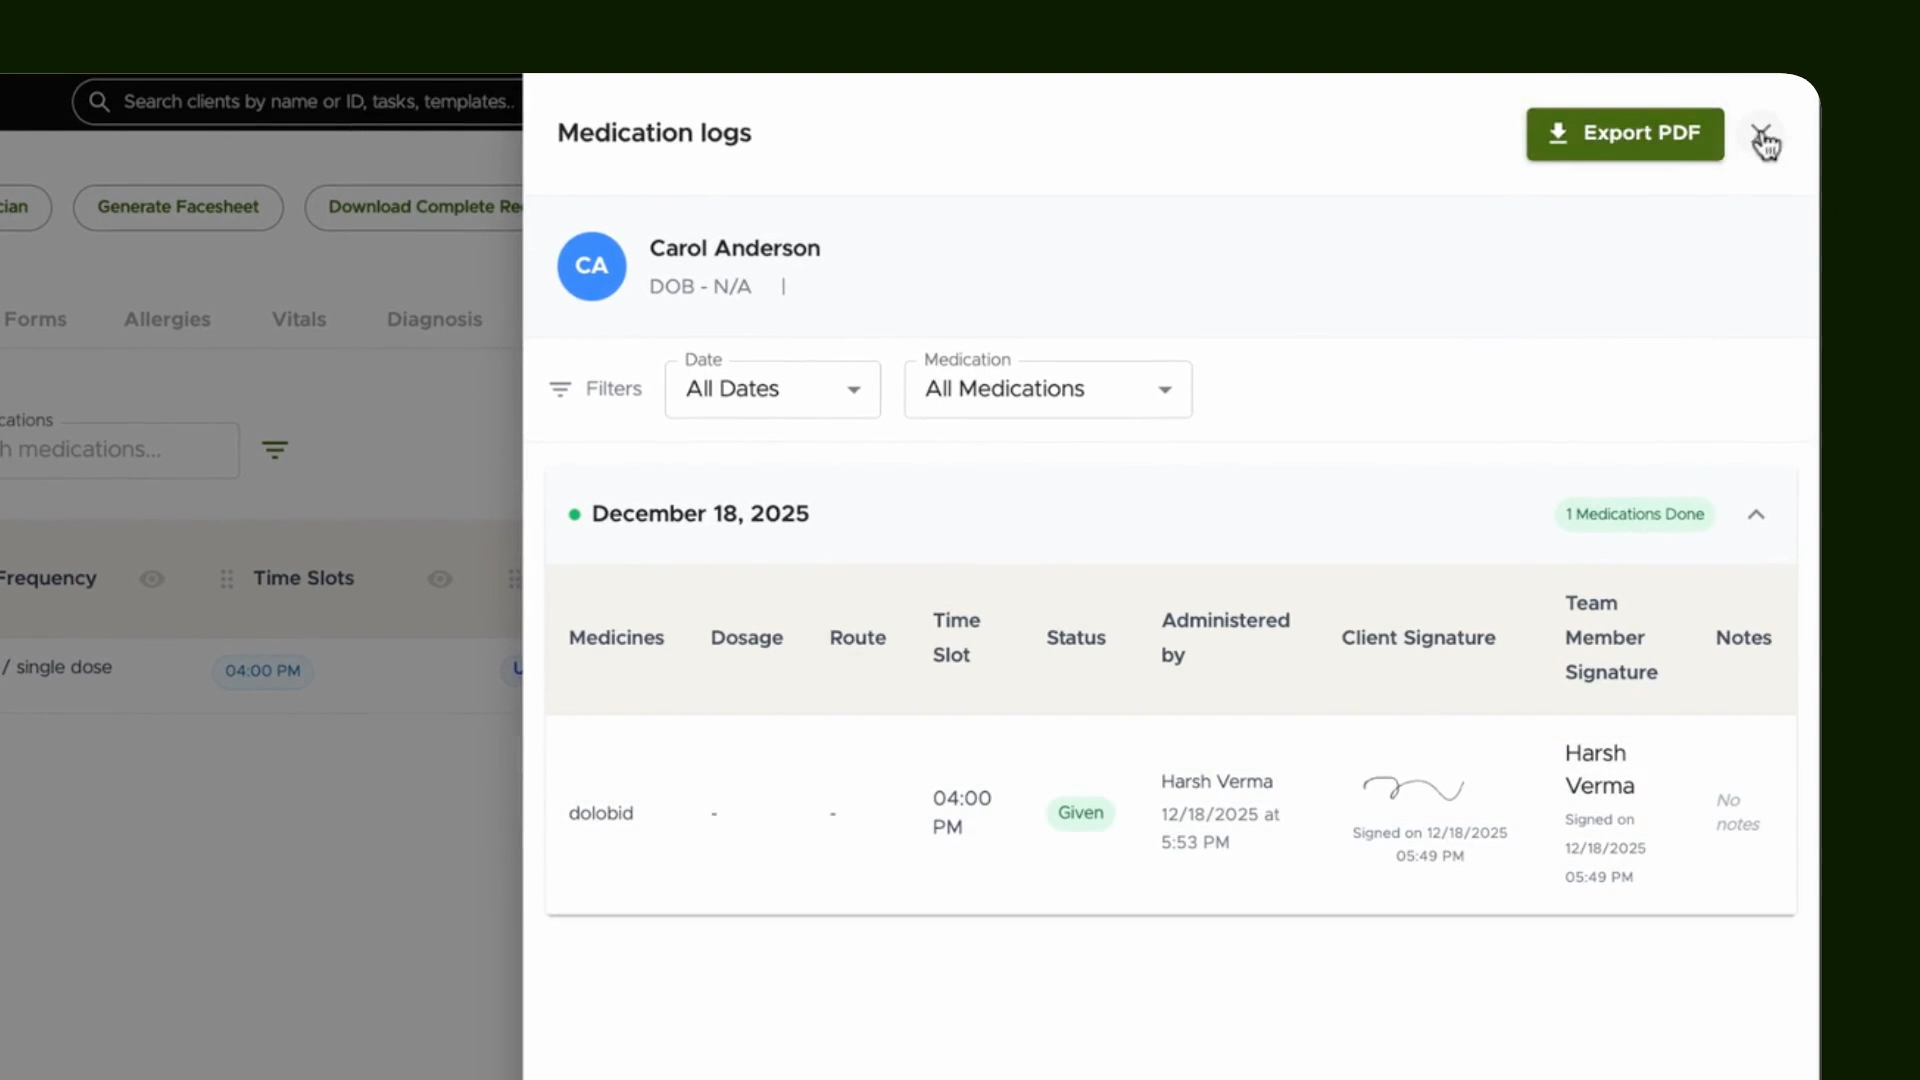
Step 12: Access Medication History for a full record of medications administered. You can also export these records as needed.
Adding a Scheduled Medication
Follow these steps when managing medications that must be administered regularly, such as daily prescriptions or ongoing treatments.
Step 1: While in the Medication tab, click Add Medication.
Step 2: Enter a Pill Count (such as 10) to keep inventory of the medication.
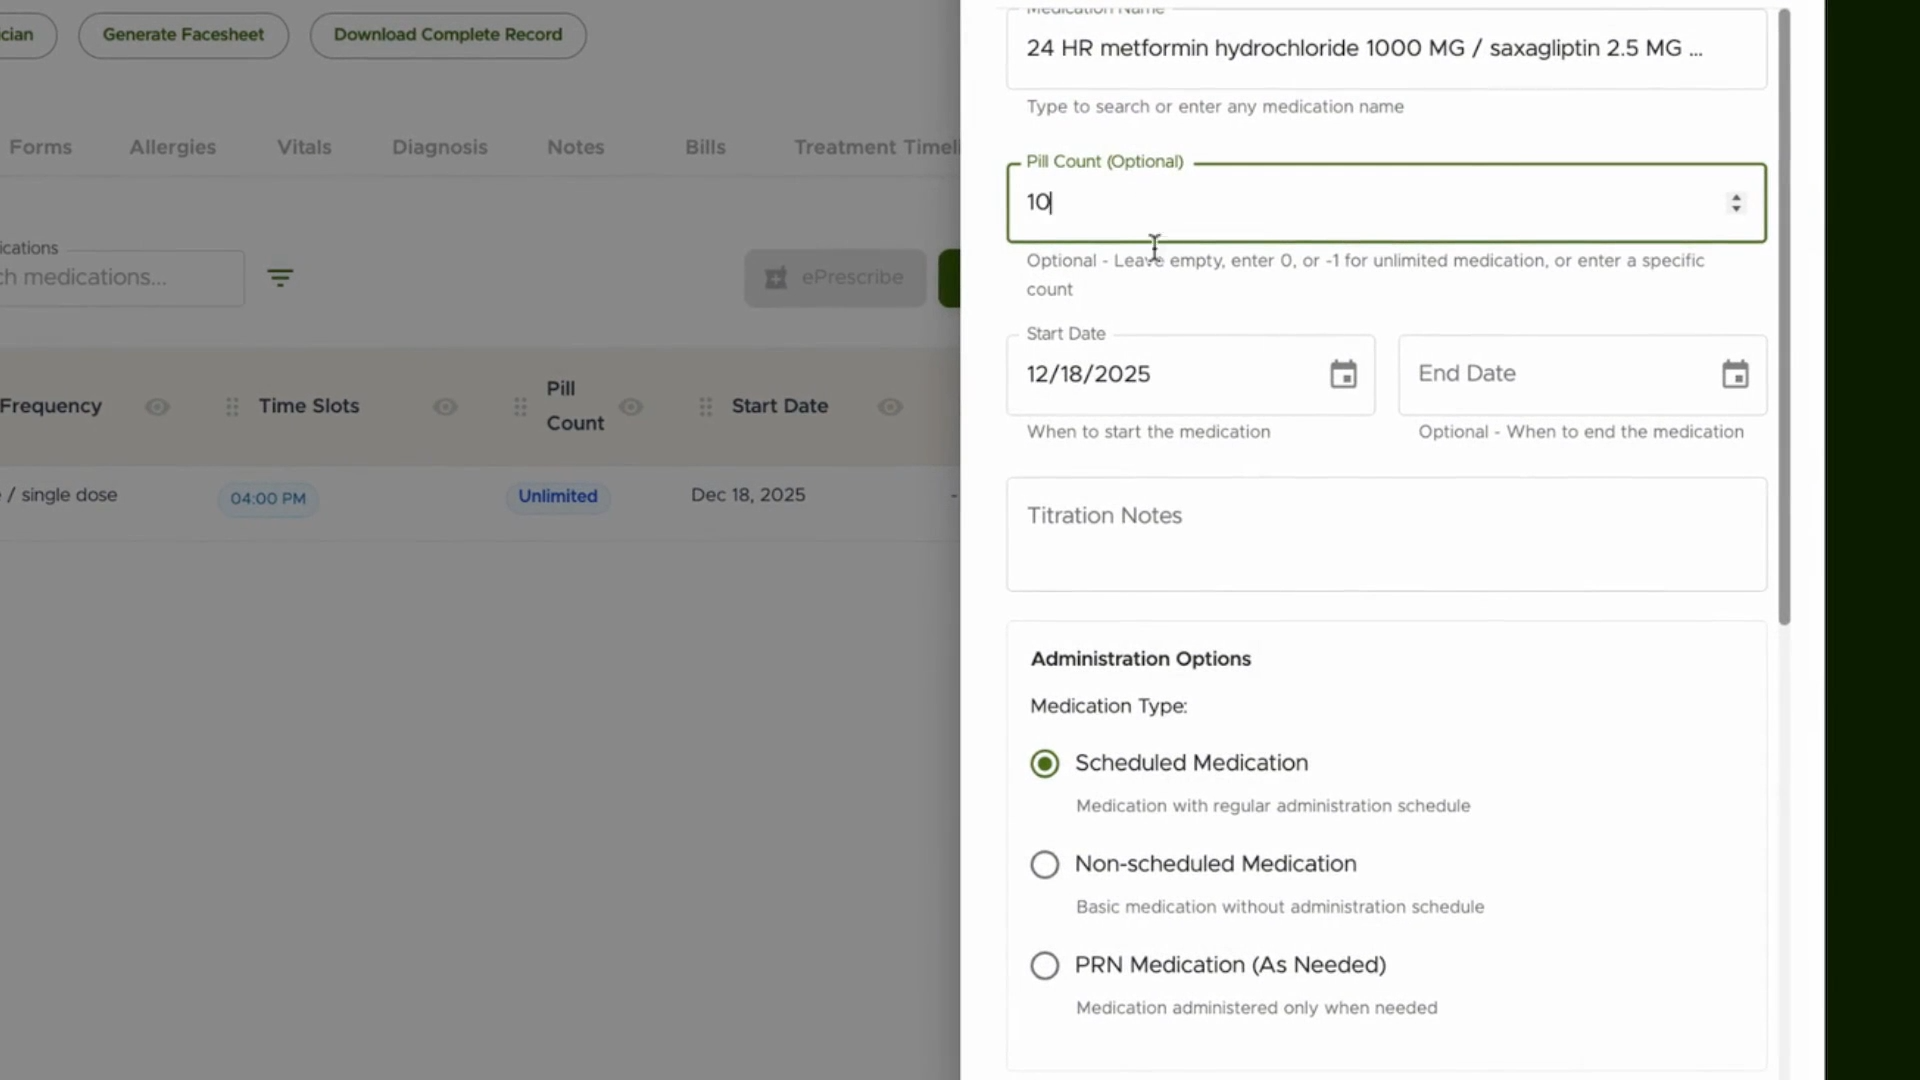
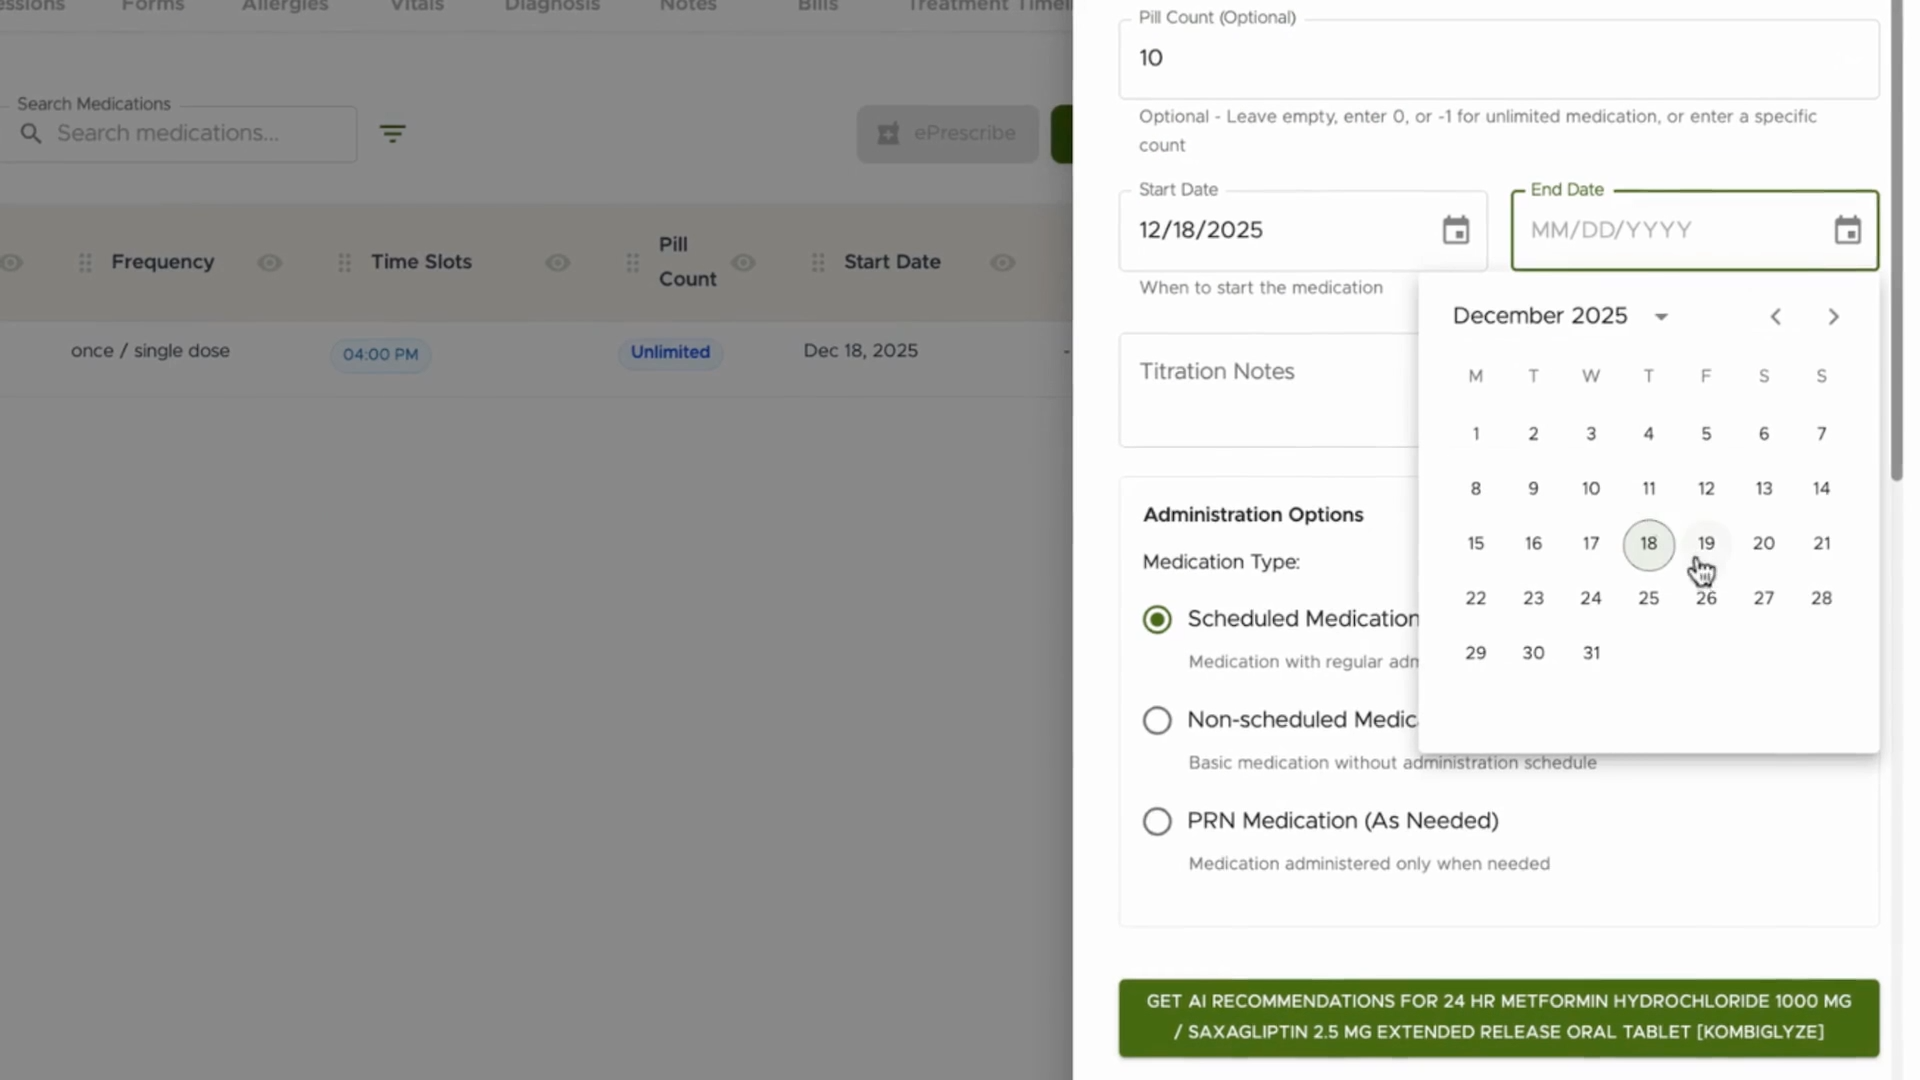
Step 3: Add an End Date to indicate when the course of medication ends.
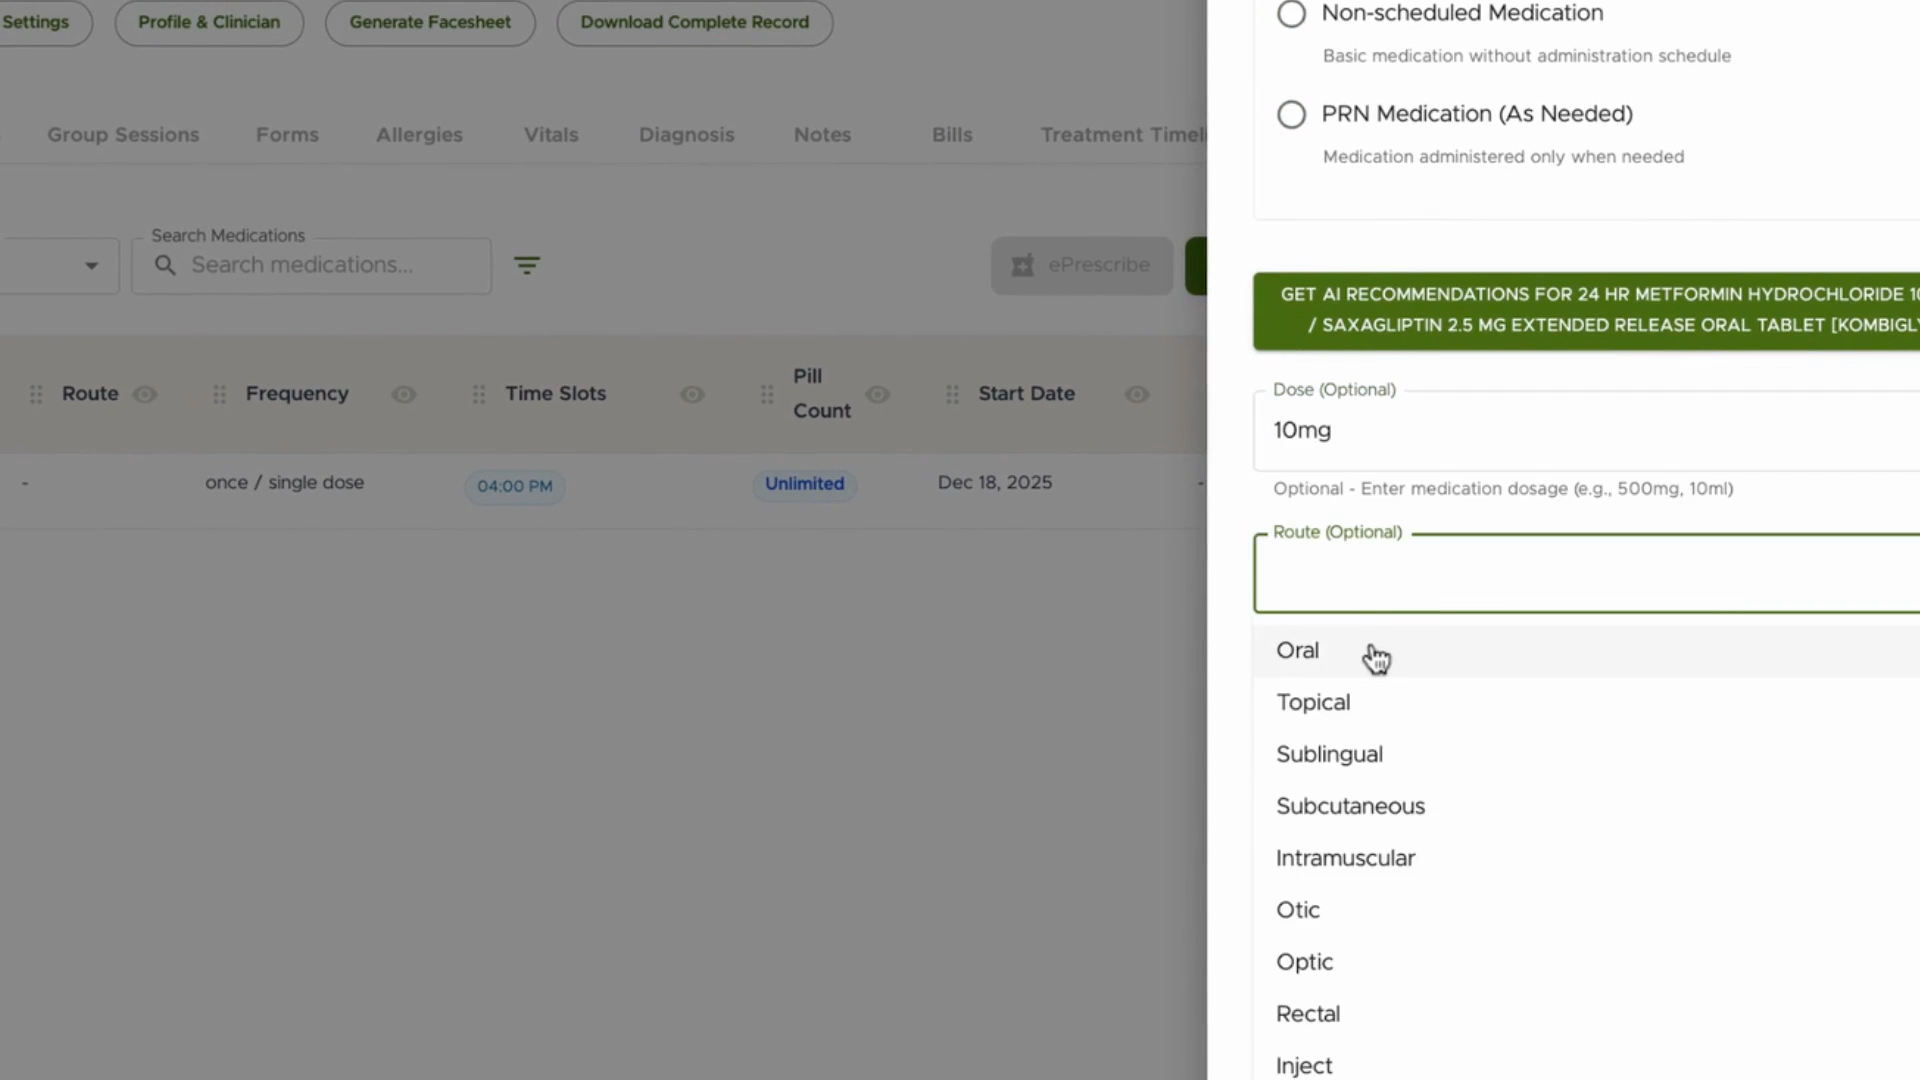
Step 4: Specify the correct Dose (e.g., 10 milligrams) to ensure accurate administration.
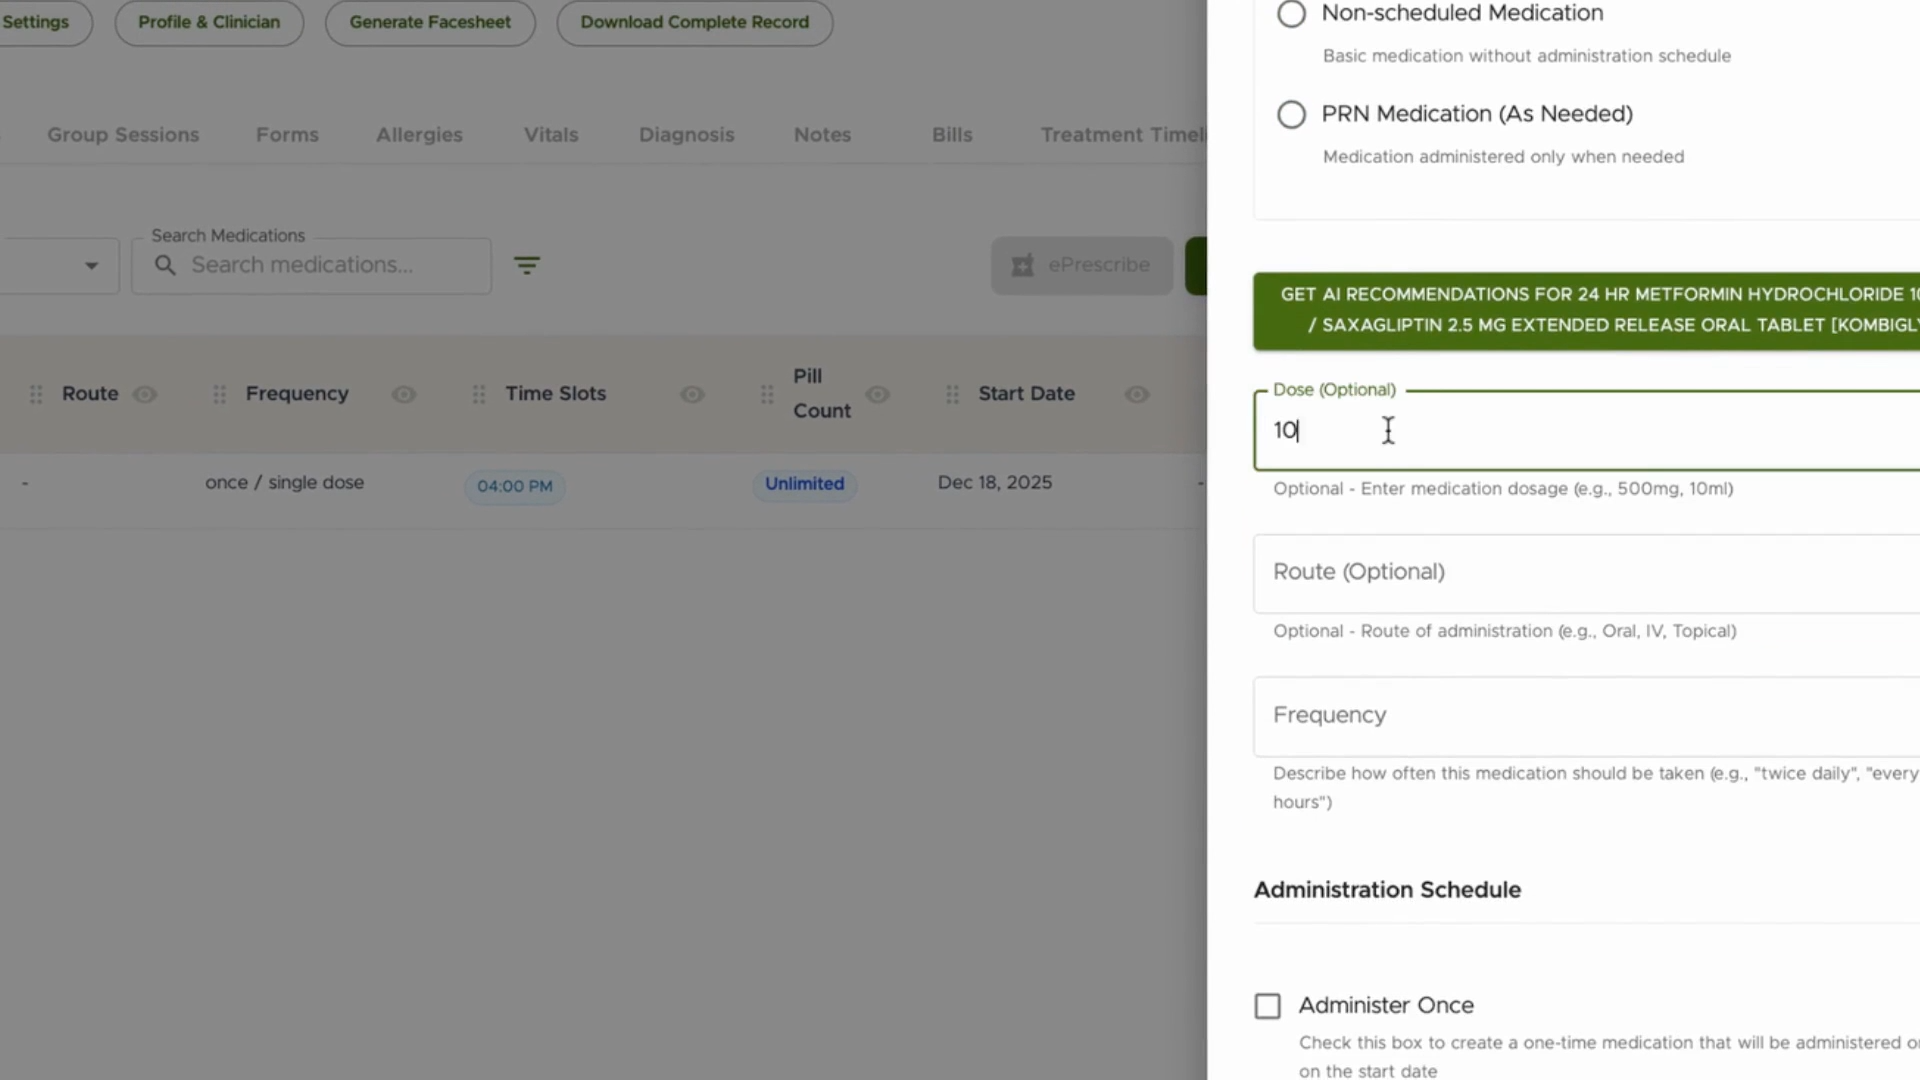
Step 5: Select the Route for administration, like oral, injection, etc.
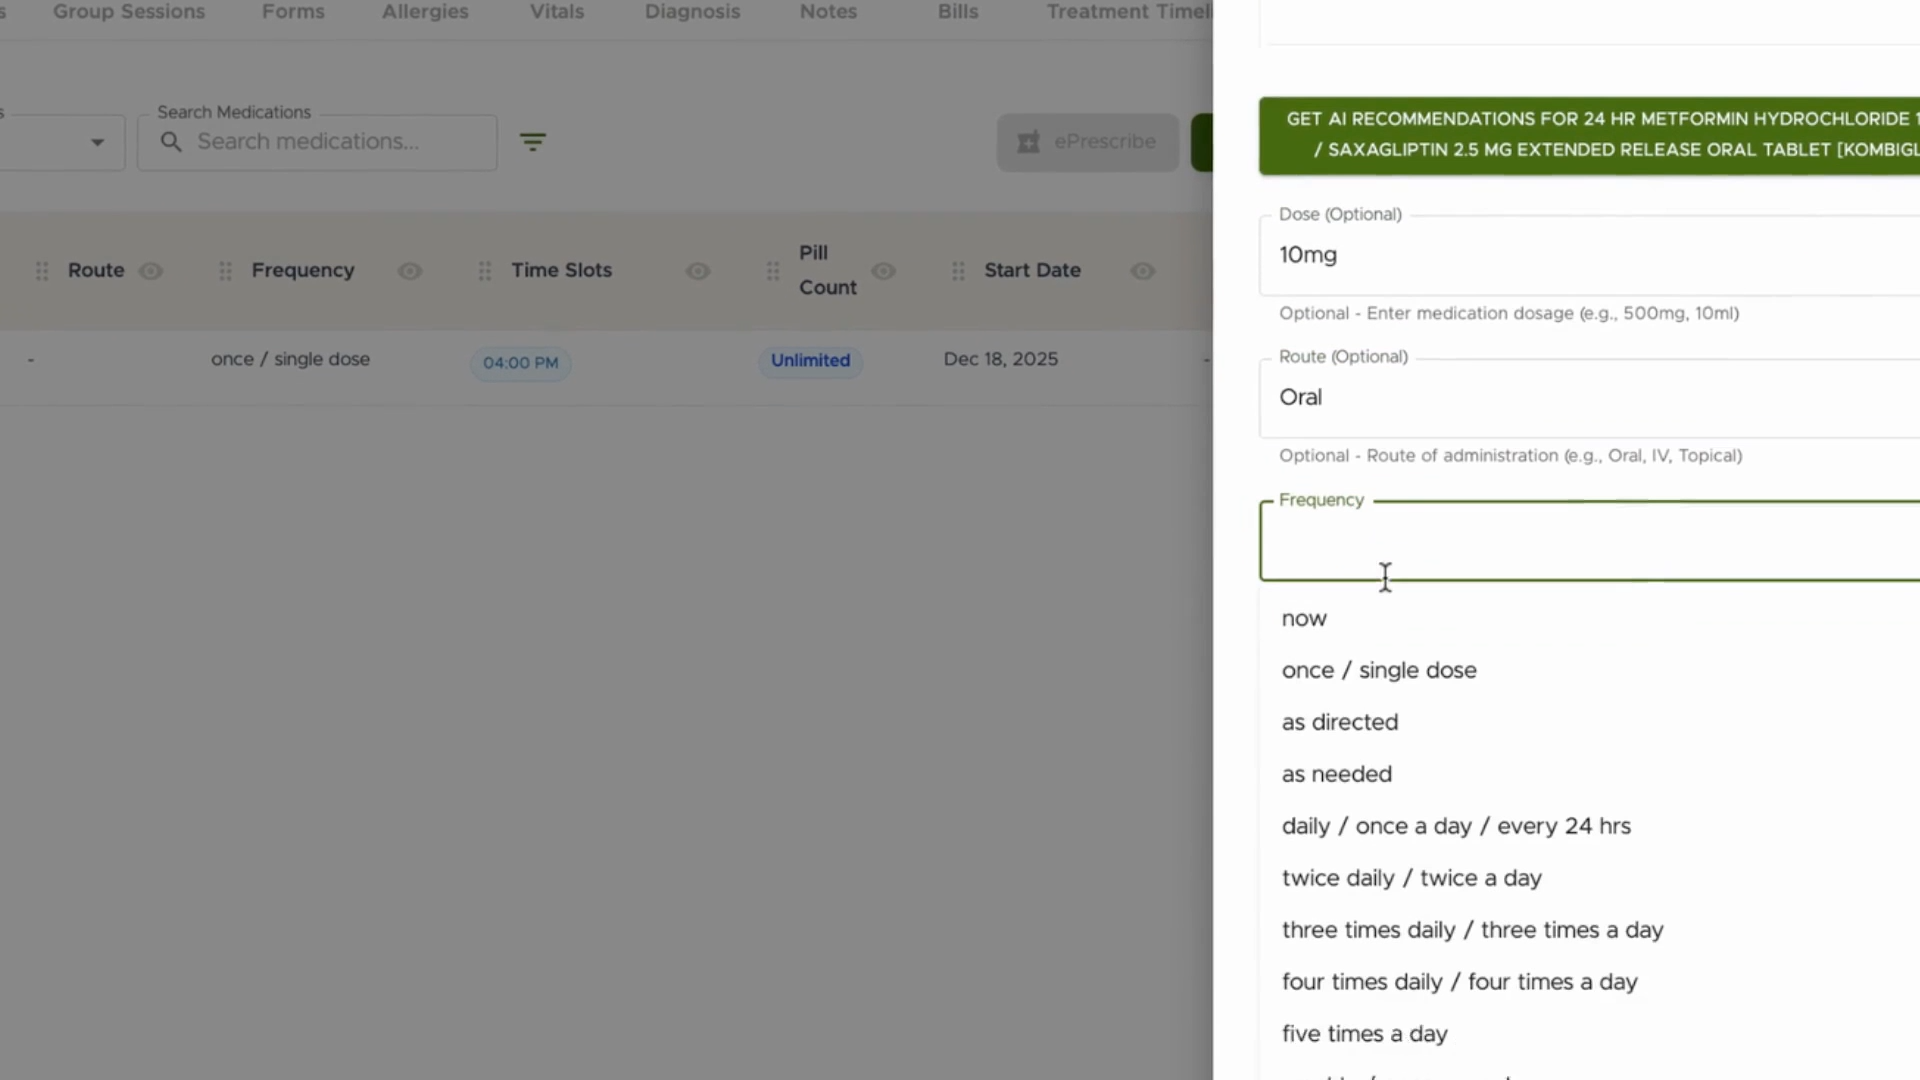
Step 6: Set the Frequency for how often the medication should be given (e.g., twice daily).
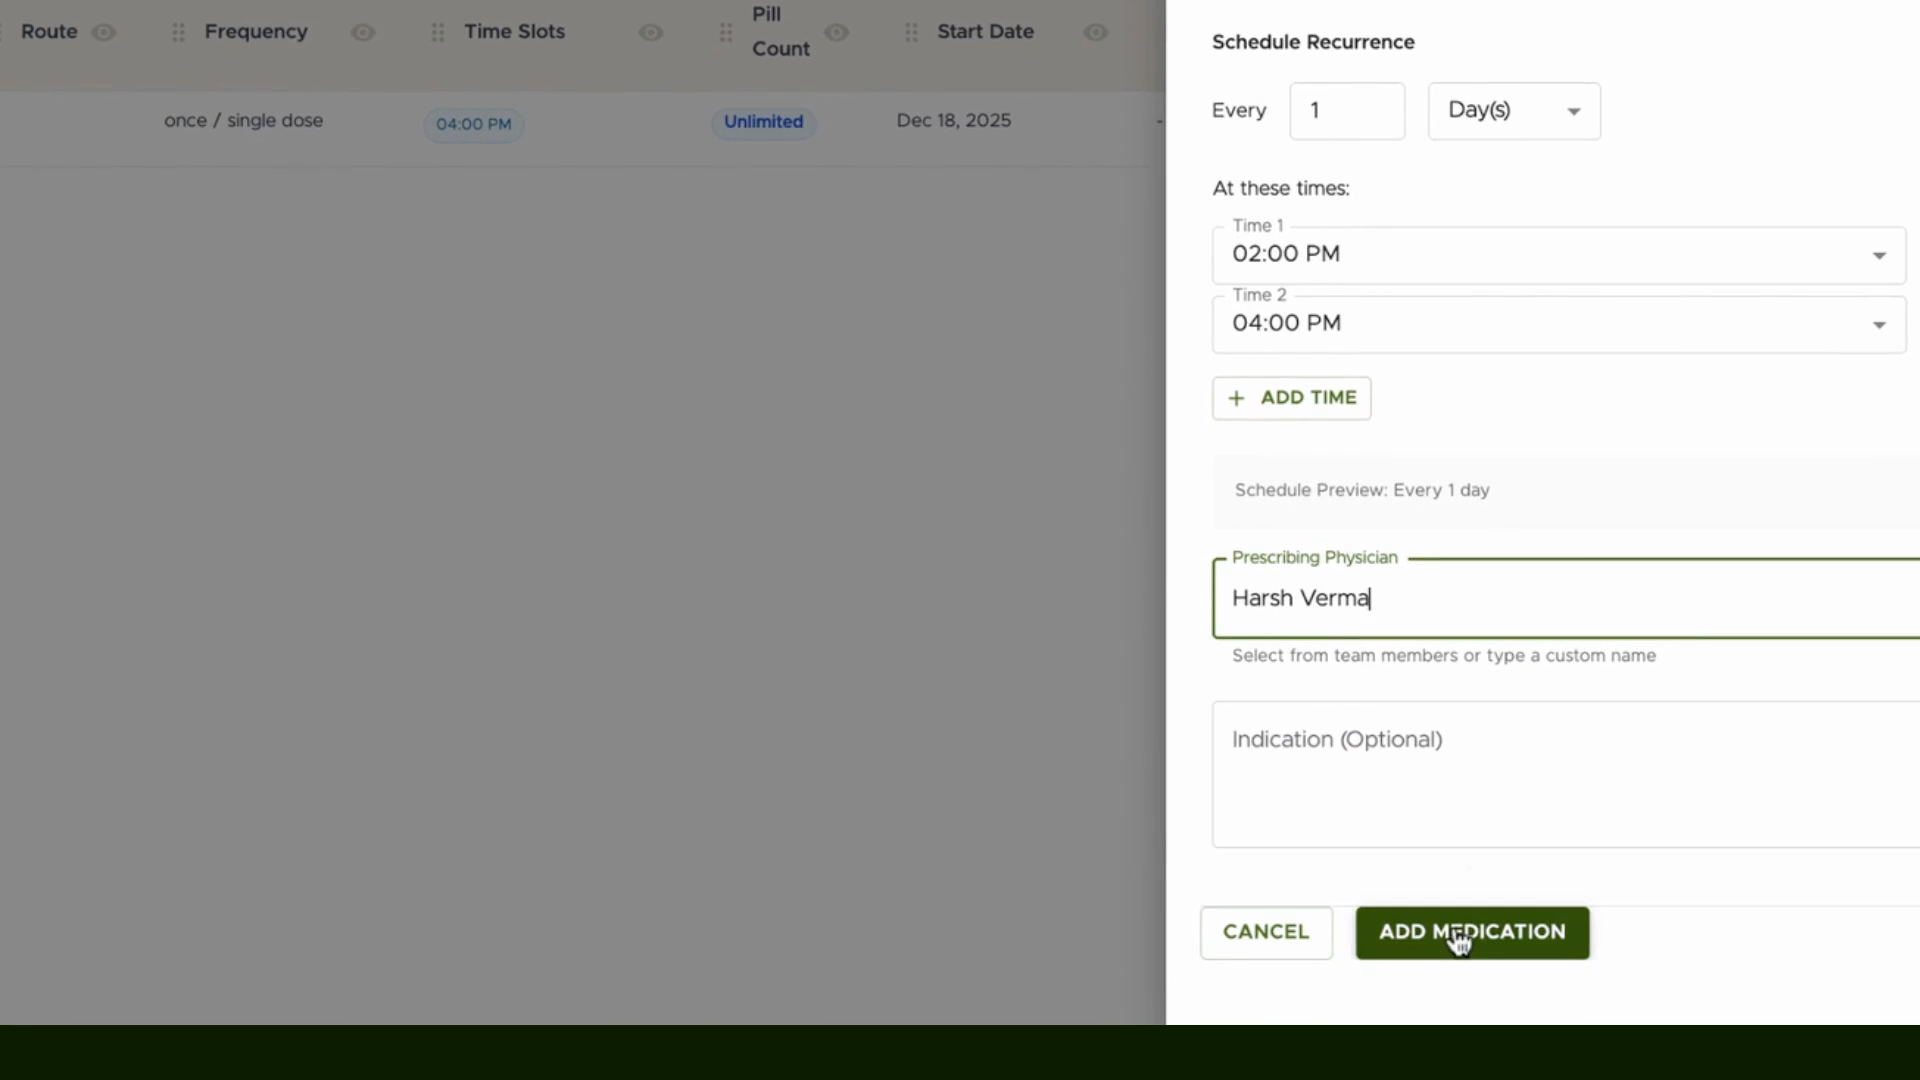
Step 7: Create a MAR Schedule for the dosing pattern.
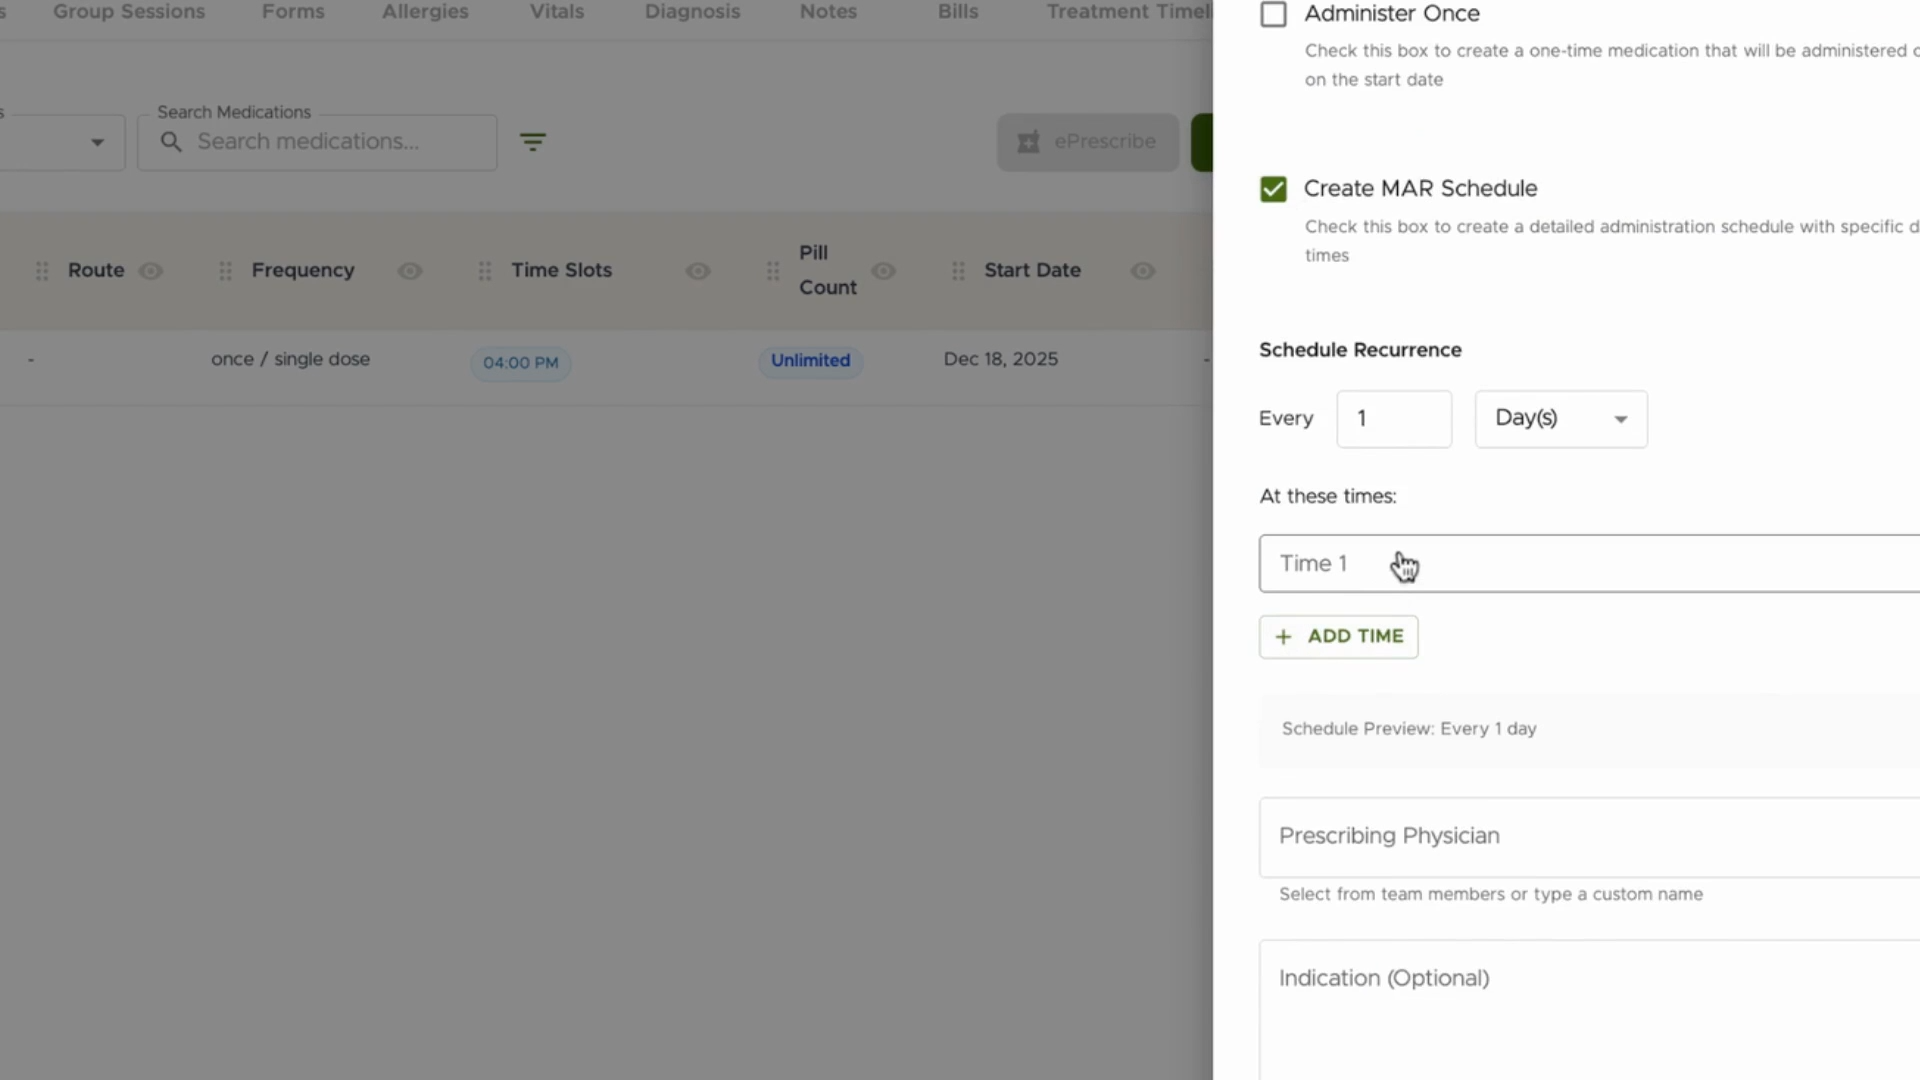
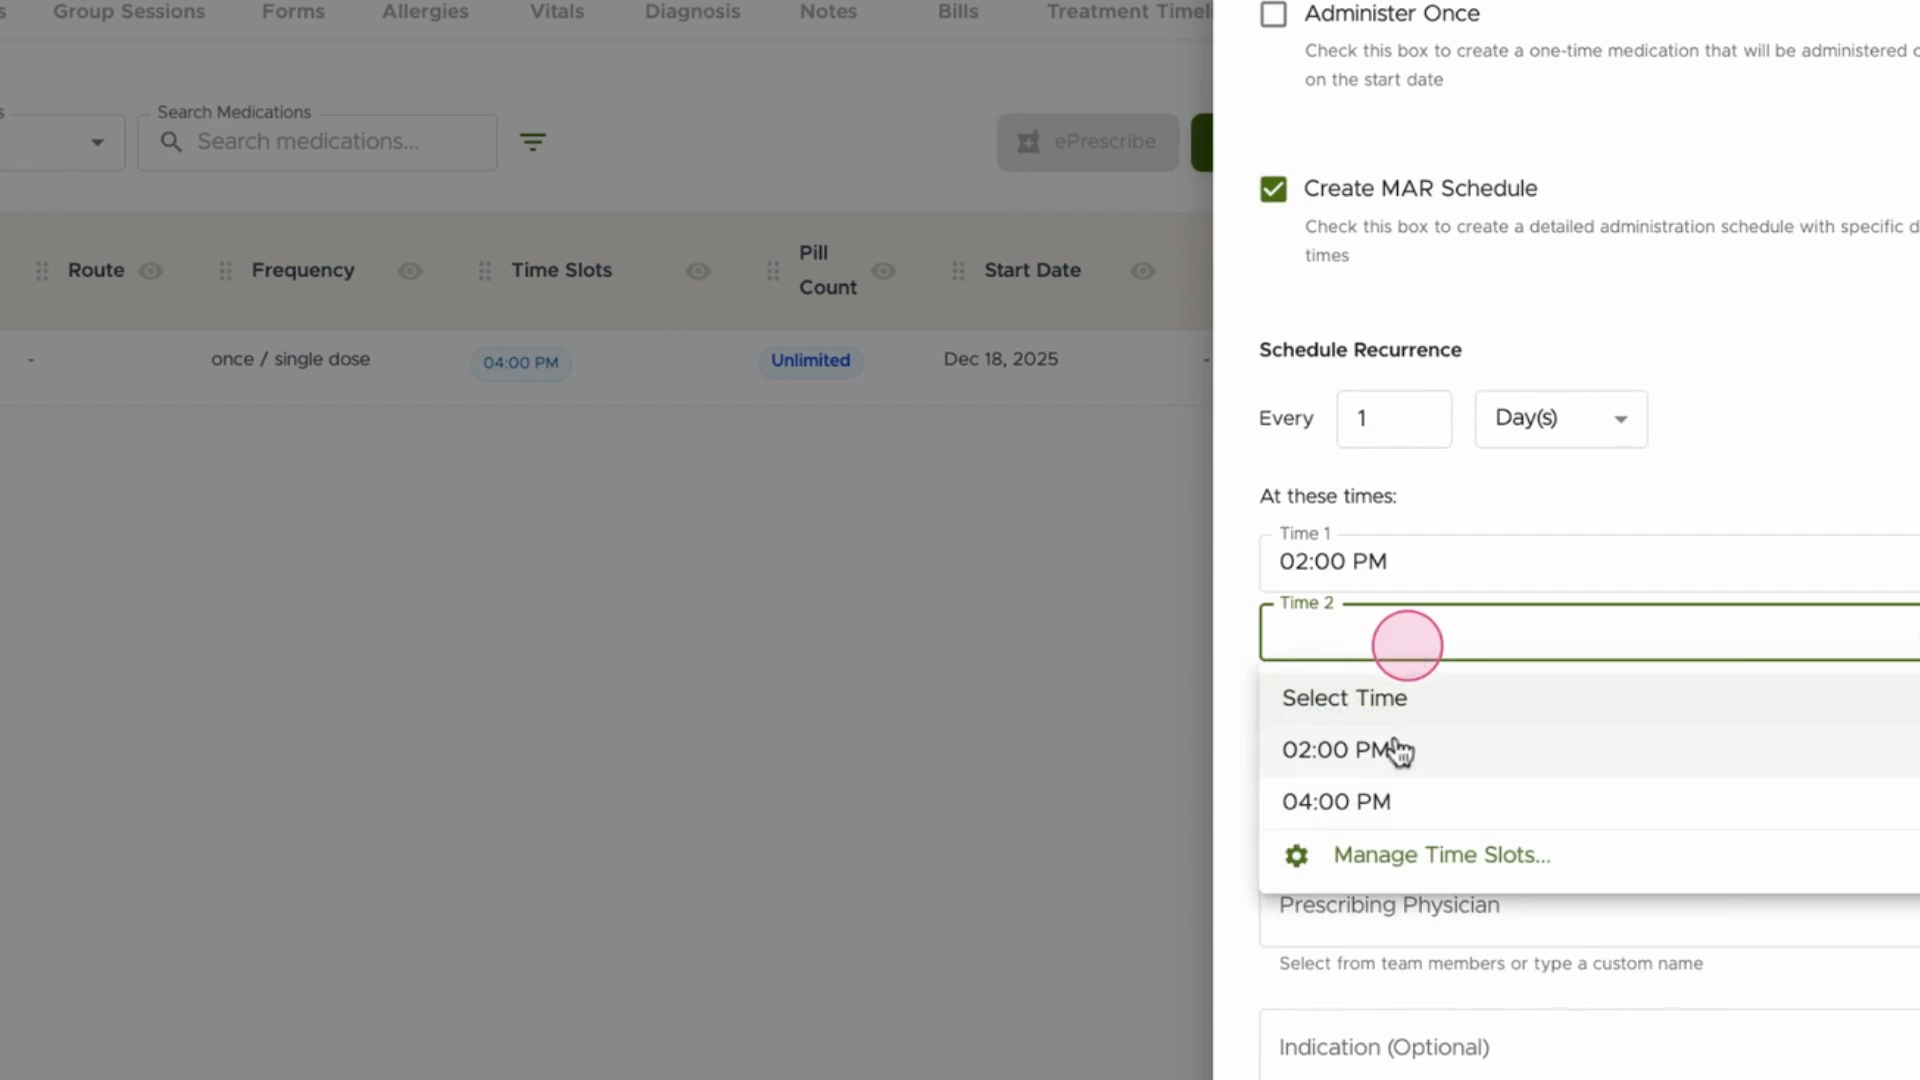
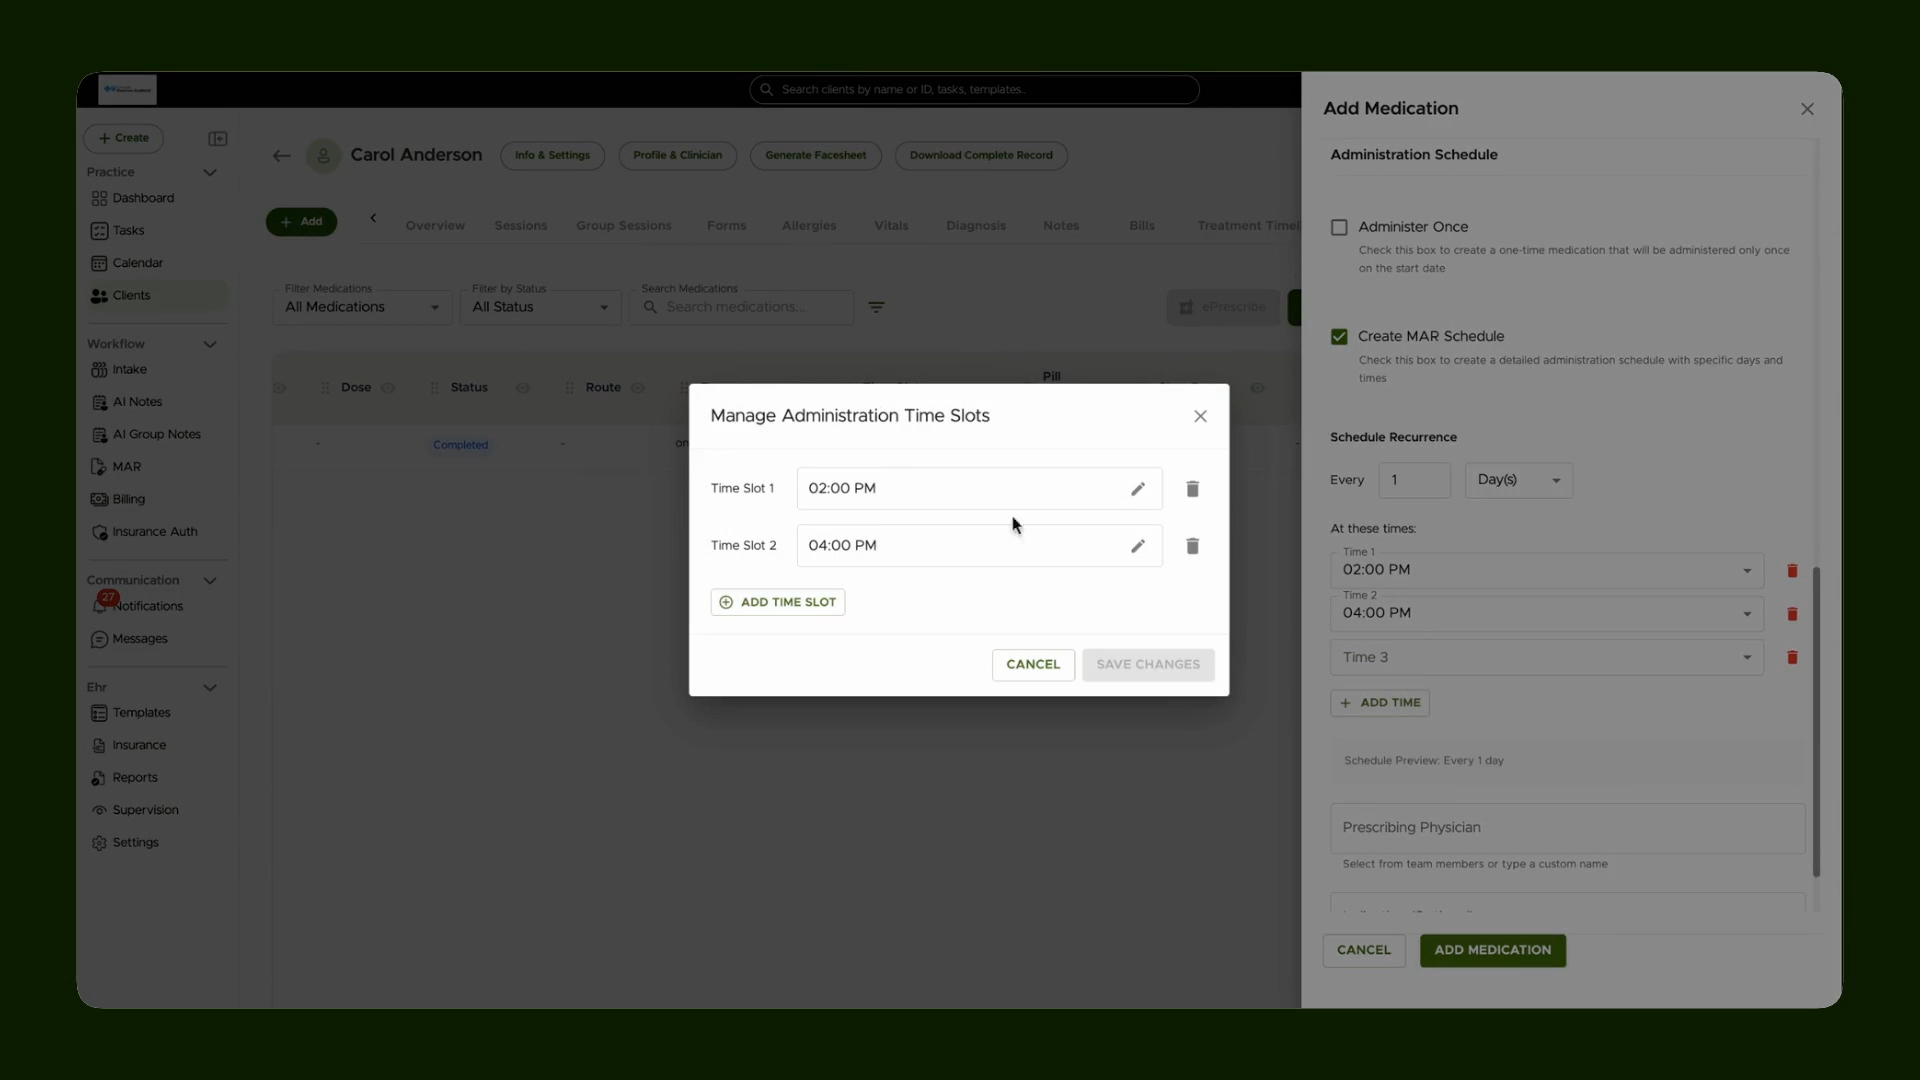
Step 8: Add one or more Time Slots (such as 2pm and 4pm), and use Manage Time Slot for customization.
Step 9: Choose the Prescribing Physician and click to add the medication.
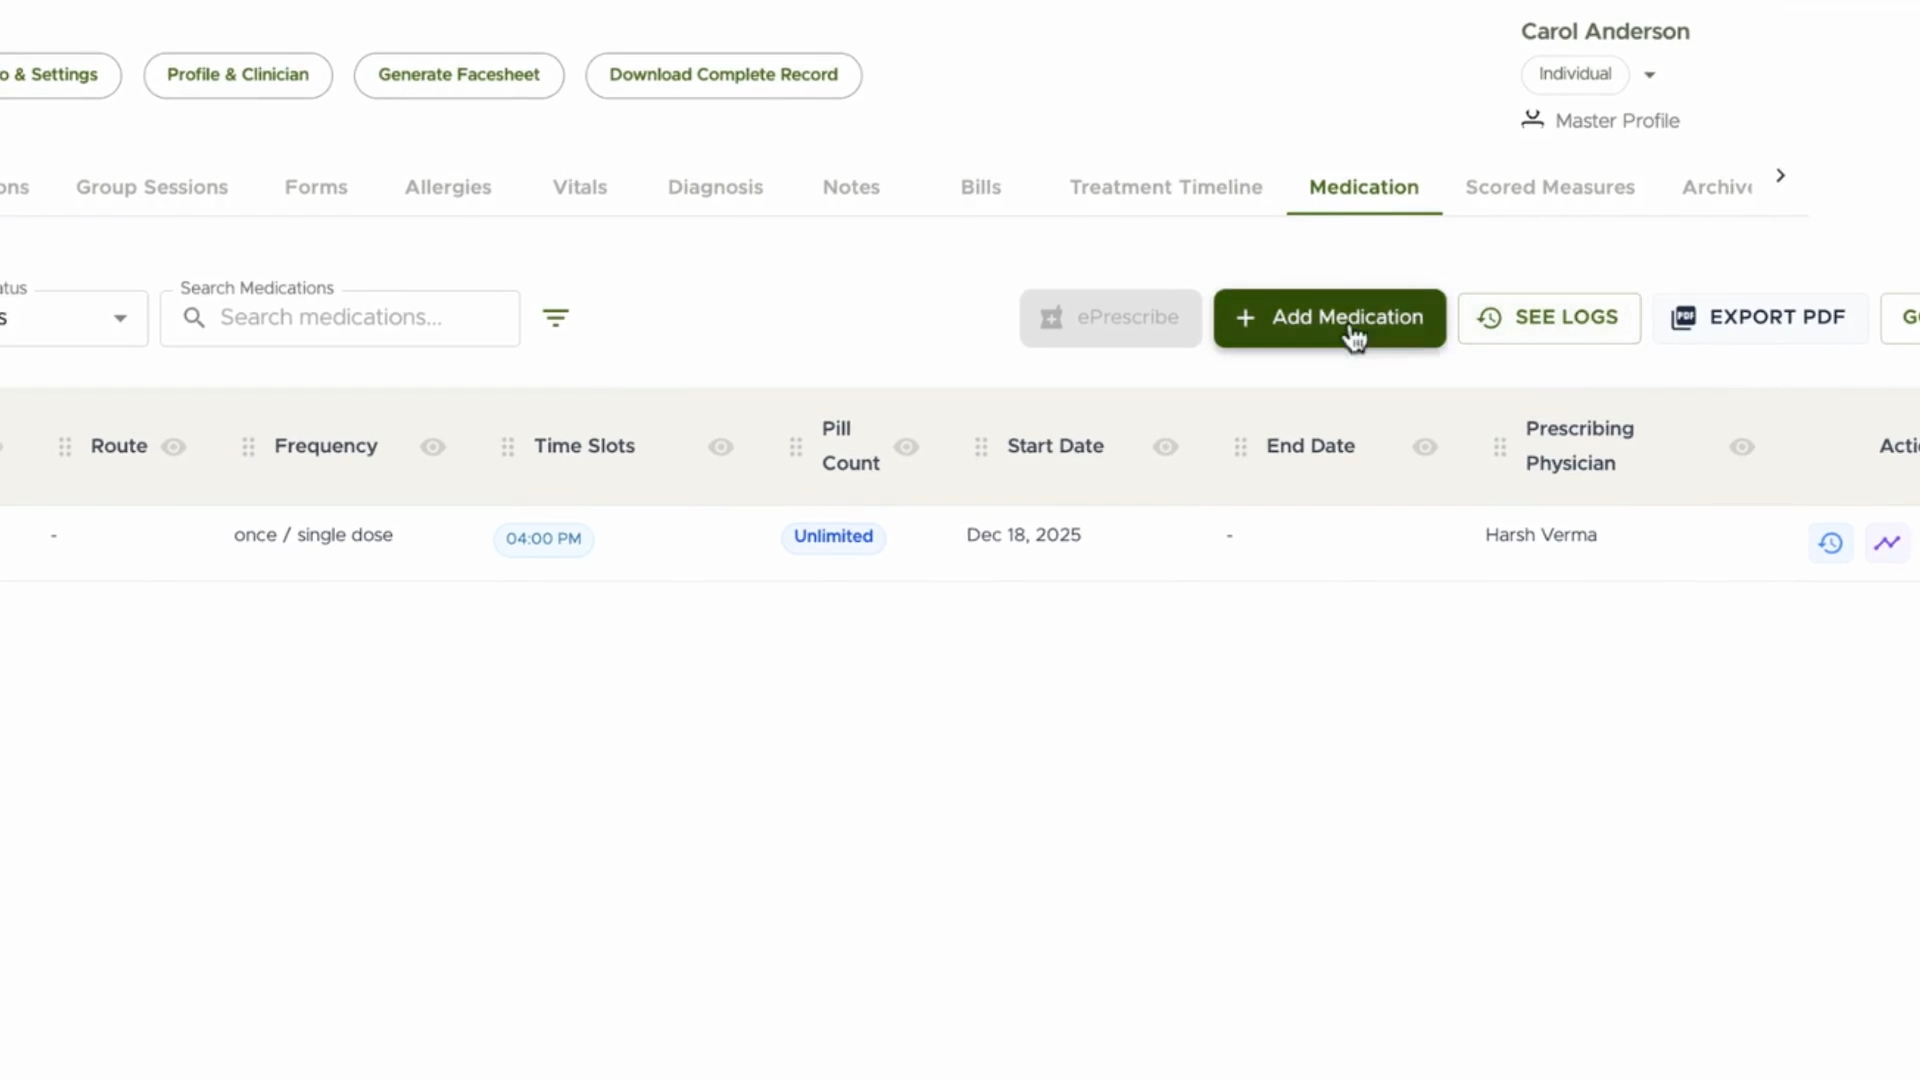
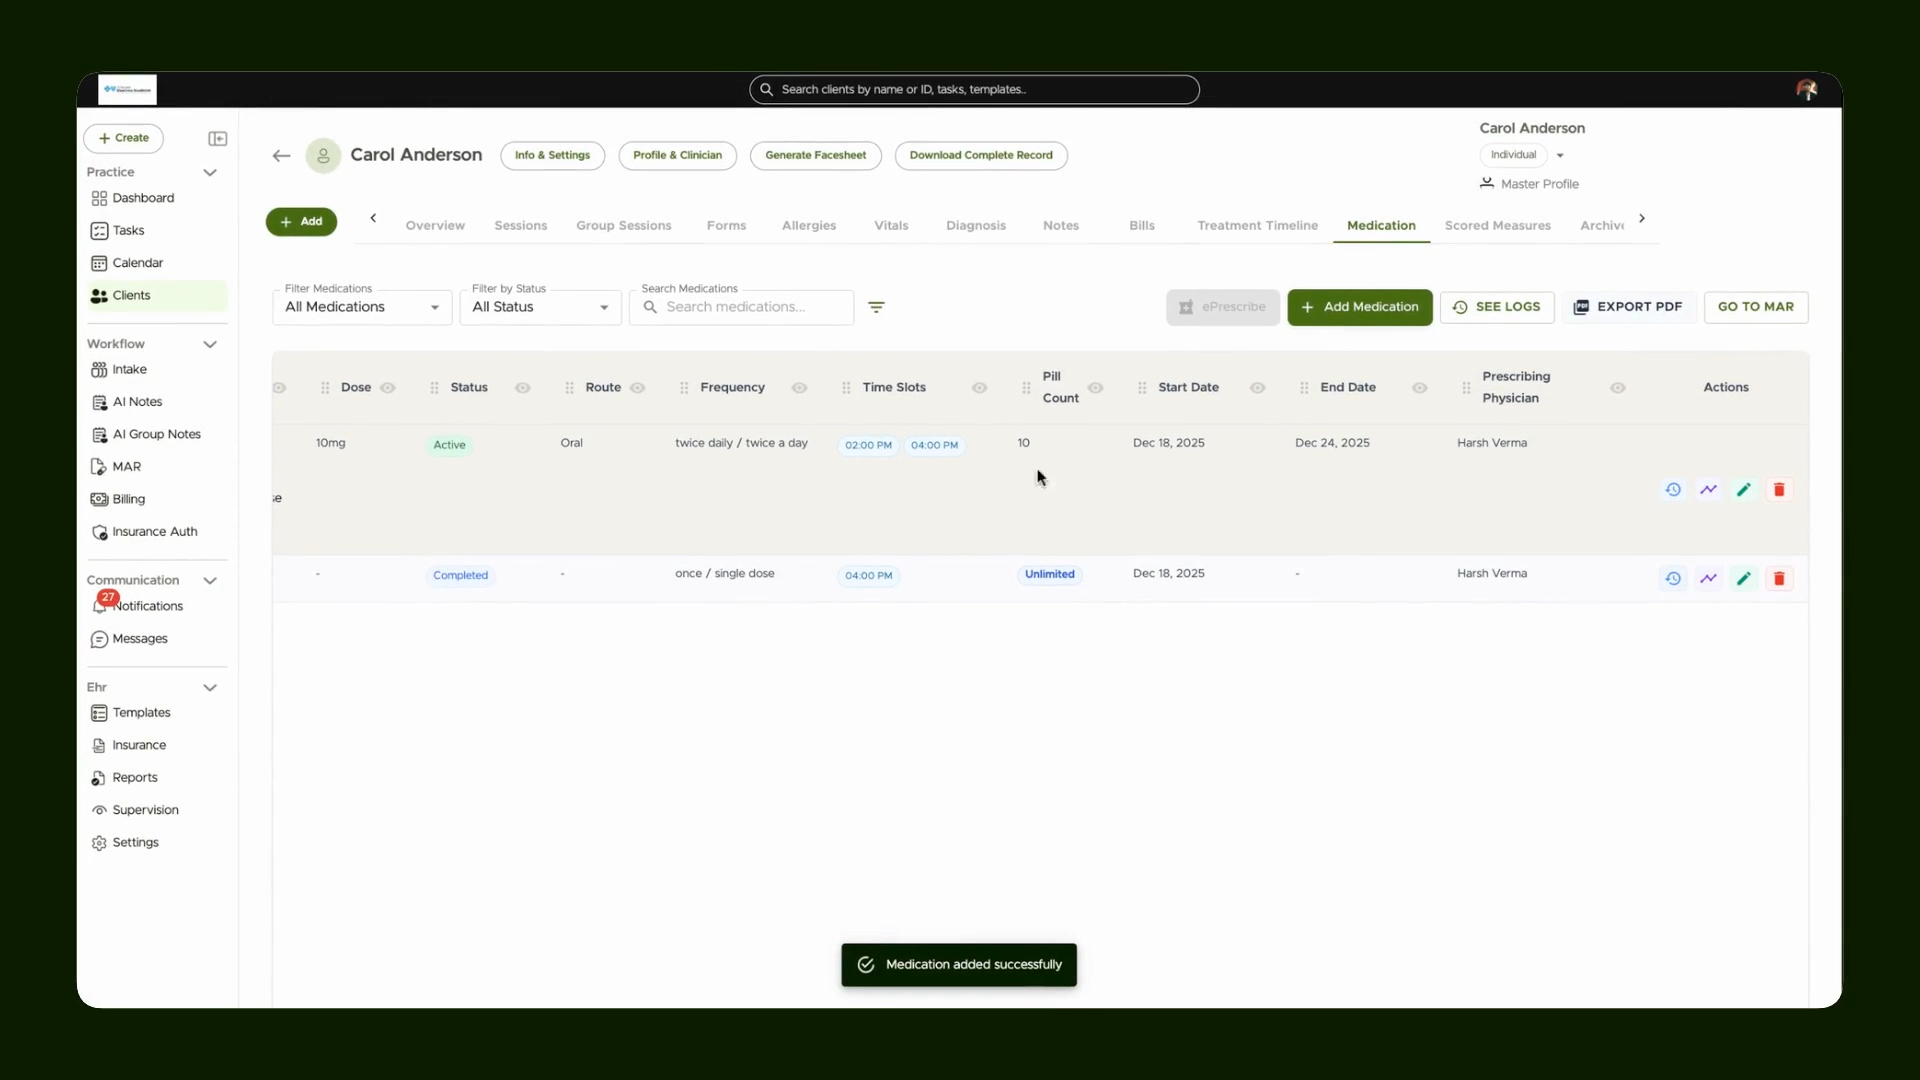
Step 10: The scheduled medication will appear in your list for easy access.
Step 11: Open the MAR to view all scheduled doses pending administration.

Step 12: Administer the scheduled dose, entering the pill count given. If dose sizes differ from pill sizes, adjust accordingly and add notes if needed (for example, giving two 5mg pills for a 10mg dose).
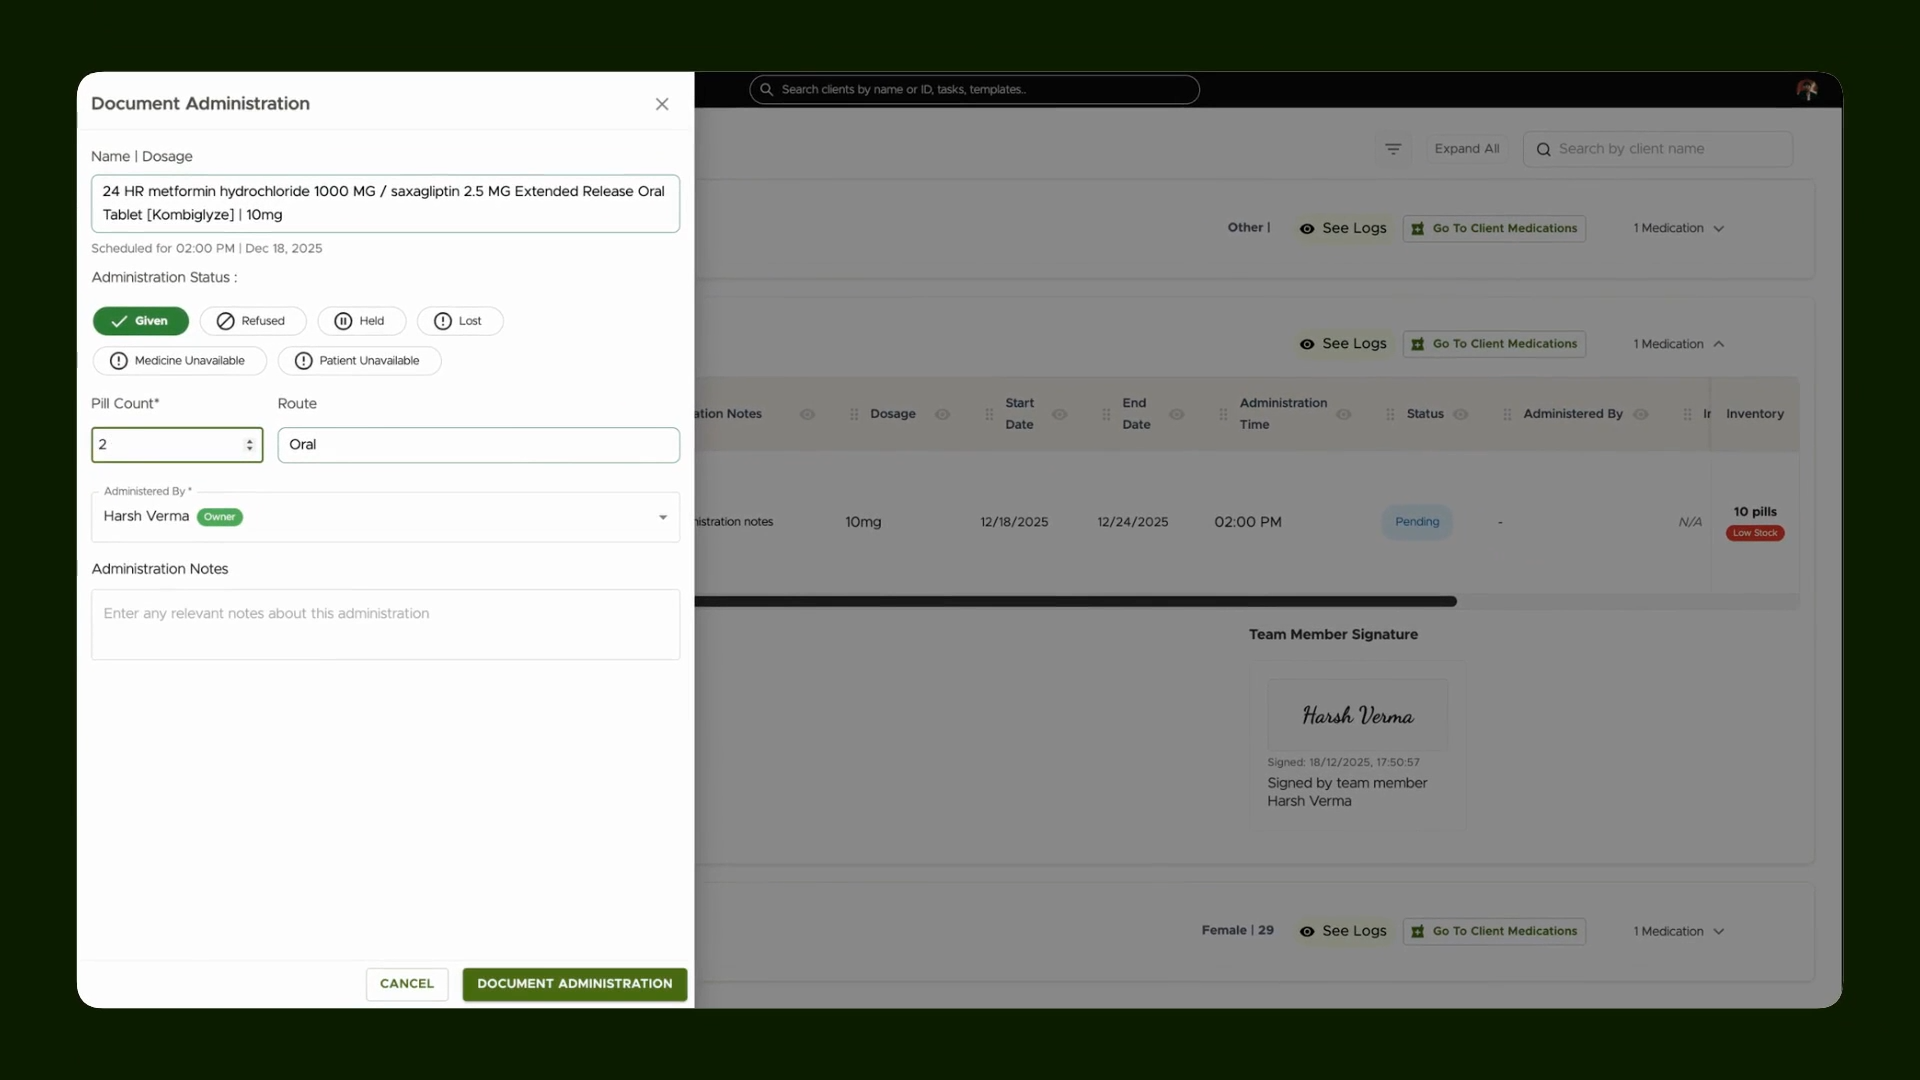
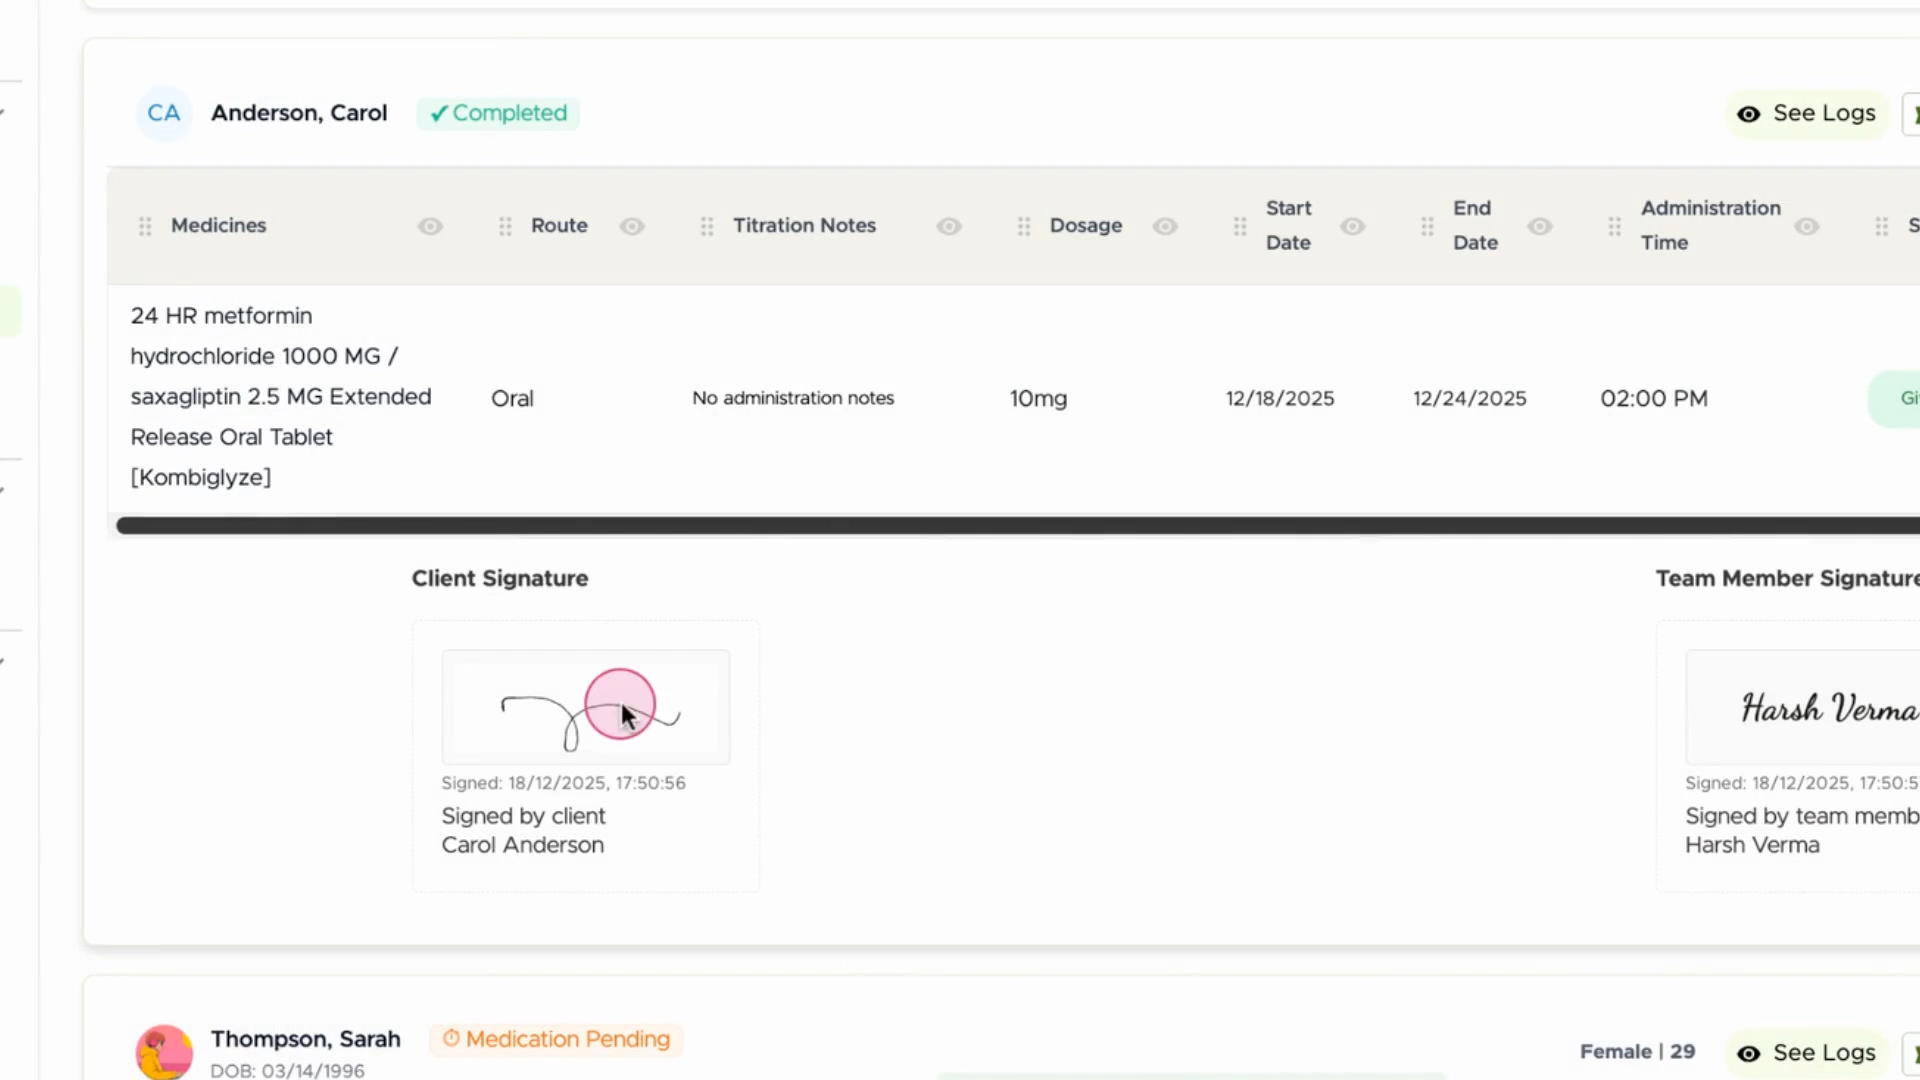
Step 13: Secure required signatures from the client and team member for compliance.
Step 14: Omnipractice automatically deducts the administered pills from your inventory for accurate stock management.
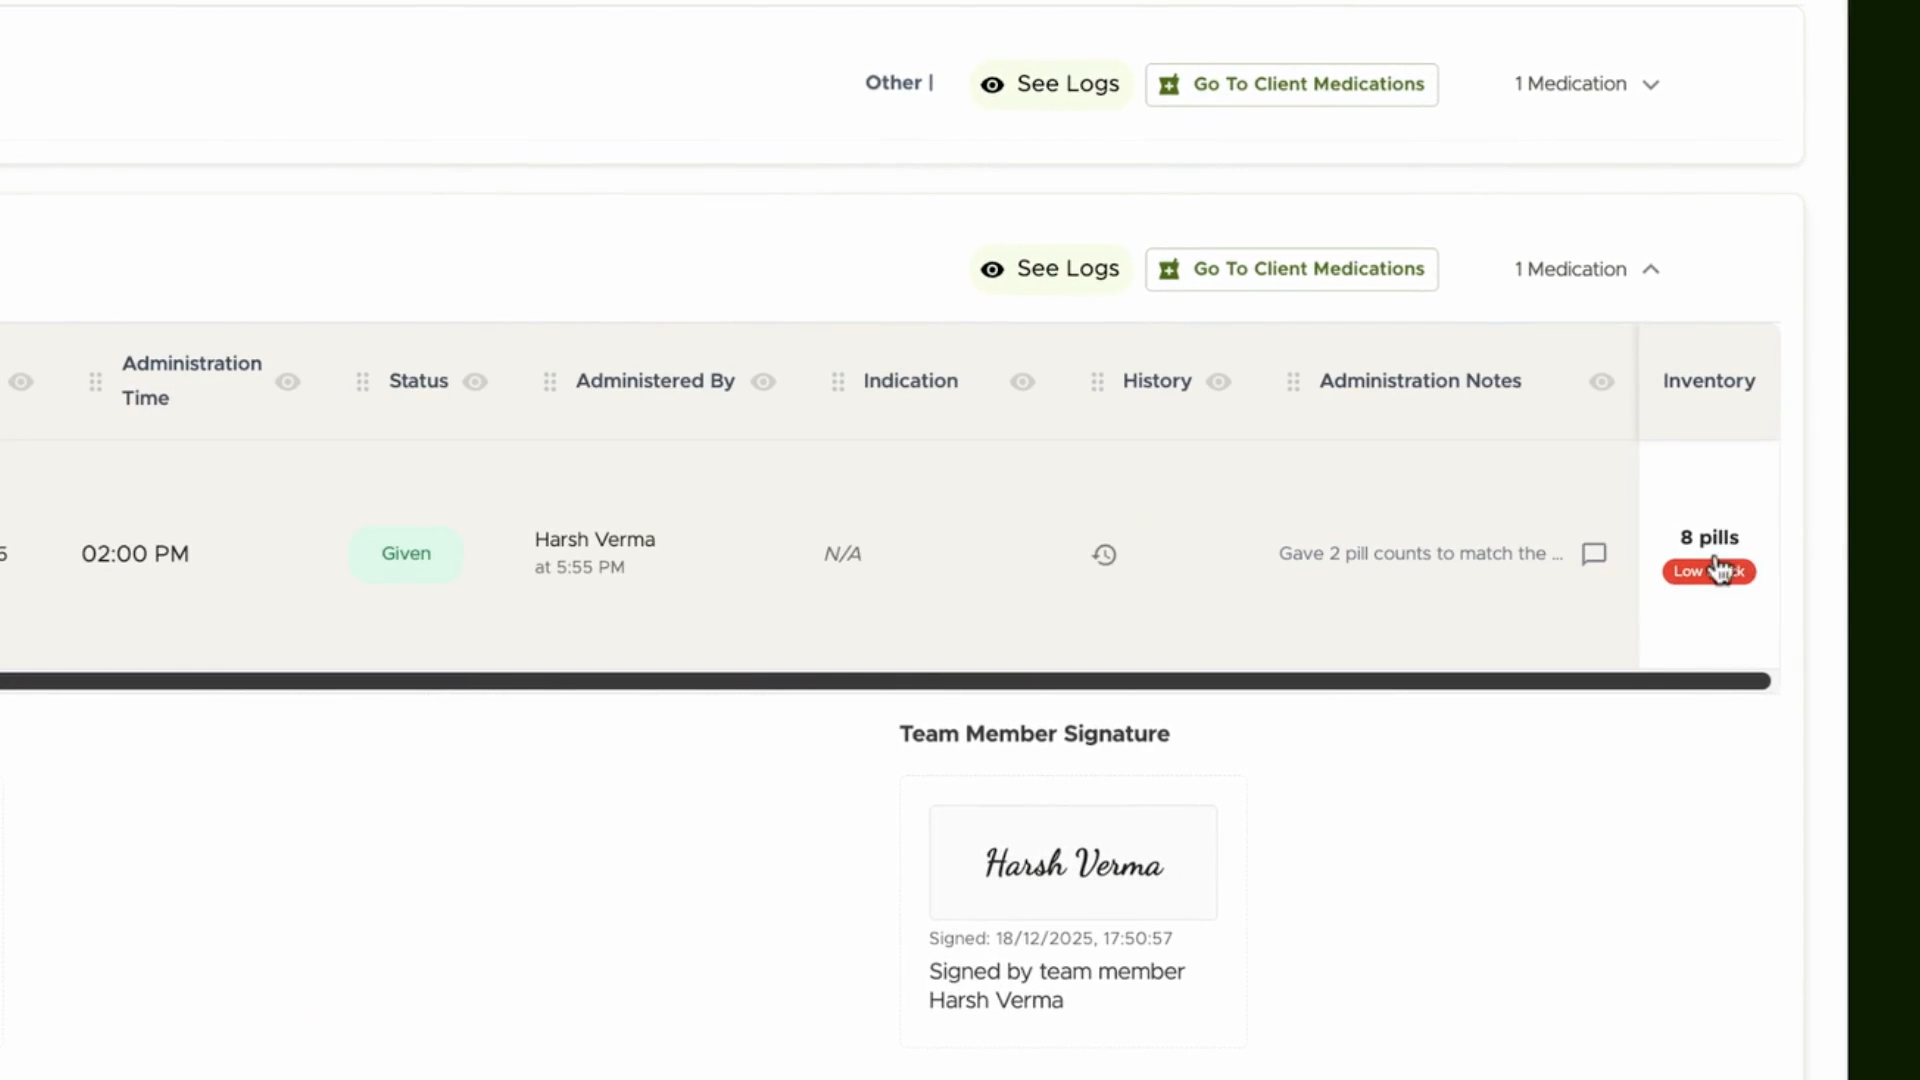
Step 15: Click History to review all the doses that have been given.
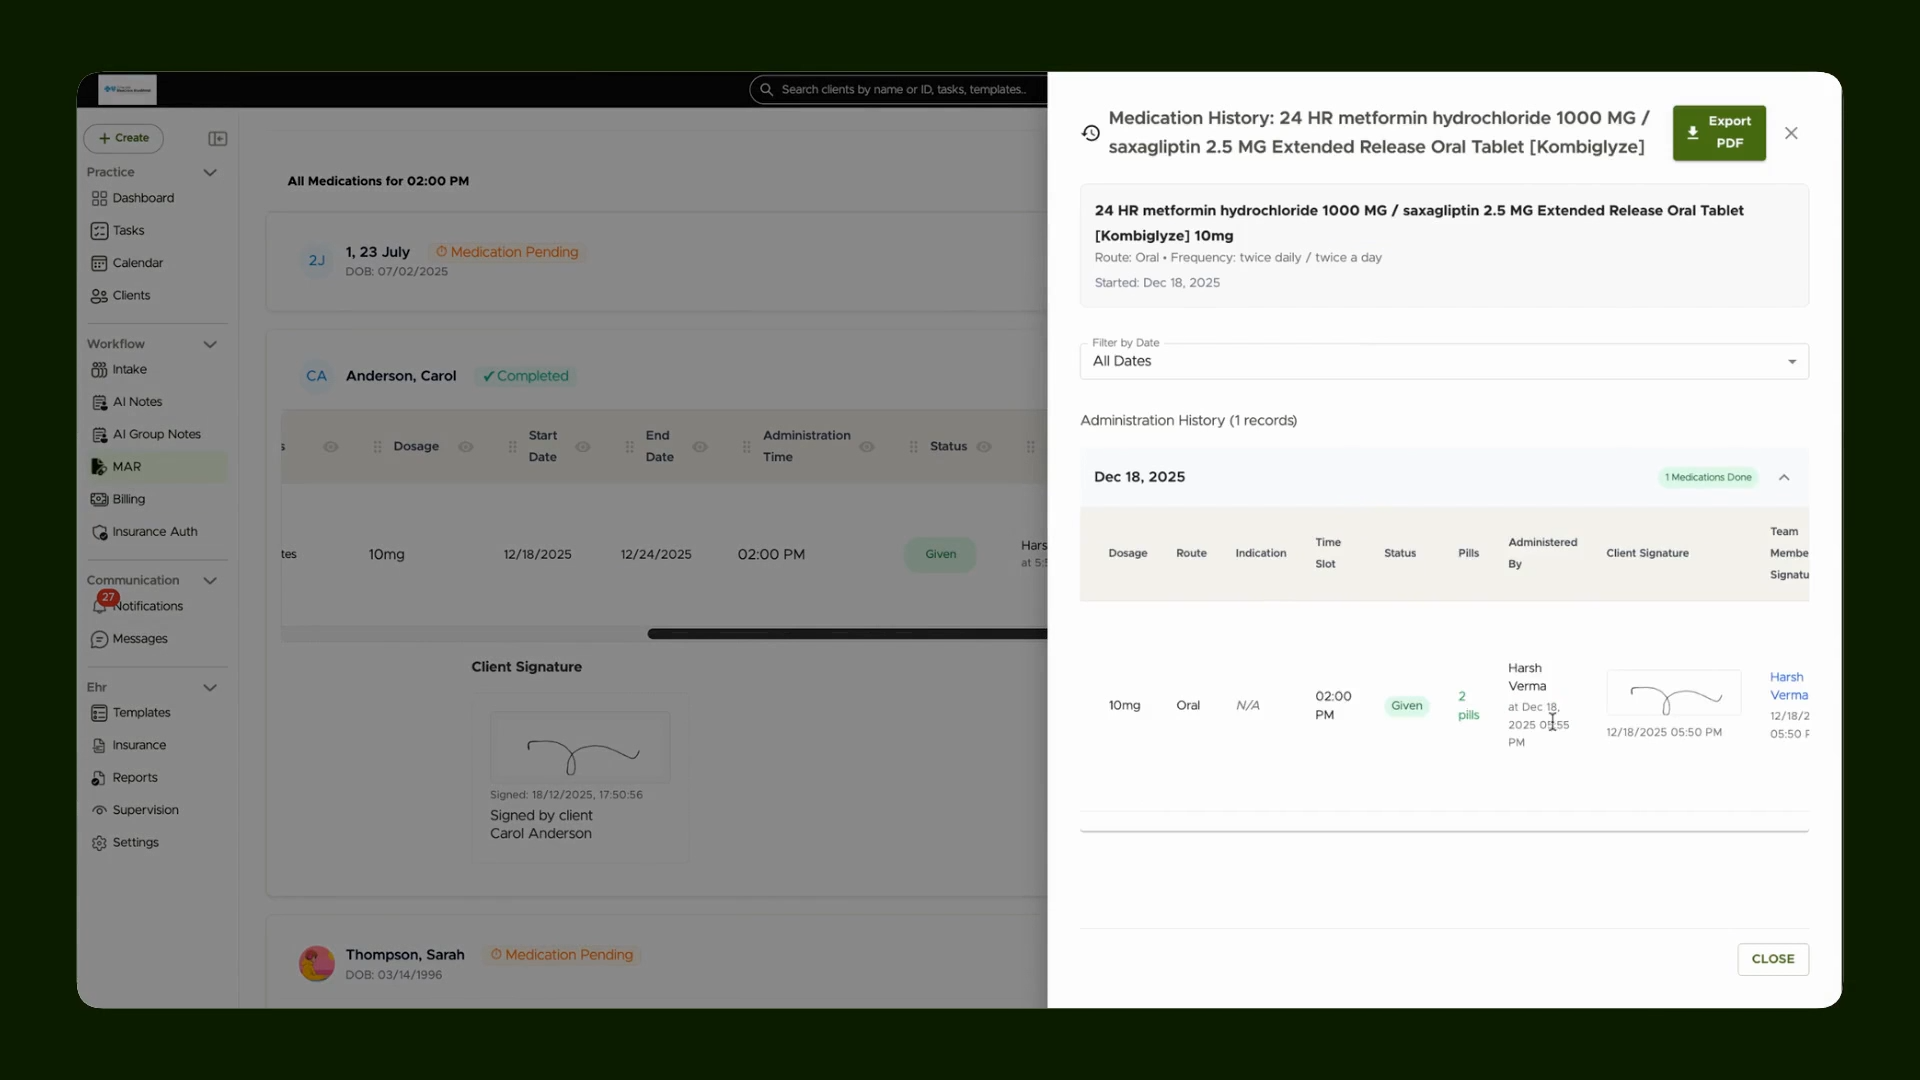
Step 16: Keep an eye on the Schedule and Pill Count History to stay on top of medication administration and stock levels.
Wrapping Up
With Omnipractice’s medication management tools, you’ll ensure every client gets their medications precisely when needed. Comprehensive history tracking and pill inventories make it simple to maintain records and meet reporting requirements. By following these structured steps and making use of the visual guides provided, you’re set up for clear, confident medication management every time.